
Three Must Visit Lakes in the Grand Tetons
When we first planned out our trip to Grand Teton National Park, I was stoked to find out there were several short hikes. From taking a gander at Jenny Lake, to short walks, you are bound to enjoy your time in the Tetons no matter how you spend your time.
The best part? The Tetons also have an incredible bike path (very few national parks do) that takes you from Jackson Hole into and throughout the park. The bike path is paved and lengthy, ending at Jenny Lake. You can also continue along roadside. We were thrilled.

We parked inside the park and biked from there. We brought our own bikes, but there are several places in town to rent from. If cycling isn’t your thing, you can also explore these scenic lakes by foot or by car.

Check out the three lakes I recommend spending your Teton time at:
Taggart & Bradley Lake
Taggart and Bradley lake are everything you imagine about the Tetons and more. As soon as you park at the trailhead, you are greeted with inspiring views of the Tetons. Just the trailhead parking lot alone is a sight to take in. Arrive early because this parking lot caters to hikers of all types: those who are tackling the grands, those who are going for a leisure stroll, and those who needed a quick pee stop.
We scored the last available parking spot at the Taggart Lake Trailhead (only a few miles in from the national park entrance) and began our hike to Taggart Lake. At a little over two miles, while gazing almost entirely at the Tetons above, we reached Taggart Lake.

Another 1.5 miles on the trail led us to Bradley Lake, which was easy to miss at the junction. This lake was less crowded, and just as stunning as Taggart. A little over two miles led us to complete the loop at around 5.5 miles and 500 feet elevation gain total.

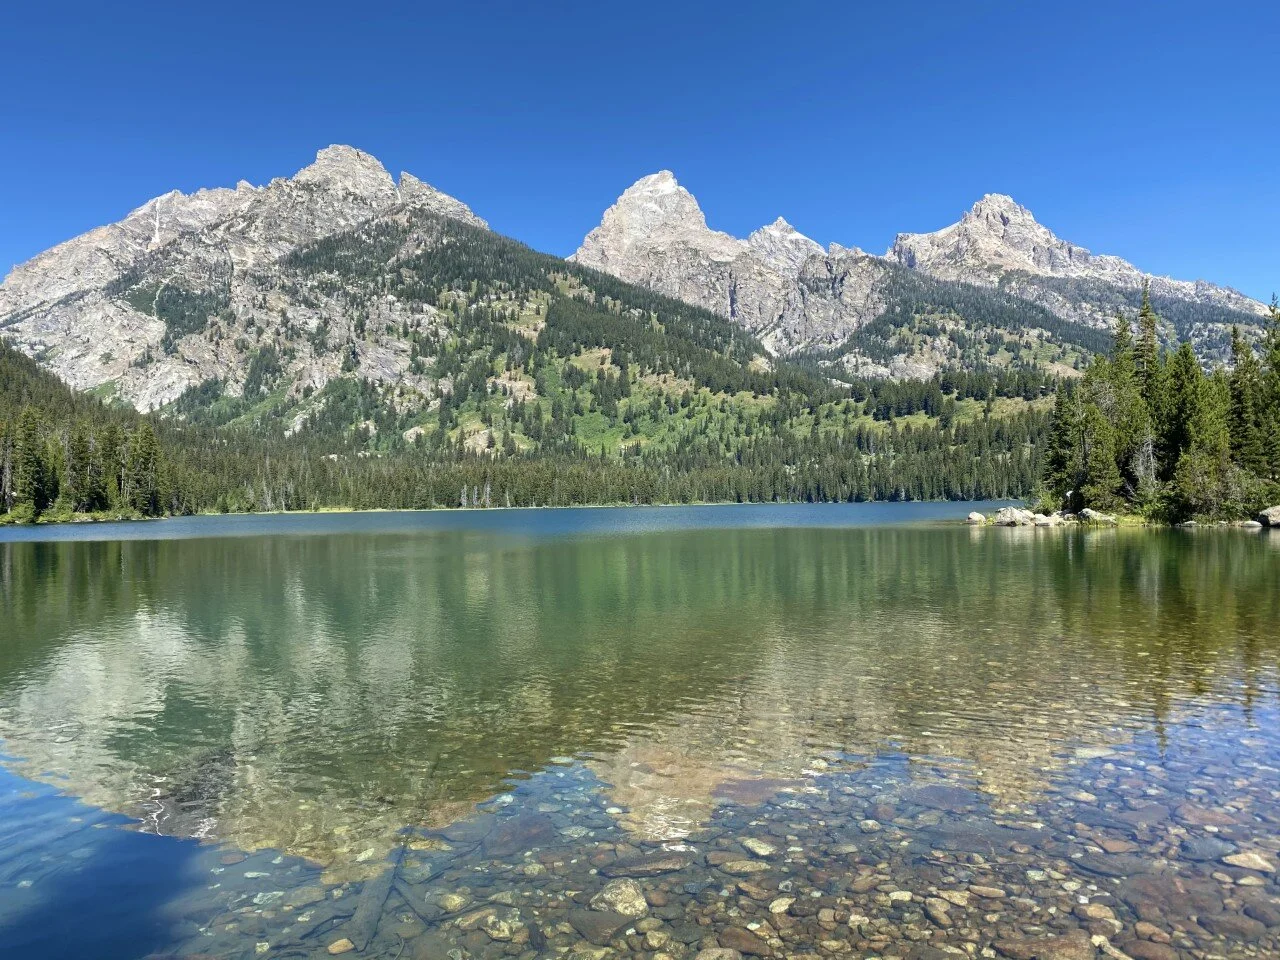
Jackson Lake
This national park is quite large, but we were determined to see as much of it as we possibly could. From hiking to a couple lakes, to biking alongside the road, we also explored the northern part of the park by car. This drive brought us to Jackson Lake, where the summer blue sky seamlessly blended into the shimmering crystal waters.

I could stare at this view forever. It’s the perfect spot to eat your packed lunch, stop for a break, or simply relax. Plenty of viewpoints to pull over for with ample parking to take in this dreamy view.
What’s your preferred way to see the lakes - bike, hike, or drive up to the view?

Best Day Hike in Glacier National Park
Glacier is Montana’s gem. Truly. From the summer wildflower fields to the grazing wildlife, to the glaciers. Oh my goodness the glaciers! I left part of my heart in Glacier and I cannot wait to go back.
With initial plans to hike to the Grinnell Glacier, only to find out the night before that that part of the park was closed (summer 2020), we swiftly searched our NPS map for other hikes. The maps that the park service provides are jampacked with information about wildlife need-to-knows, safety measures to take, and hikes to explore. I highly recommend grabbing a map when you arrive (or check out GNP’s breakdown by regions of the park here).
Turns out, Grinnell Glacier can also be reached from the skies. Lucky me! Instead of reaching the glacier from the ground-level, we’d be hiking up to the lookout spot surrounded by the peaks. In hindsight, part of the park’s closure worked out in our favor because I never would have experienced this trail otherwise.
We set out early in the morning. Early in Glacier summers means 3:30 or 4am with the peak tourism. You would think a park in the furthest part of Montana would be kept as a hidden secret, but alas, the secret’s out. Glacier is a gem no one wants to miss out on.
With only one road to the trail’s access point, we quickly found ourselves in traffic. Shuttles that usually run throughout the park were shut off. Parking was full at Logan Pass, but we were fortunate to snag a spot half a mile away alongside the road in a designated parking spot.

Hiking along the Highline Trail…
Moments later, we embarked on the Highline Trail and I kid you not, every step had mountainscape views. Wildflowers and even some wildlife (deer, marmots, and mountain goats) along the trail as well. My first experience with a marmot is one I’ll never forget. As soon as I set my eyes on this adorable, sunbathing creature, a screech was let out that sounded like someone was being attacked. Turns out this adorable little thing has a fiery side to him. We quickly hiked on.

Even if you only have a couple hours to spare, hiking the Highline Trail is completely worth it. We gave it the day to see the glacier, so we made our way up the majority of the hike’s ascent to the Grinnell Glacier Overlook. The sign lies to you when it says .6 miles away. Trust me.


Closer to a mile of what felt like an endless uphill, we reached shimmering, aqua blue waters outlined by ice. It looked surreal.

With time to spare, we decided to make our way to the Granite Park Chalet, not too far from the start of the ascent to the glacier overlook. Glacier originally had over ten chalets built to mimic the vibe of Switzerland – ultimately, to promote tourism. Why go to Switzerland, when you can have it all right here in Montana? Sadly, various situations led to many of them no longer standing. The Granite Park Chalet is one of two remaining in the backcountry.

The views from this chalet are phenomenal. The fact that this trail is extraordinarily stunning and leads you to a homey chalet just tops it. Bookings fill up swiftly, for good reason, so plan ahead if you’re hoping to snag a spot at this dreamy stay. We did an out-and-back from the chalet, adding up to 3,700 elevation gain in 18 miles of trekking.
The Granite Park Chalet also has a campground below it, not too far away. It’s the perfect entry into the backcountry if that’s your thing. My heart was completely full after this hike. If you only have a day to devote to hiking, this is your trail for a taste of all the delights that Glacier offers.


A Beginner’s Guide to Skiing
There are so many reasons not to ski. It’s expensive. It’s tough. It’s overwhelming to think about where to begin. All great reasons to try it out, right? By now you know I love the mountains and winter, so it was only a matter of time before I tried out a winter activity outside of hiking that includes my favorite things: great views, high adrenaline, and a good challenge.
I’ve only gone skiing four times in the last five years, so I’m still very much a beginner. Here’s my guide for beginner skiers (with the hope that you start skiing with paying less and enjoying more):

1. Look Local.
My first couple times skiing, I joined a friend to a popular ski destination in Vermont. The trip was essentially a hefty cost on my end to ski the bunny hill (for beginners). Heads up, there are bunny hills at every ski mountain and each time I practice on them to get what little “ski legs” I have up and moving again.
What I wish I had done is find a local ski mountain instead as I was starting out. It’s way more affordable! A nearby mountain for me cost $30 for the ski lift pass and $35 for equipment (skis, boots, and poles). It’s still a pricey way to spend an afternoon, but way better for your budget than the fancy spots.

2. Build your equipment bank.
The first time I skied, I rented (or borrowed) everything. I borrowed pants from a friend, paid $10 to rent a helmet, and wore an old winter jacket. I lucked out one snowy day that I opted out of renting goggles, but actually needed them. A ski lift operator gave me a hand-me-down pair for free. You’ll notice that skiing can get expensive, swiftly. The first time you do it, try to borrow attire from a friend and rent any remaining equipment. If you find you enjoy skiing, then begin building your equipment bank.
It takes some patience, but wait for the season to end. I purchased incredible ski pants at Eastern Mountain Sports for a fraction of the actual cost (solely because it was the end of the ski season). The following year, I purchased a helmet at Costco for $60. Each year I add to my equipment so the cost is never outrageously high for me as I continue to get into skiing.
Another tip: ski mountains and ski shops often have goodies on sale at the end of the season as well, not just adventure stores like EMS. Be on the lookout at the end of March and pre-season around September for bargain buys!
3. Know your direction. Going up the ski lift is all fun until you have to immediately hop off and are unsure of which way to go. Obviously going the wrong way can be disastrous. There are three types of trails for skiing: green circles, blue squares, and black diamonds. These are always clearly labeled on ski mountain maps and at the top of the lift.
If you’re ever uncertain, there is always an operator at the bottom of the lift before you get on that you could ask, as well as inside the lift at the top. It’s way better to clarify your direction than to end up going down a black diamond when you aren’t ready. For context, I’ve only gone down greens and I still have a great time.
Aim to do your research in advance as well. Every ski mountain has trail maps on their websites that you can download or screenshot to your phone.
4. Enjoy the learning. As someone who tried skiing in their early 20s, I was intimidated by the toddlers tackling the black diamond trails while I took on the bunny slope for the fifth consecutive time. I’m serious, it’s impressive what kids can do. They’re fearless!

Once I stopped fearing what would happen if I fell, my arms flailing reduced and I remembered the procedure for how to stop. I love that no matter what age you are, you can continue growing. Even if it means falling a time, or two.
Let me know if you’ve ever tried skiing! If you have, what tips would you give others just starting out?

How to Plan Your Trip to Yellowstone National Park

Driving east through Wyoming would never give you the impression that it is home to one of the U.S.’s most fascinating and largest national parks: Yellowstone. It’s where Montana’s forest green meets Wyoming’s Wild West. Western Wyoming, on the other hand, looks much like the Wild West in your head, solely missing the tumbleweed rolling slowly across the one-lane “highway.”
Needless to say, western Wyoming was one of those long stretches of road where you aren’t sure if your car will make it on your current tank of gas before you see another gas station (or any sign of life, really). If I haven’t convinced you yet to visit Wyoming, just wait. When you reach the little pocket of northwestern Wyoming, you’ll feel transported to another world. Seriously, Yellowstone felt otherworldly.
We spent a couple days in the park absorbing as many geysers, hot springs, and wildlife viewing as possible. We spent a great amount of time driving from destination to destination. It felt like navigating through an IKEA with all of the stops on the map that we wanted to explore.
Check out the map below from the National Park Service and you’ll see what I mean. There are miles upon miles between each destination region– almost like the kingdoms at Disney World, except it’s more like nature’s amusement park. Summer in Yellowstone feels similarly to a summer trip to Disney World – crazy crowds (and cars) everywhere.

We split up the park into sections to take on to get the most out of our days. With summer travel plans coming into fruition and you find adding the northwestern pocket of Wyoming on your list, here’s how to make the most of Wyoming’s Wild West.
Divide the park into these three sections to see all the fascinating beauty Yellowstone has to offer:

1. Canyon Village
Canyon Village contains the Grand Canyon. Not to be confused with the Grand Canyon down in Arizona. Also for East Coasters, this is not to be confused with the Grand Canyon of the East in Letchworth State Park in New York.
Mt. Washburn was on our list to hike in the Canyon Village area, but its location put it right in the middle of a road construction project. If that’s the case for you, it’s still worth exploring this section of the park. Places to see: The Grand Canyon of Yellowstone, Artist Point, and the accompanying Falls (Lower and Upper).
These scenic viewpoints are all very short, well-marked trails that work for all types of hikers. A bonus if you’re heading back south is Hayden Valley.
Bring your binoculars because wildlife love the vastness of this valley, especially when dusk starts to set in. If you forget about this tip, you’ll see loads of cars parked alongside the road to remind you to keep your eyes peeled.


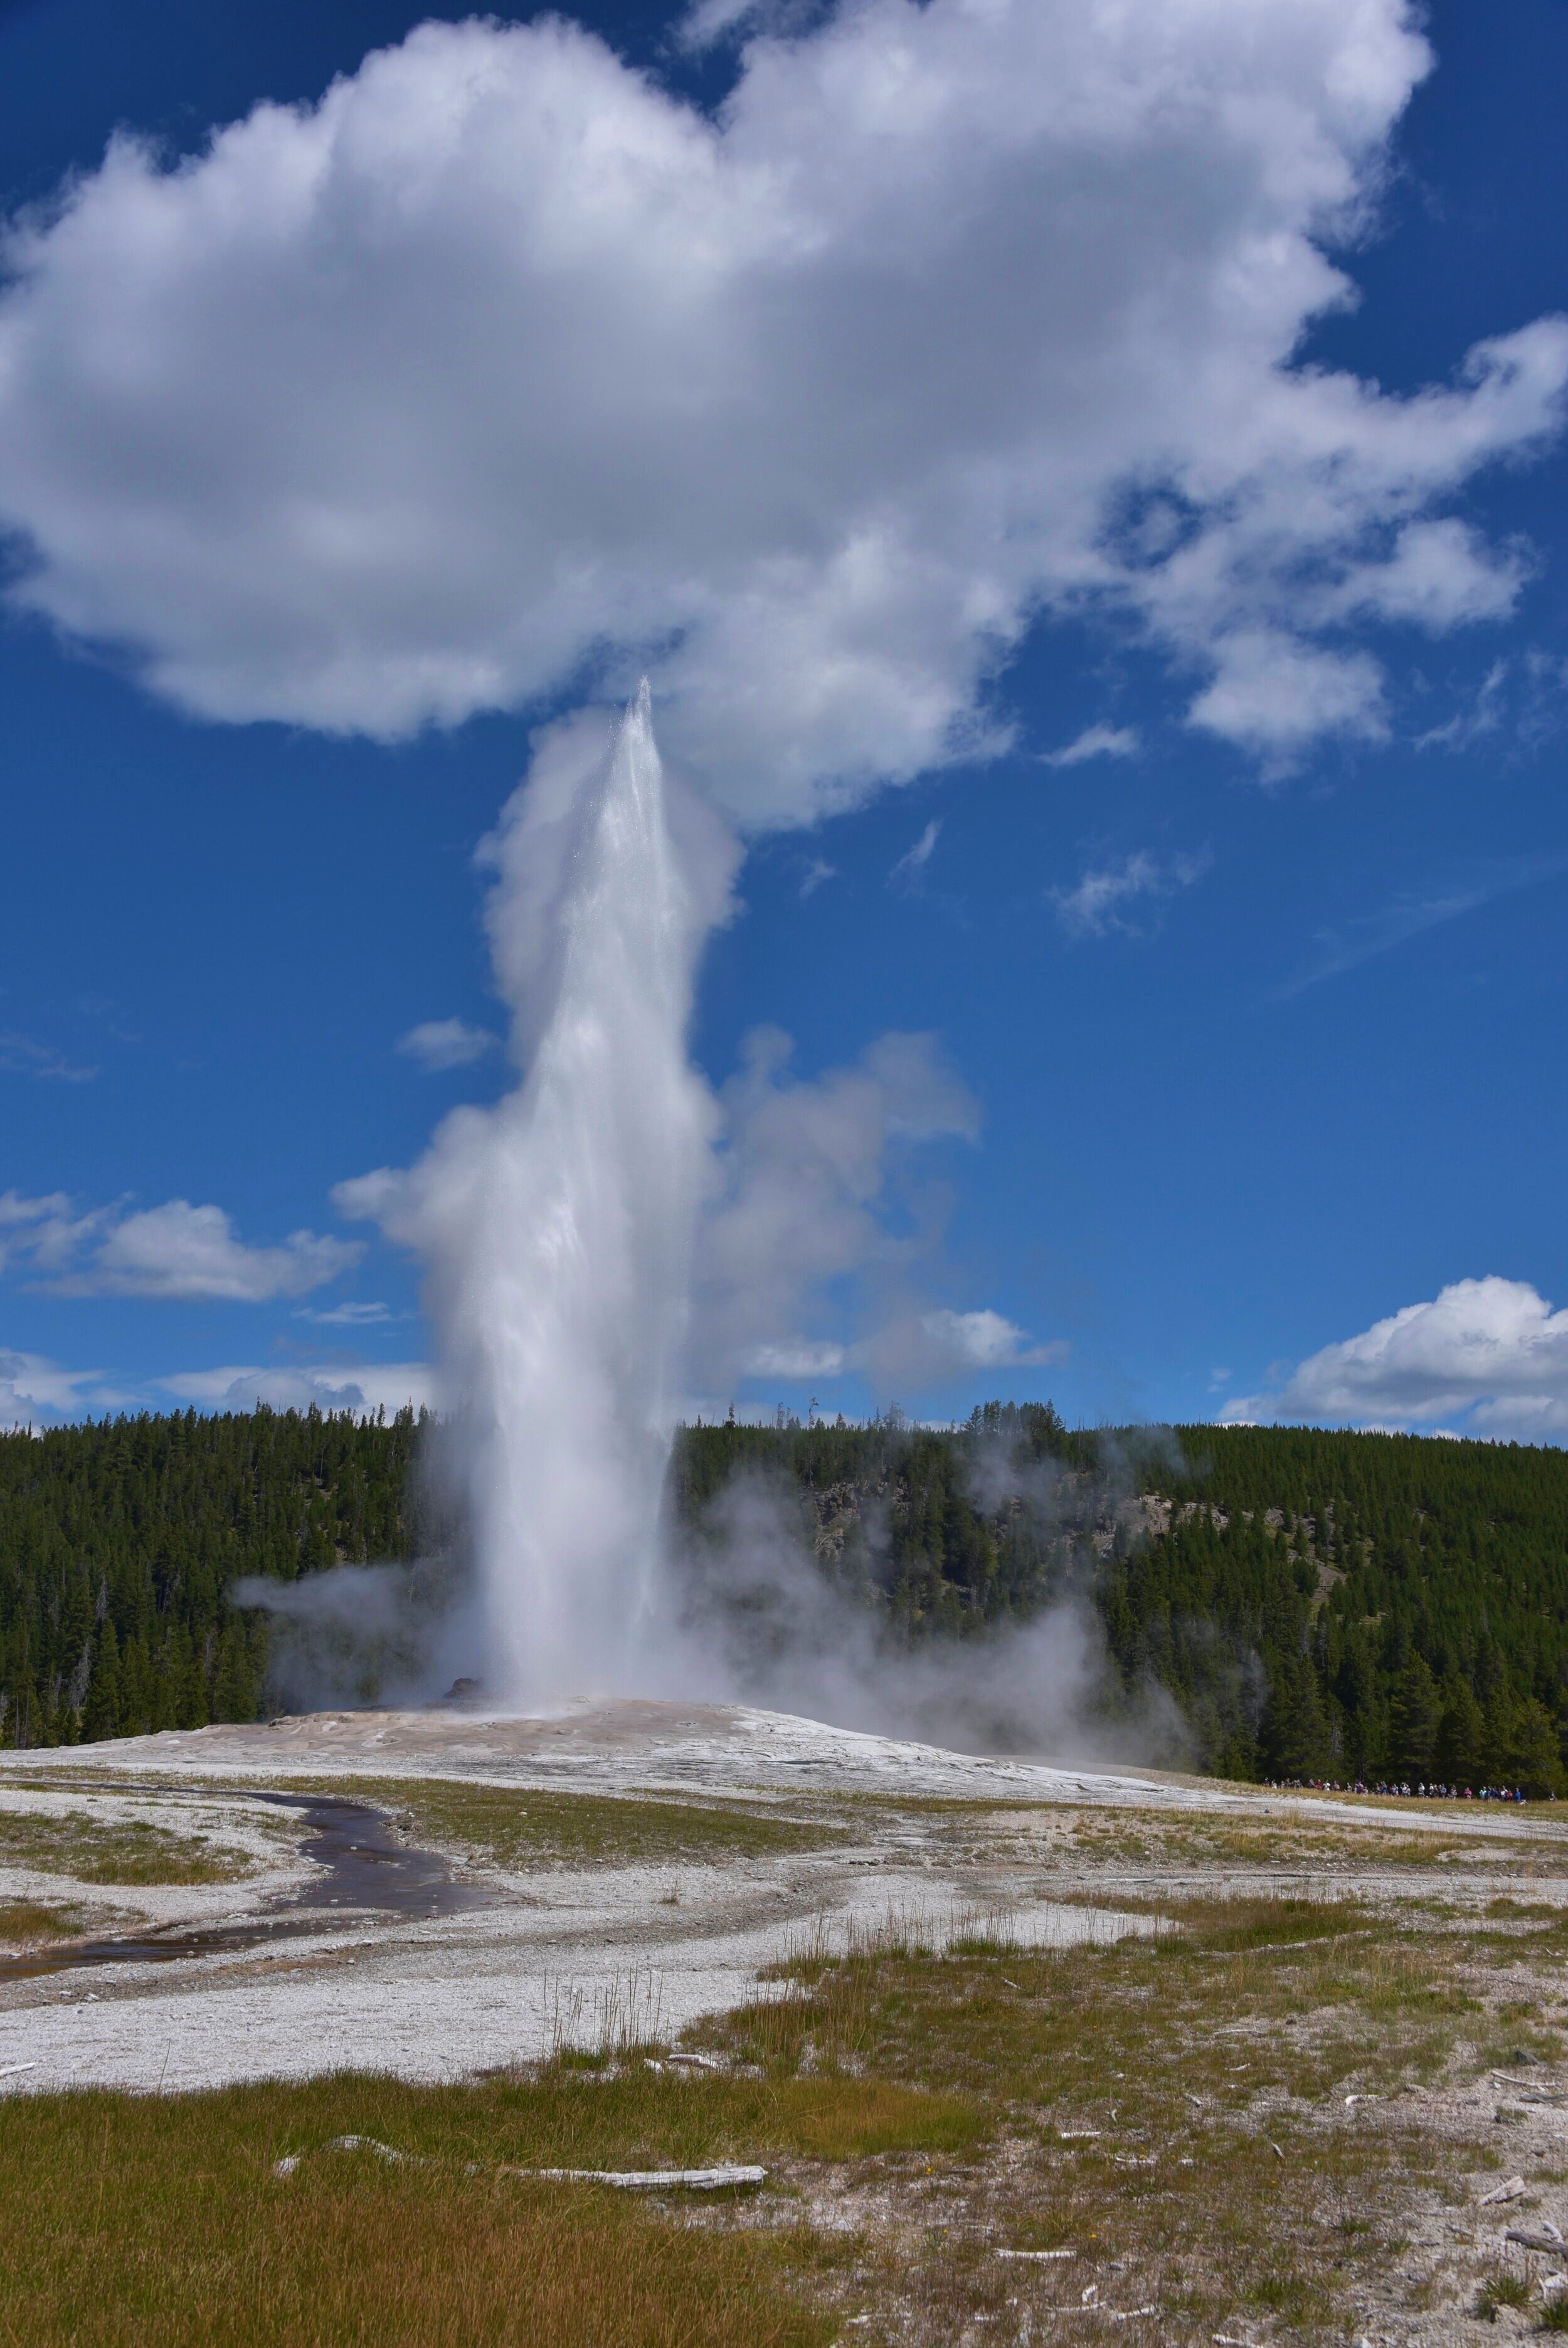
2. Old Faithful and West Thumb/Grant Village
With our map in hand, we embarked on a self-guided geyser tour through the heart of Yellowstone National Park. We spent a day going from geyser to geyser. We made our way first to Old Faithful — given that it’s the most popular (and named appropriately). The park gets the timing of this geyser narrowed down to a small window, so you won’t need to waste time waiting for it to erupt. It’s quite the spectacle.
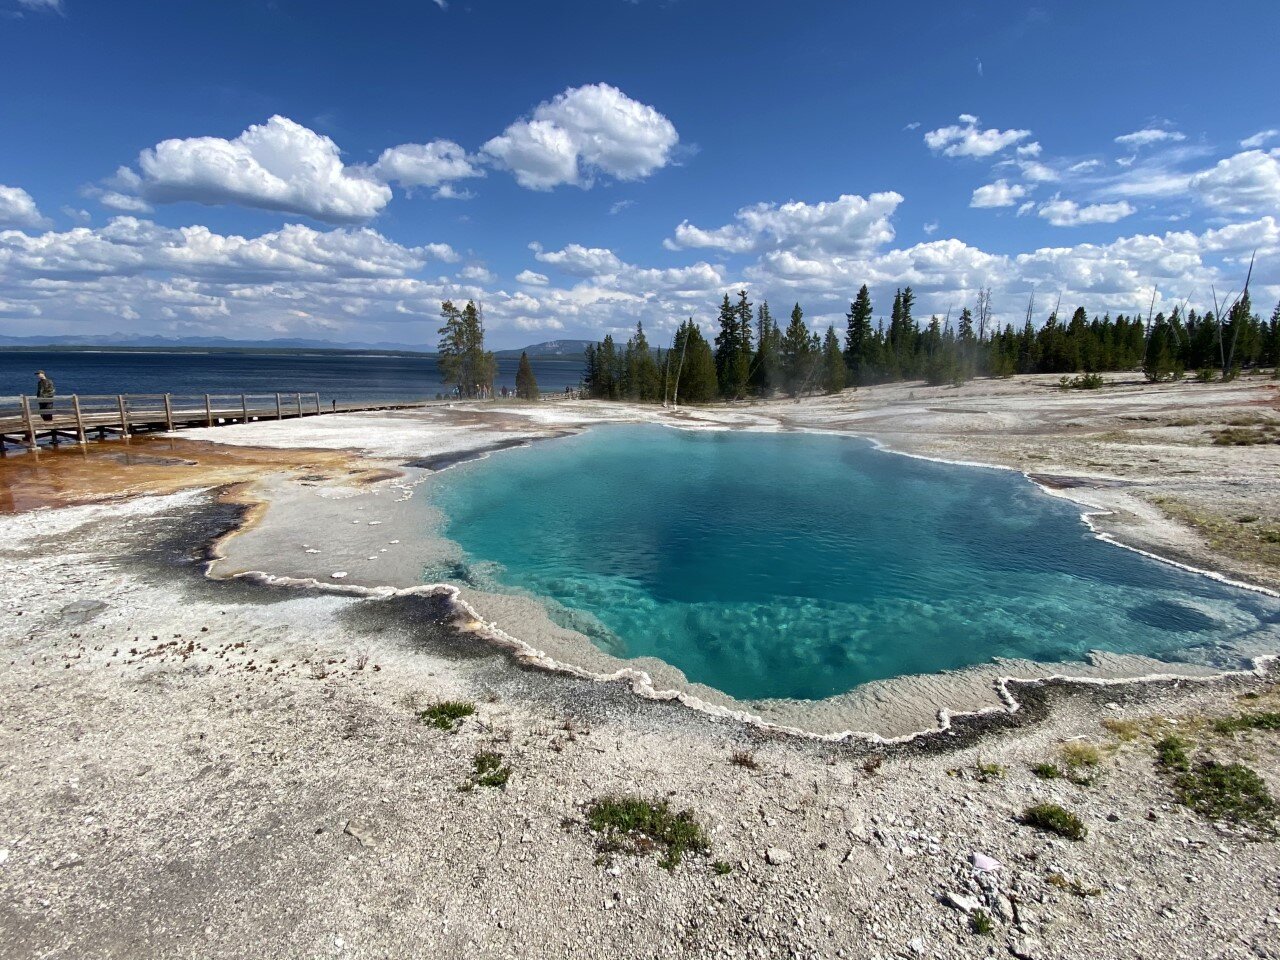
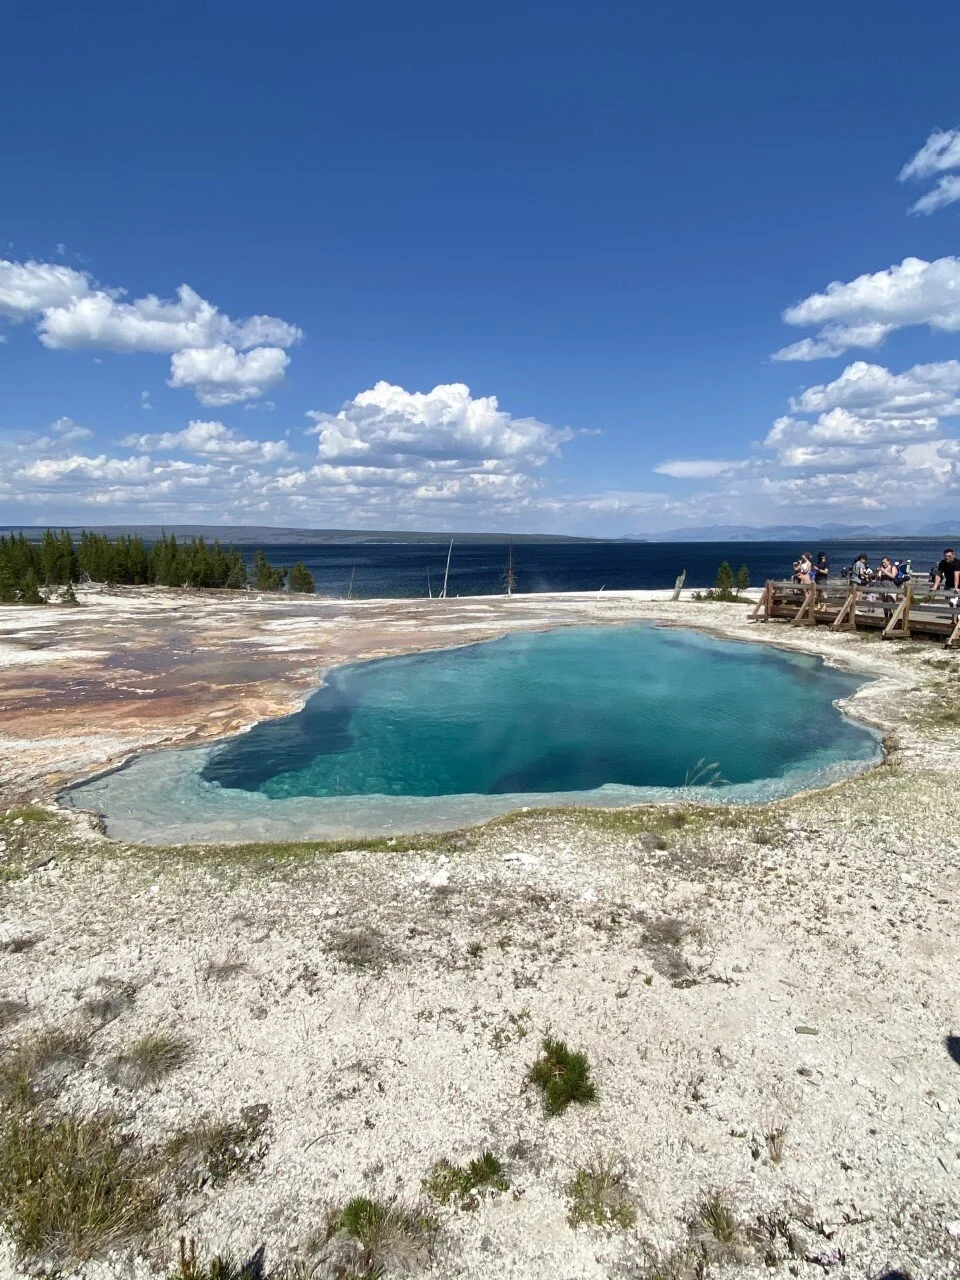
After Old Faithful, we explored the Upper Geyser Basin, Lower Geyser Basin, Black Sand Basin, Biscuit Basin, and West Thumb Geyser Basin (pictured below. I told you – a great deal of geysers. Turns out, Yellowstone is home to over 10,000 geysers, hot springs, mud spots, and the sort. Each of these geyser basins takes about a half hour or less to walk around and explore.
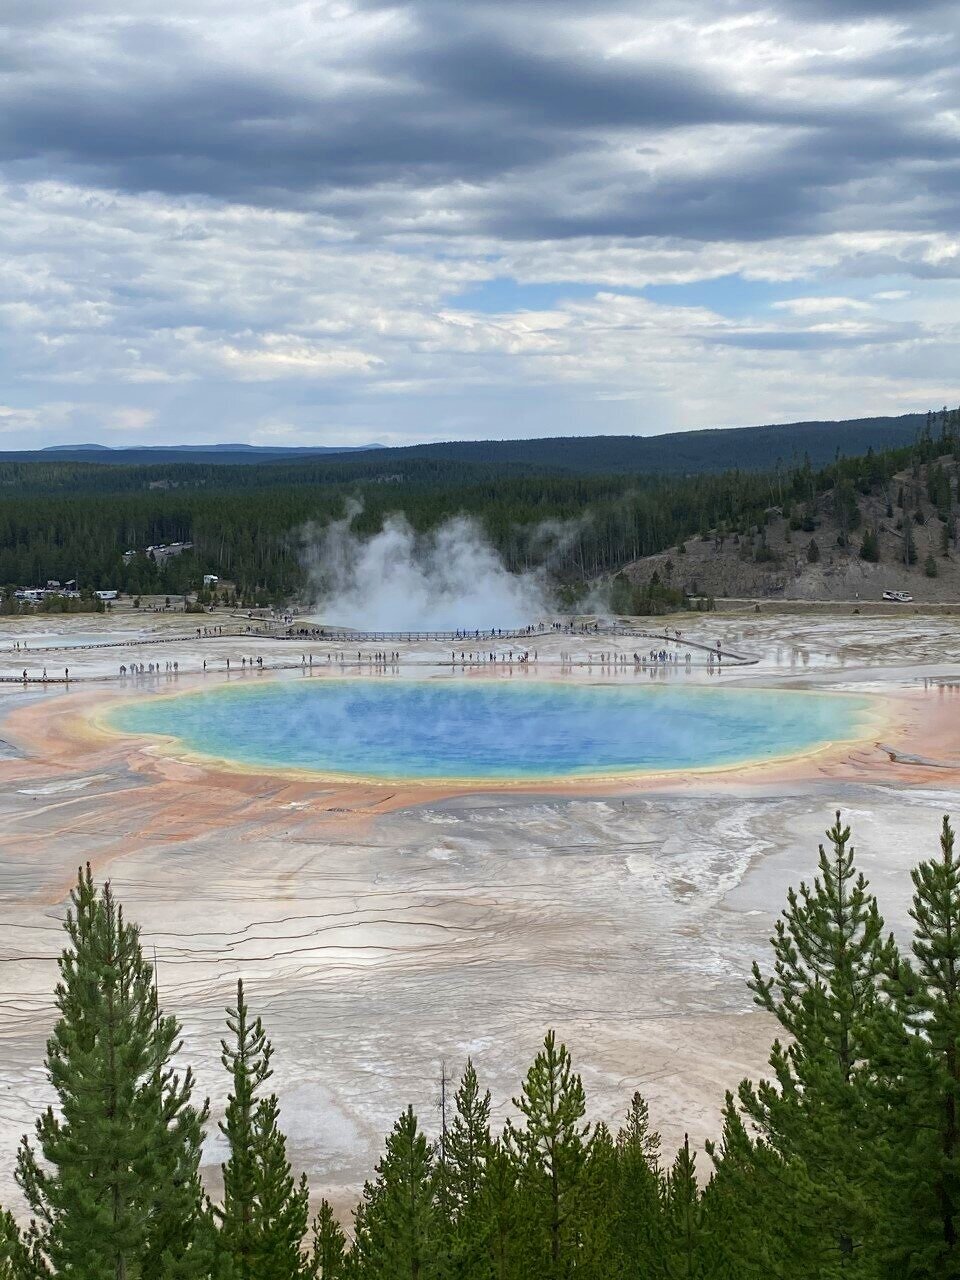
The Grand Prismatic Spring was well worth the view. We gave this one a little more exploration time. Parking here was also limited, but spots opened up quickly as the walking loop to view the spring isn’t long.

3. Mammoth Hot Springs
This northern part of the park was way quieter, which might be why it was my absolute favorite. Like I said earlier, I’m a tourist, but I’m not a fan of hoards of tourists. I love the local feel (hard to come by in the heat of summer in America’s first national park).
The Mammoth Hot Springs Terraces are a small point on the large map. In a matter of steps, you are viewing jagged, salt-like walls with Montana in the north. I felt transported back to Peru’s salt mines in Maras with the coloring of the limestone in a desert-like landscape. This part of the park is also “near” Lamar Valley, another massive valley ideal for spotting wildlife. We ran into multiple bison jams here.
Is Yellowstone National Park on your list yet? What spot do you want to see the most?

Hiking Cascade and Porter Mountains in the Adirondacks

Winter in the mountains is surreal. Growing up in Texas meant only seeing snow once or twice, and it was mostly ice. I am absolutely enamored by the winterscape in the northeast. From snow-capped peaks to the crunch of spikes in snow on the trail, to the summit sunsets that are more frequent with shorter daylight times. Selfishly I also enjoy having trails to ourselves and not heavy crowds.
This past week, we ventured up to the Adirondacks, a magical gem in New York that feels like New York’s best kept secret. It’s a long drive for many, and it’s not a national park, so it’s not extremely well-known. However, for hikers in New England, it’s a popular destination. Like the New Hampshire 48, there’s a list of 46 high peaks in the Adirondacks that results in accomplishment (and a patch, of course) if completed.
I’ve hiked a couple, but never in winter. Winter in the Adirondacks feels otherworldly to me because of my few trips up there. My first trip up was five years ago. One of my best friends who lived in Hawaii at the time sent me a picture of the Adirondacks and told me I should go. I made a day trip that weekend, which became the first of an annual fall foliage trip.
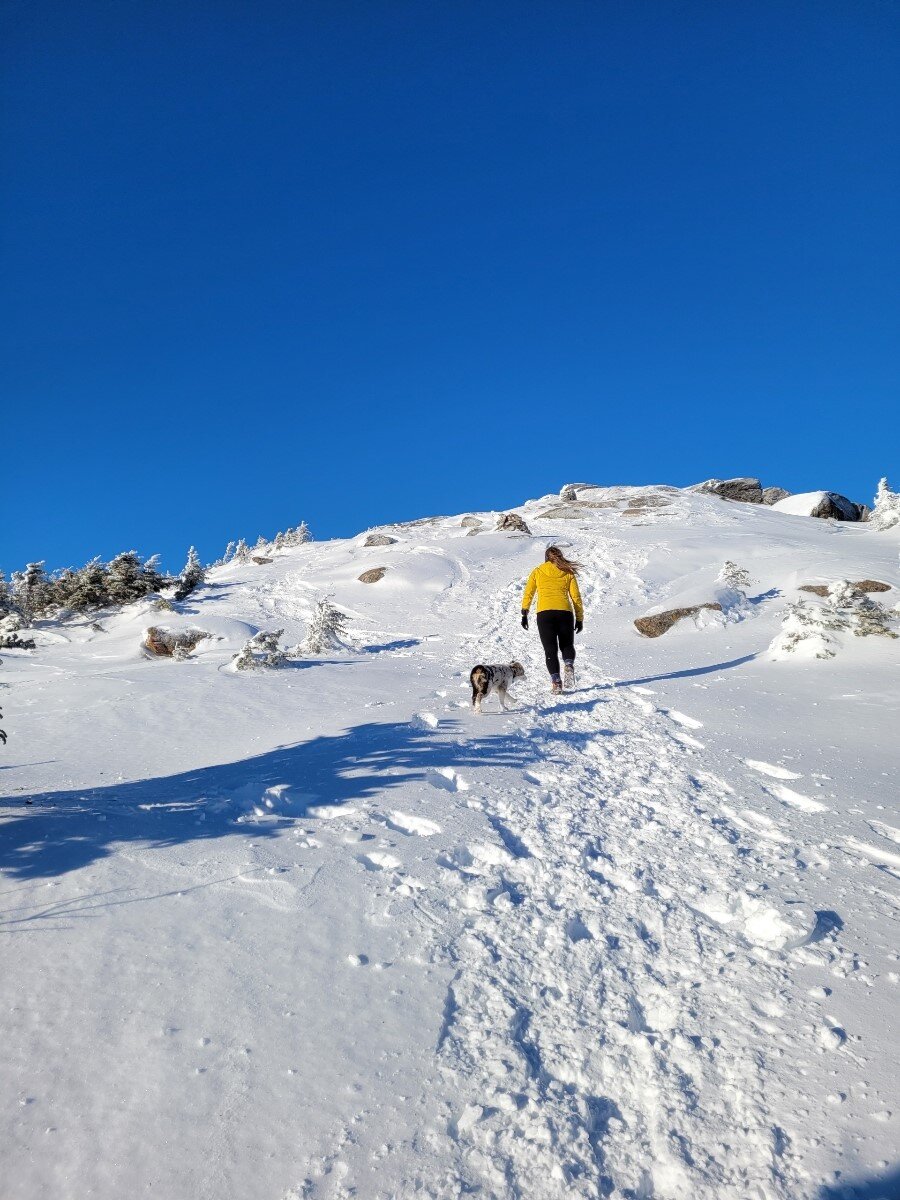
This trip, however, would be the first attempt of a winter trek in these vast mountains. We set our hearts on two of the 46: Cascade and Porter. After arriving in the early afternoon to a nearly empty parking lot, we set out on the 2.4 mile ascent to Cascade along the Cascade Mountain trail. The trail was packed down and clearly labeled. Right before the summit of Cascade, at about 2 miles, there is a y on the trail. One direction leading up to Cascade (head toward “privy”), and the other about .6 miles to Porter. We headed up Cascade first.

One of my favorite parts of winter hiking is the lowered probability of getting lost because you only have two options: follow the trail another hiker sweetly packed down for you, or dive into feet of untouched snow. Seems obvious.

The wind was brutal at the summit, so we descended almost as quickly as we made it above treeline. Beautiful bluebird days can be deceiving weather-wise since we were met with 20 mph winds producing a negative windchill experience atop Cascade.

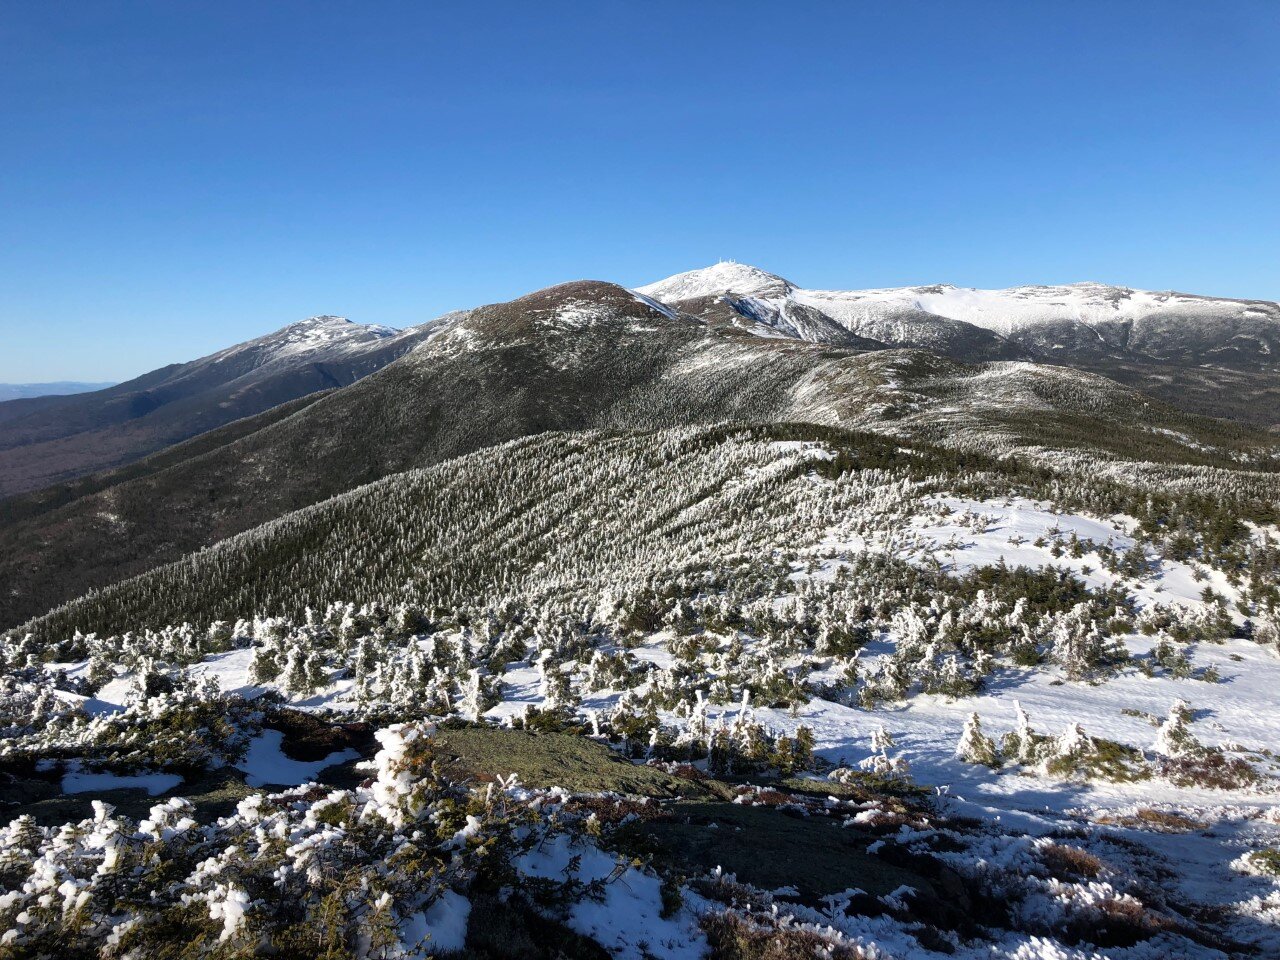
Afterwards, Porter was a fast and beautiful jaunt with views of Cascade. I love ridgelines because you get to see how far your hike has taken you.
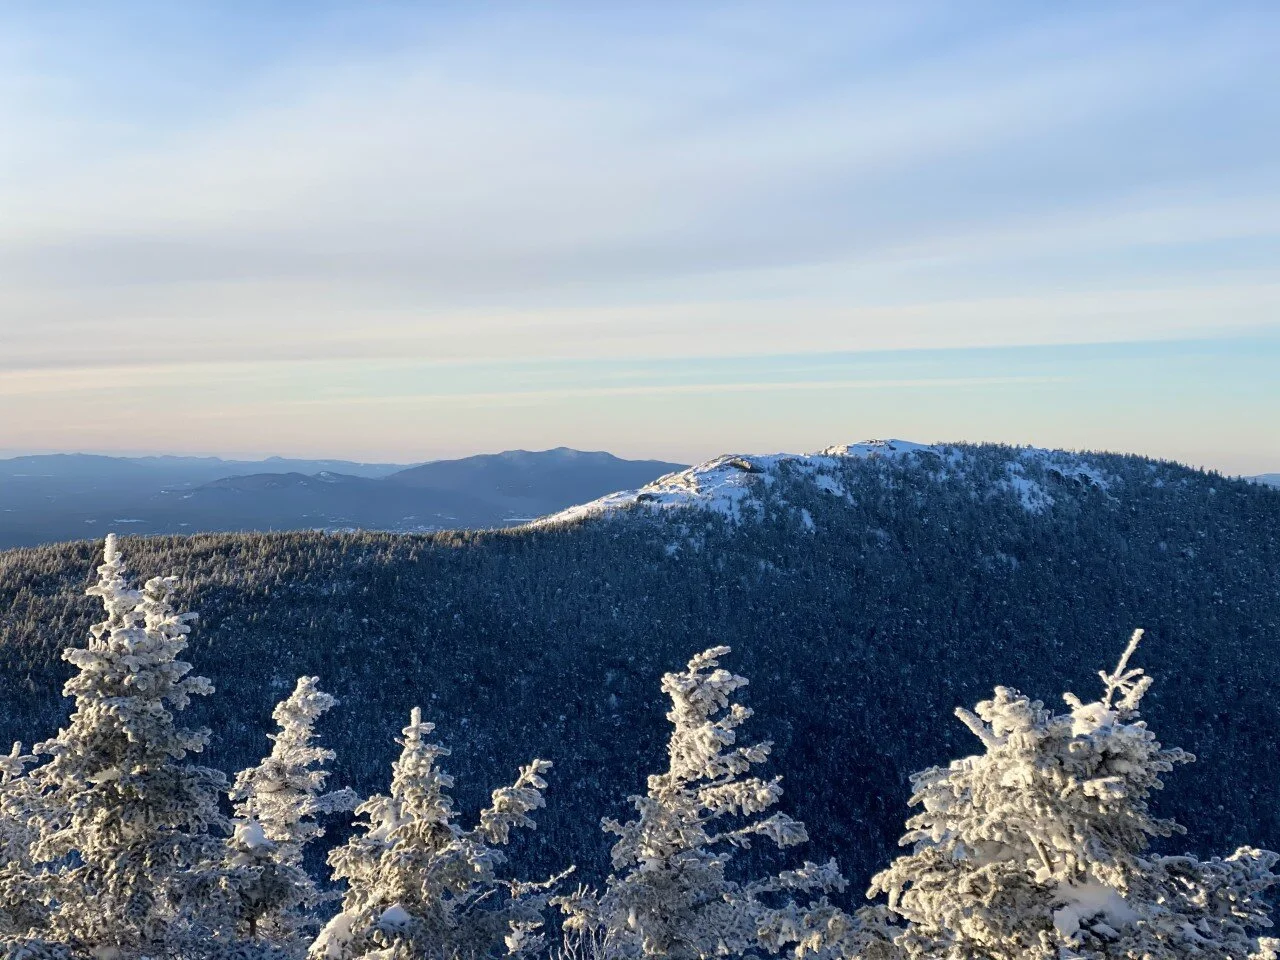
Cascade Mountain trail to the summit of Cascade Mountain (view from Porter Mountain).
We headed down Porter the way we came up and the rest of the hike was a swift and smooth descent. It was also our dog Koah’s first two of the 46! After this trip, I’m already starting to plan the next. The 46 just might be the next hiking challenge we take on.

Should the ADK 46 be our next list to take on? Have you hiked any of the 46 high peaks?

Five Adventure Musts in Oahu, Hawaii
Find yourself in Hawaii for a week without an itinerary, but with a desire to adventure? On my second trip to Oahu, I made sure I saw all that the island has to offer. From açaí bowls to a birds-eye-view of the island, to local-recommended hikes, I left the island saddened to return to a New England winter, but with the promise of returning to experience it again one day.
Given the travel restrictions in Massachusetts over the past few months, the only state we can travel to (without quaranting upon our return) is Hawaii. With that, Hawaii has been on my mind.
Here’s my list of five musts when visiting the forever dreamy Oahu:

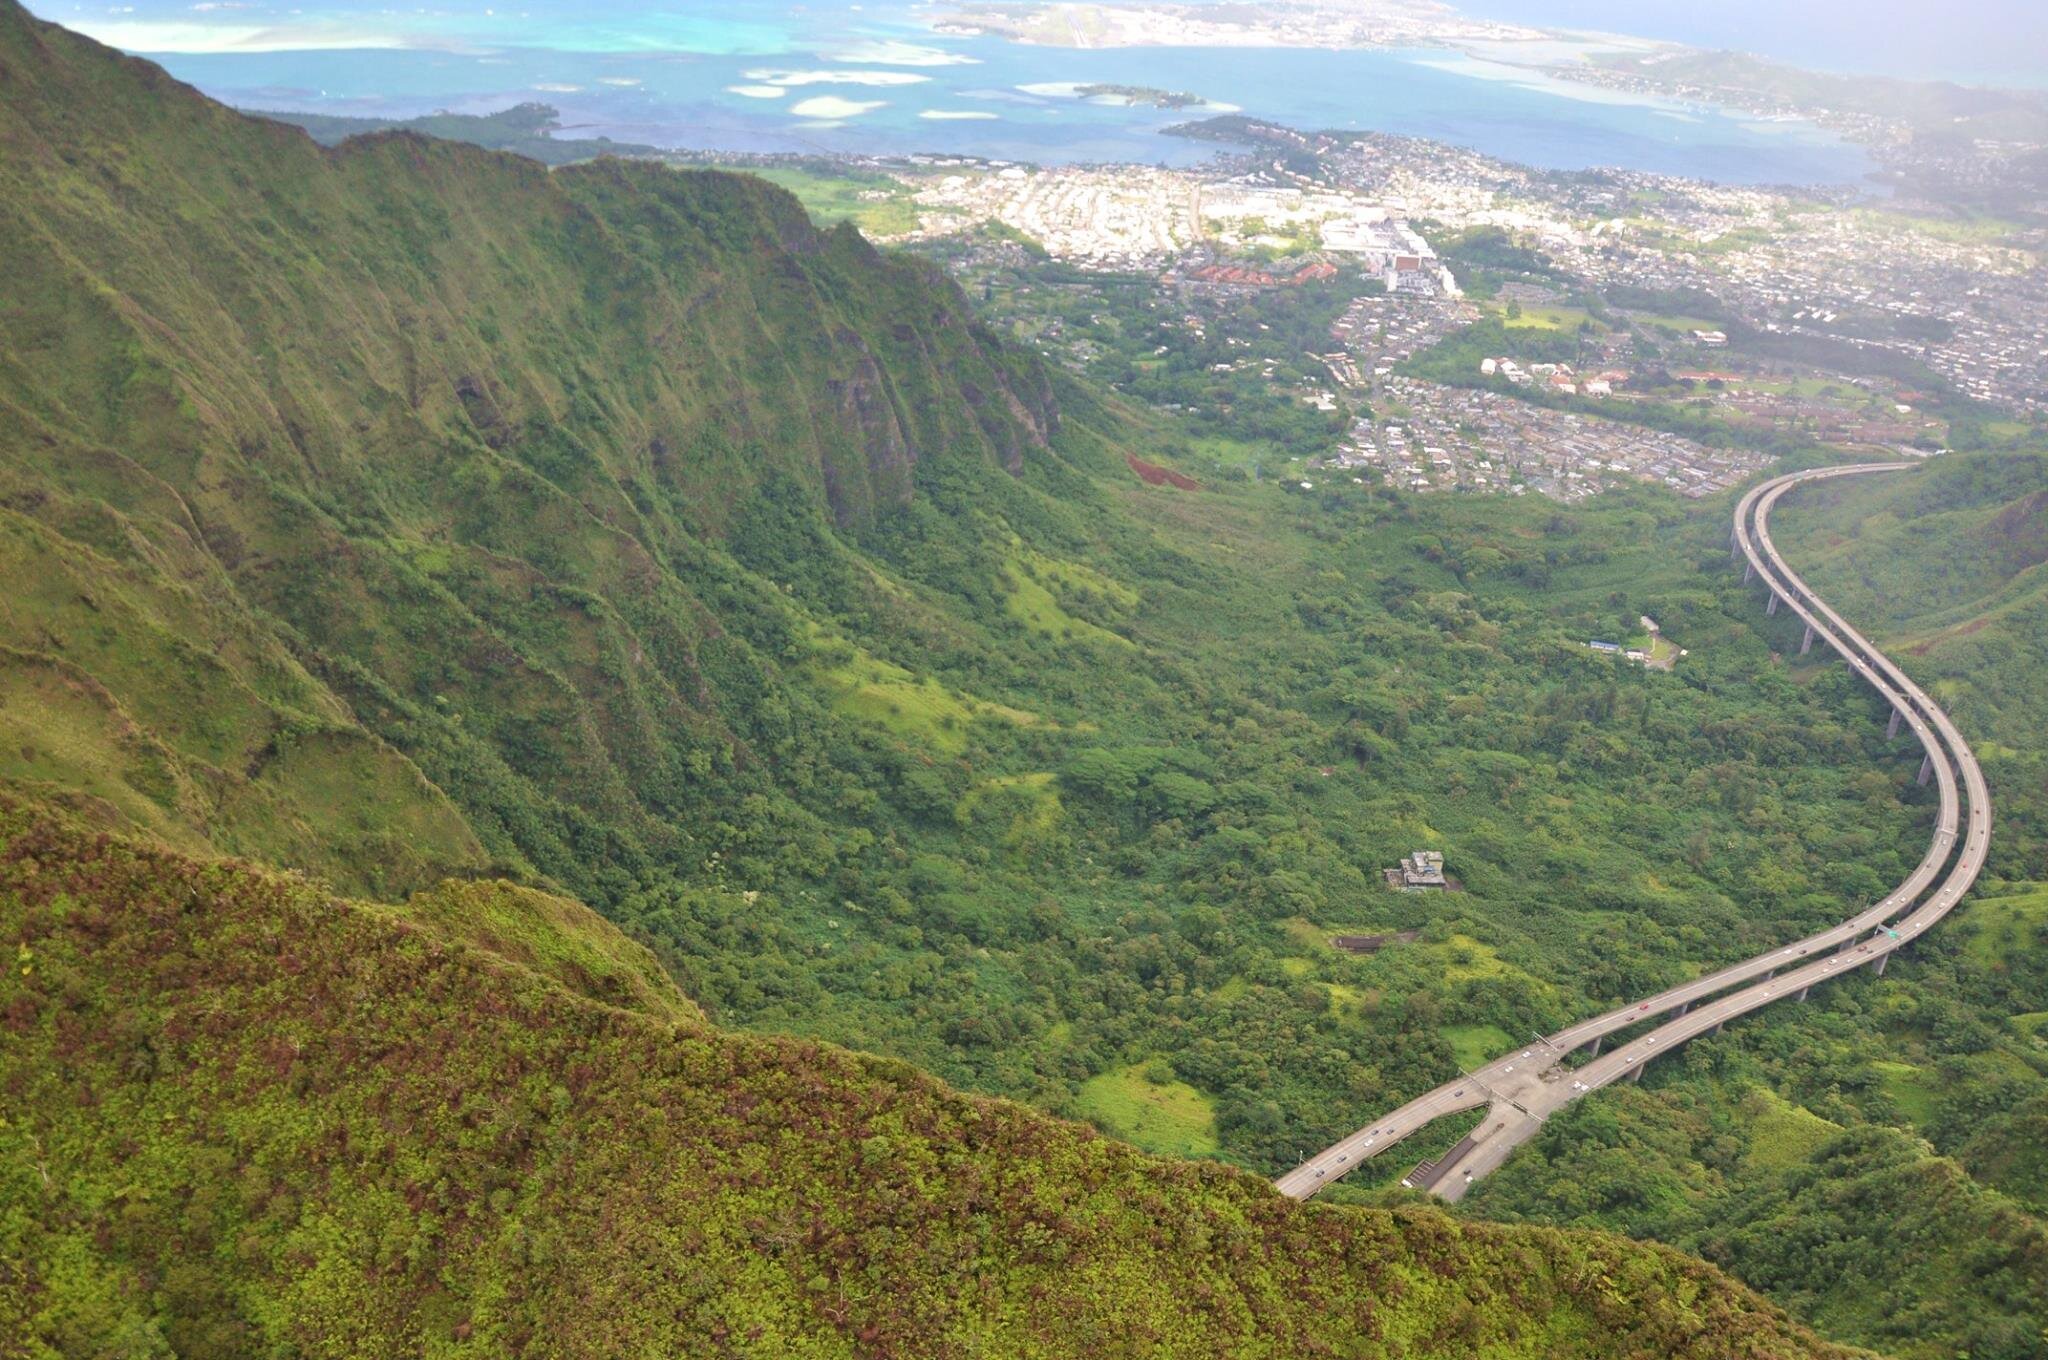
1. Take a No-Doors Helicopter Ride
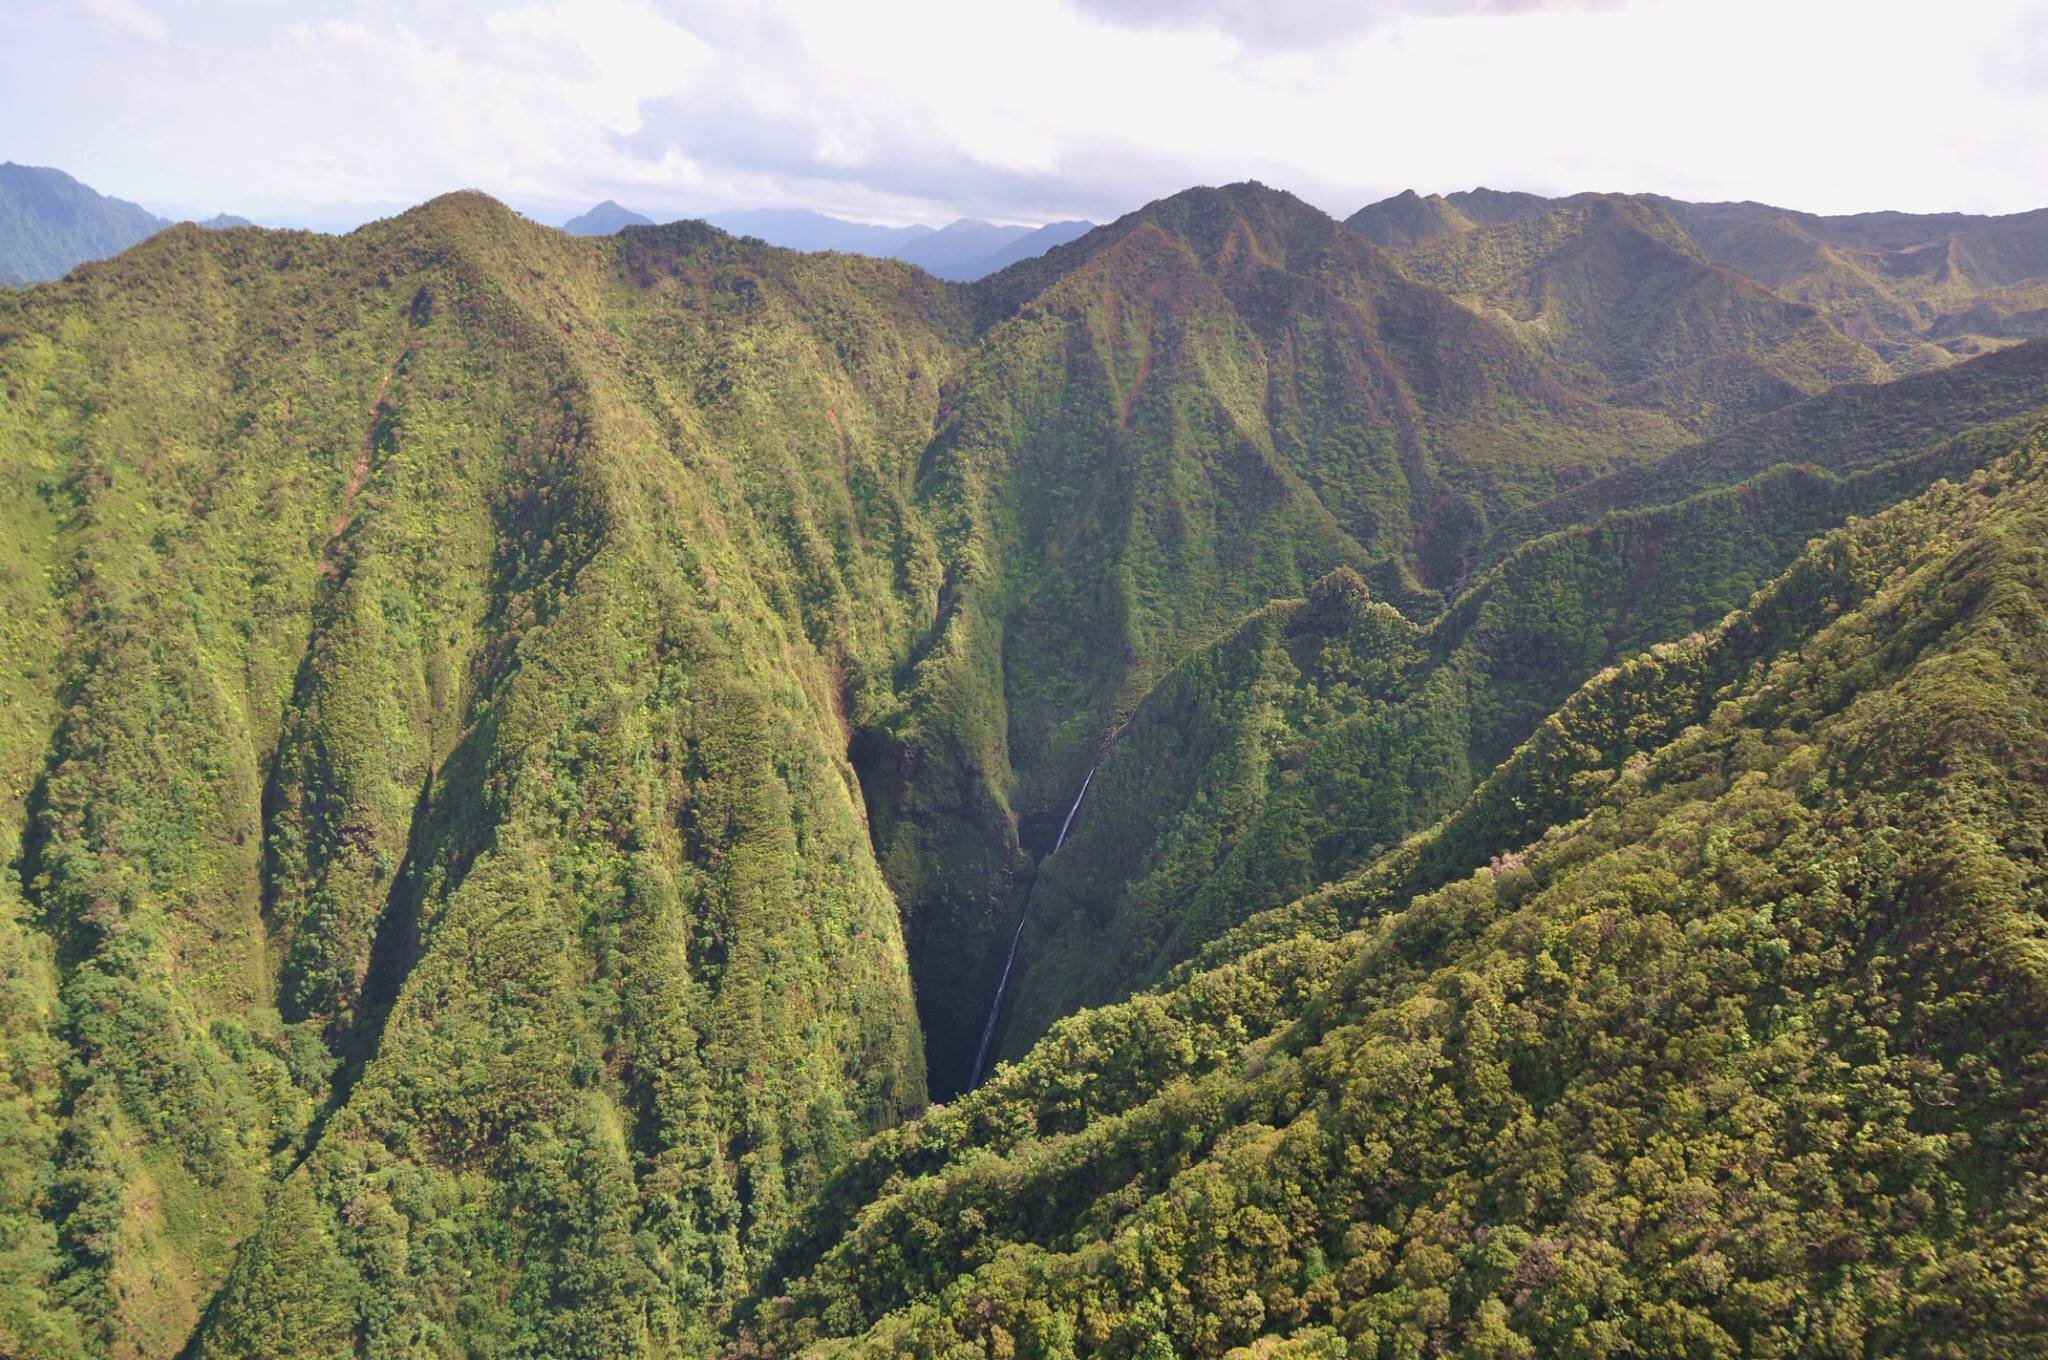
Hear me out if you read that and said absolutely not. It’s completely safe and totally exhilarating. Convinced yet? Magnum Helicopters offers a phenomenal tour from start to finish. I took this tour toward the end of my trip on Oahu, so it felt neat to see parts of the island from above that I had explored on my feet days earlier.
I absolutely love seeing places from a birds-eye-view. I’ve always been fascinated by it and every trip I take incorporates some form of this perspective (probably why I love hiking and flying so much). We flew over the Sacred Falls, Pearl Harbor, the Stairway to Heaven trail, the North Shore, Honolulu, and even the Makapu’u Lighthouse I write about next.
Flip through the pictures below to see Oahu through my lens.
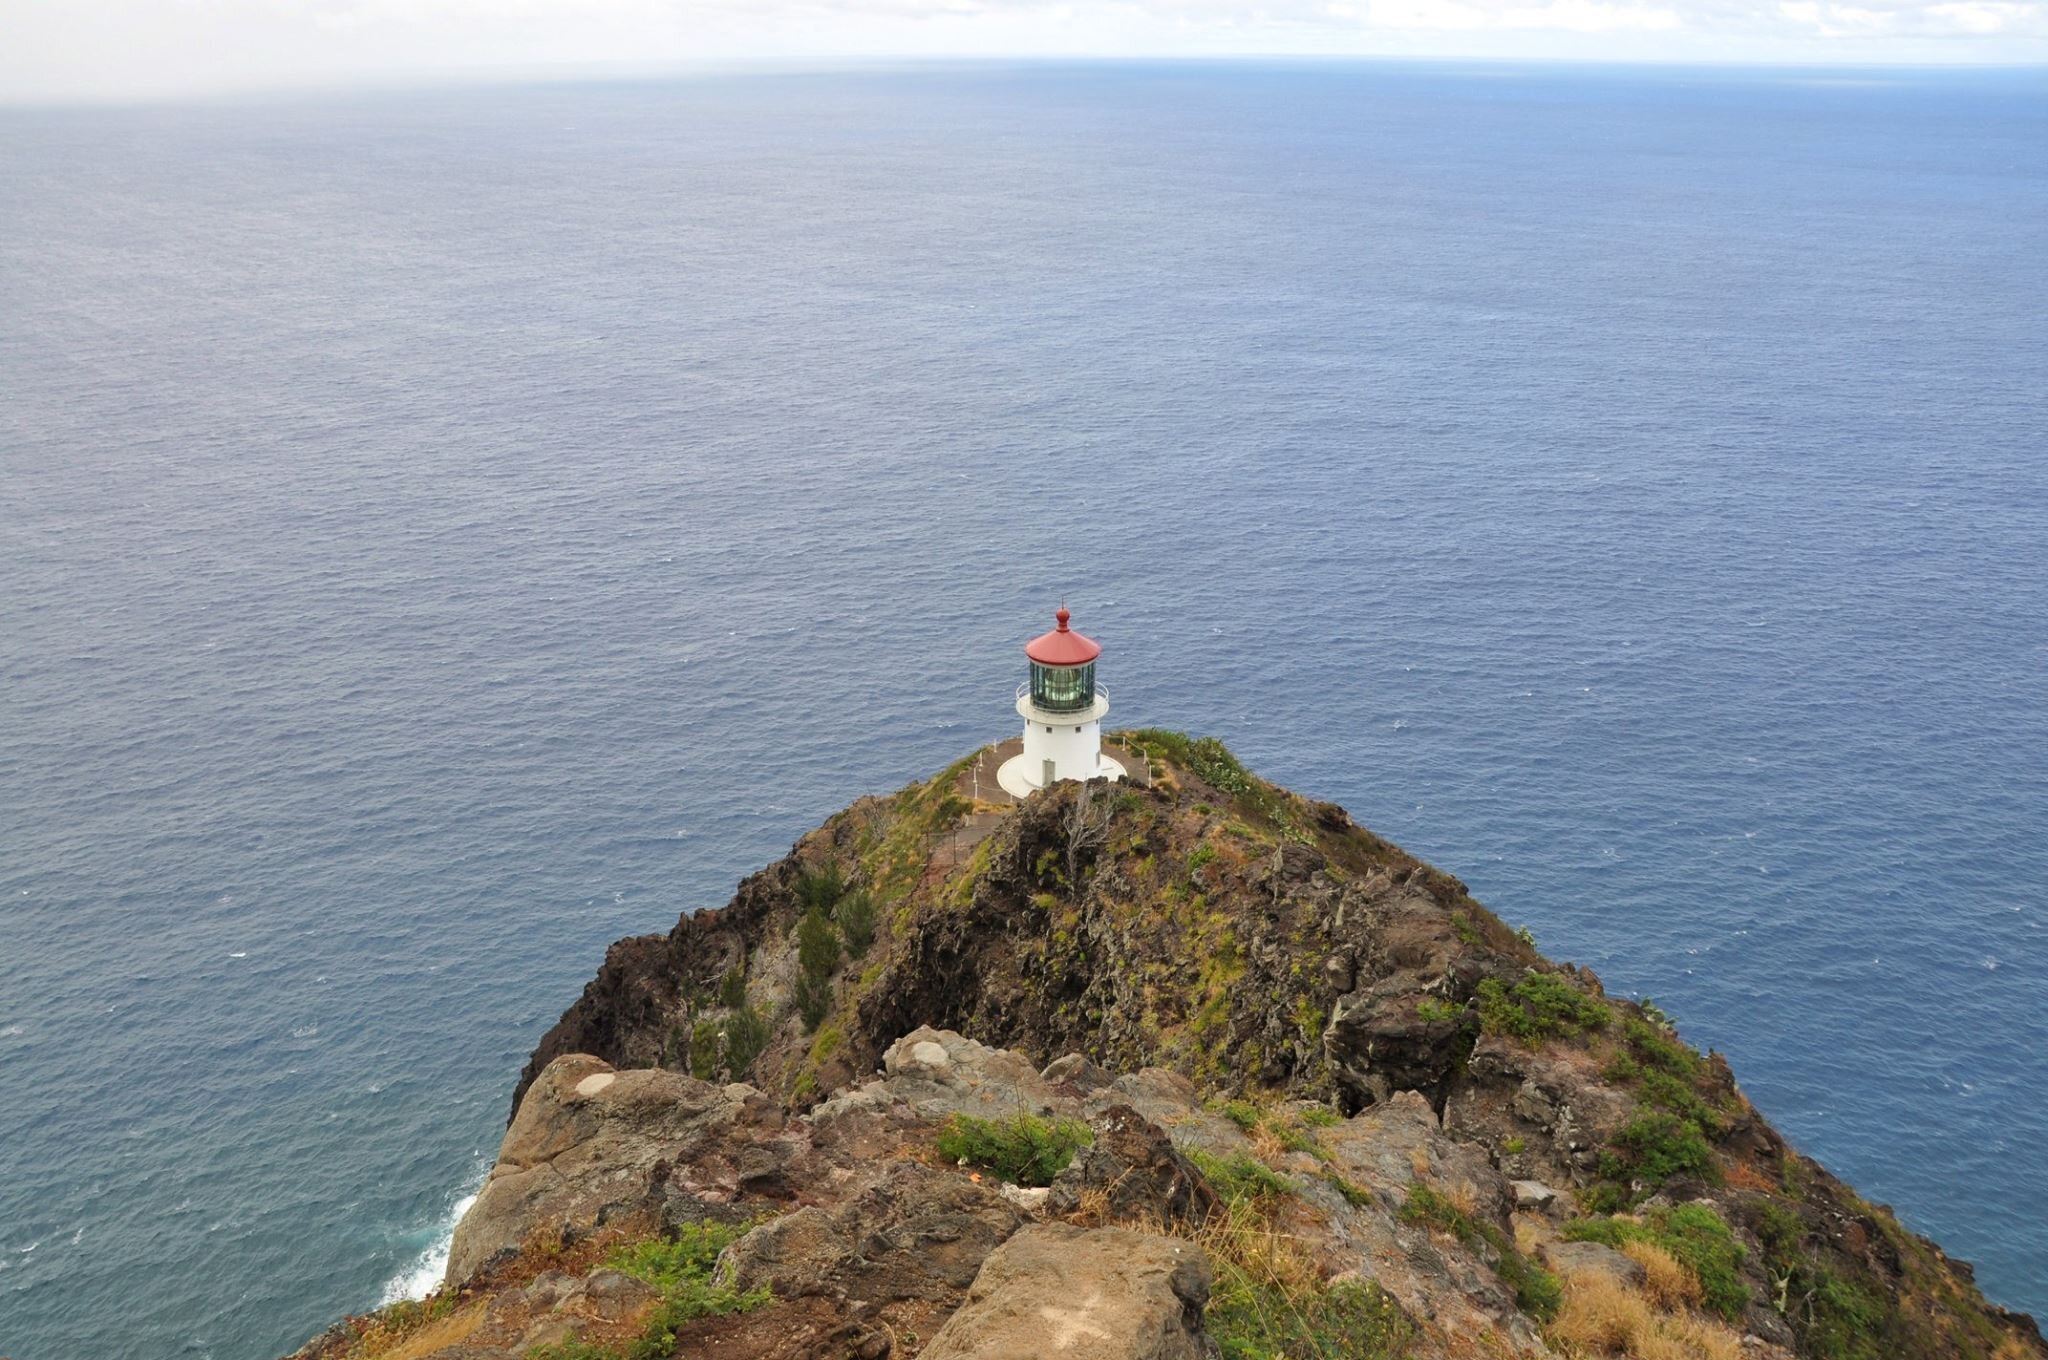


2. Hike Around the Makapu’u Lighthouse
A stunning, two-mile trail to this lighthouse was a must for me. Maine is home to dozens of lighthouses, and I’ve been to many. I go out of my way to visit lighthouses in Texas and Savannah, Georgia, so when I found out Oahu had its own gem, it was at the top of my list.
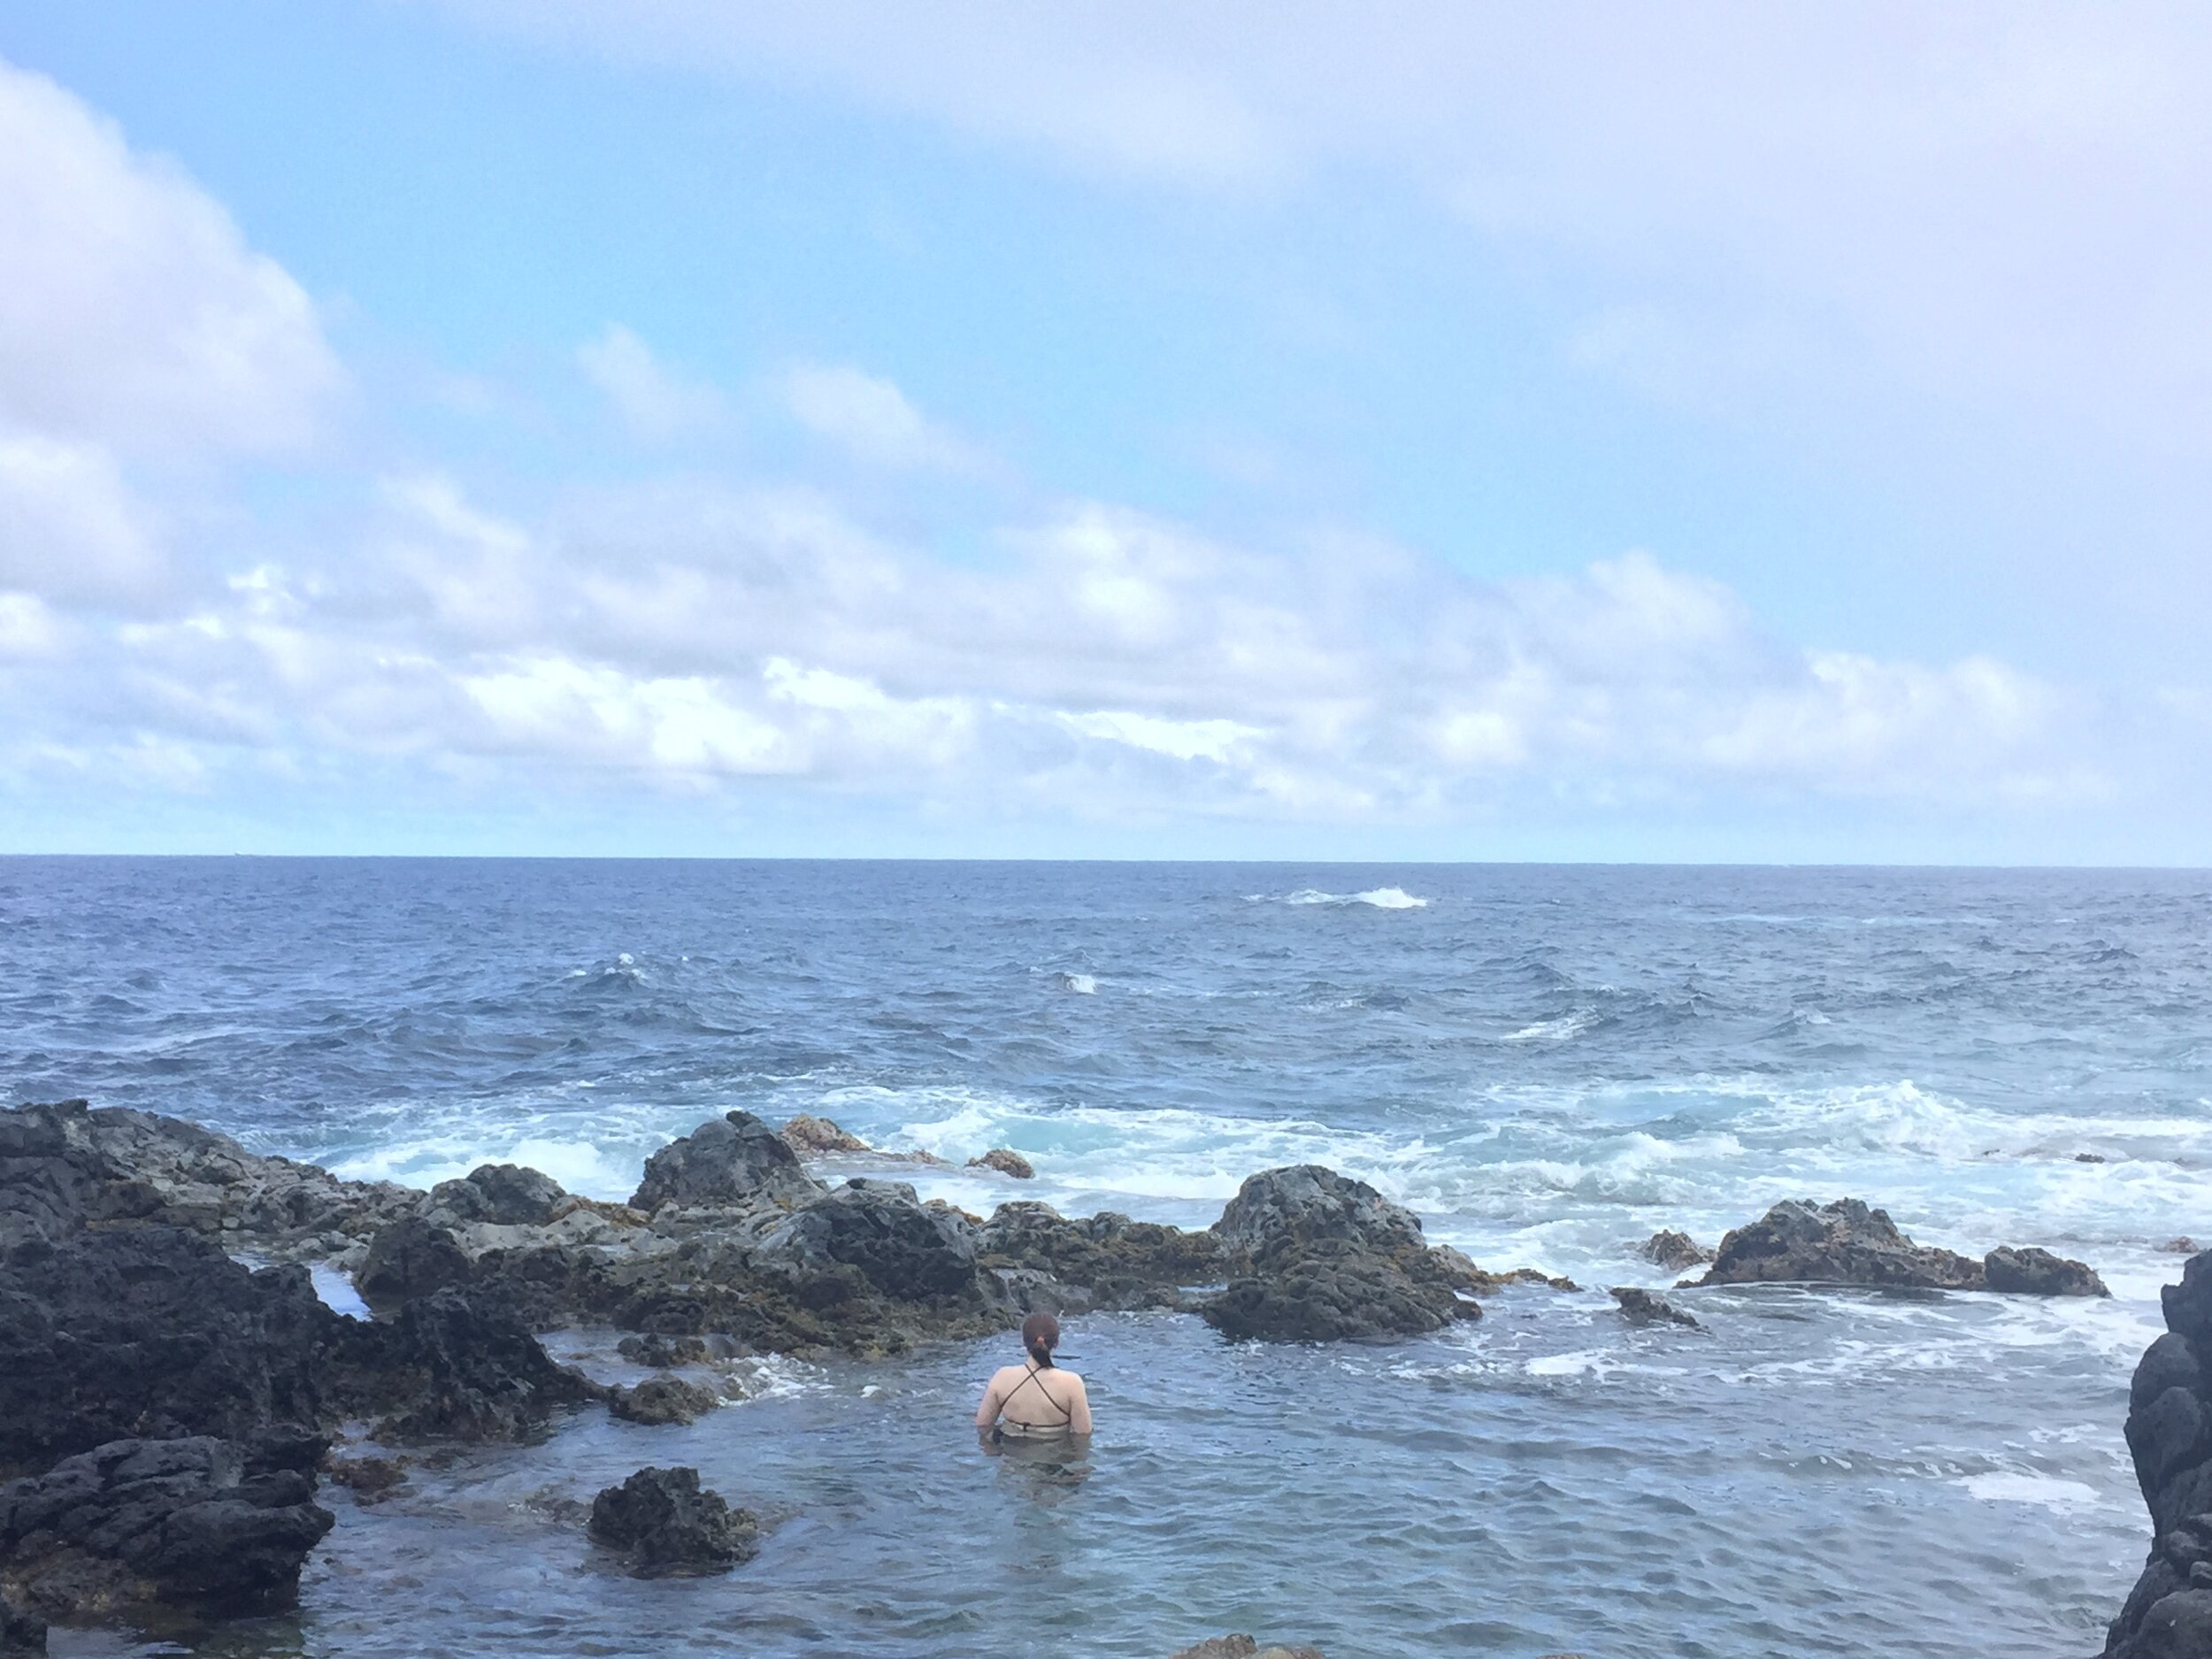
This lighthouse trail needs to be on your list. Give yourself some extra time to head down a steep descent to the Makapu’u tide pools. Wear sturdy shoes for the trek down to the tide pools (and the slow ascent back up, you’ll thank me later!)

3. Take Your Tastebuds on an Adventure With Poke and Açaí Bowls
I’m not a big foodie in general, but I always aim to try what locals eat (like that time I tried guinea pig in Peru because when in Peru…). On Oahu, it was poke and açaí bowls. A lowkey adventure one afternoon was spent grabbing poke at the local market and heading to the beach at my friend Skyla’s suggestion. Poke bowls seem like all the rage now, but I was convinced back in 2017 that I could only get poke on Hawaii’s shores. Little did I know New Hampshire had a poke place along the coast and only a couple years later Western Mass would catch up. Nothing beats that Oahu grocery store poke though.
With the Hawaii sun year-round, açaí bowls are also always a good idea. Açaí stands are around the island like snowcone shacks in Texas.


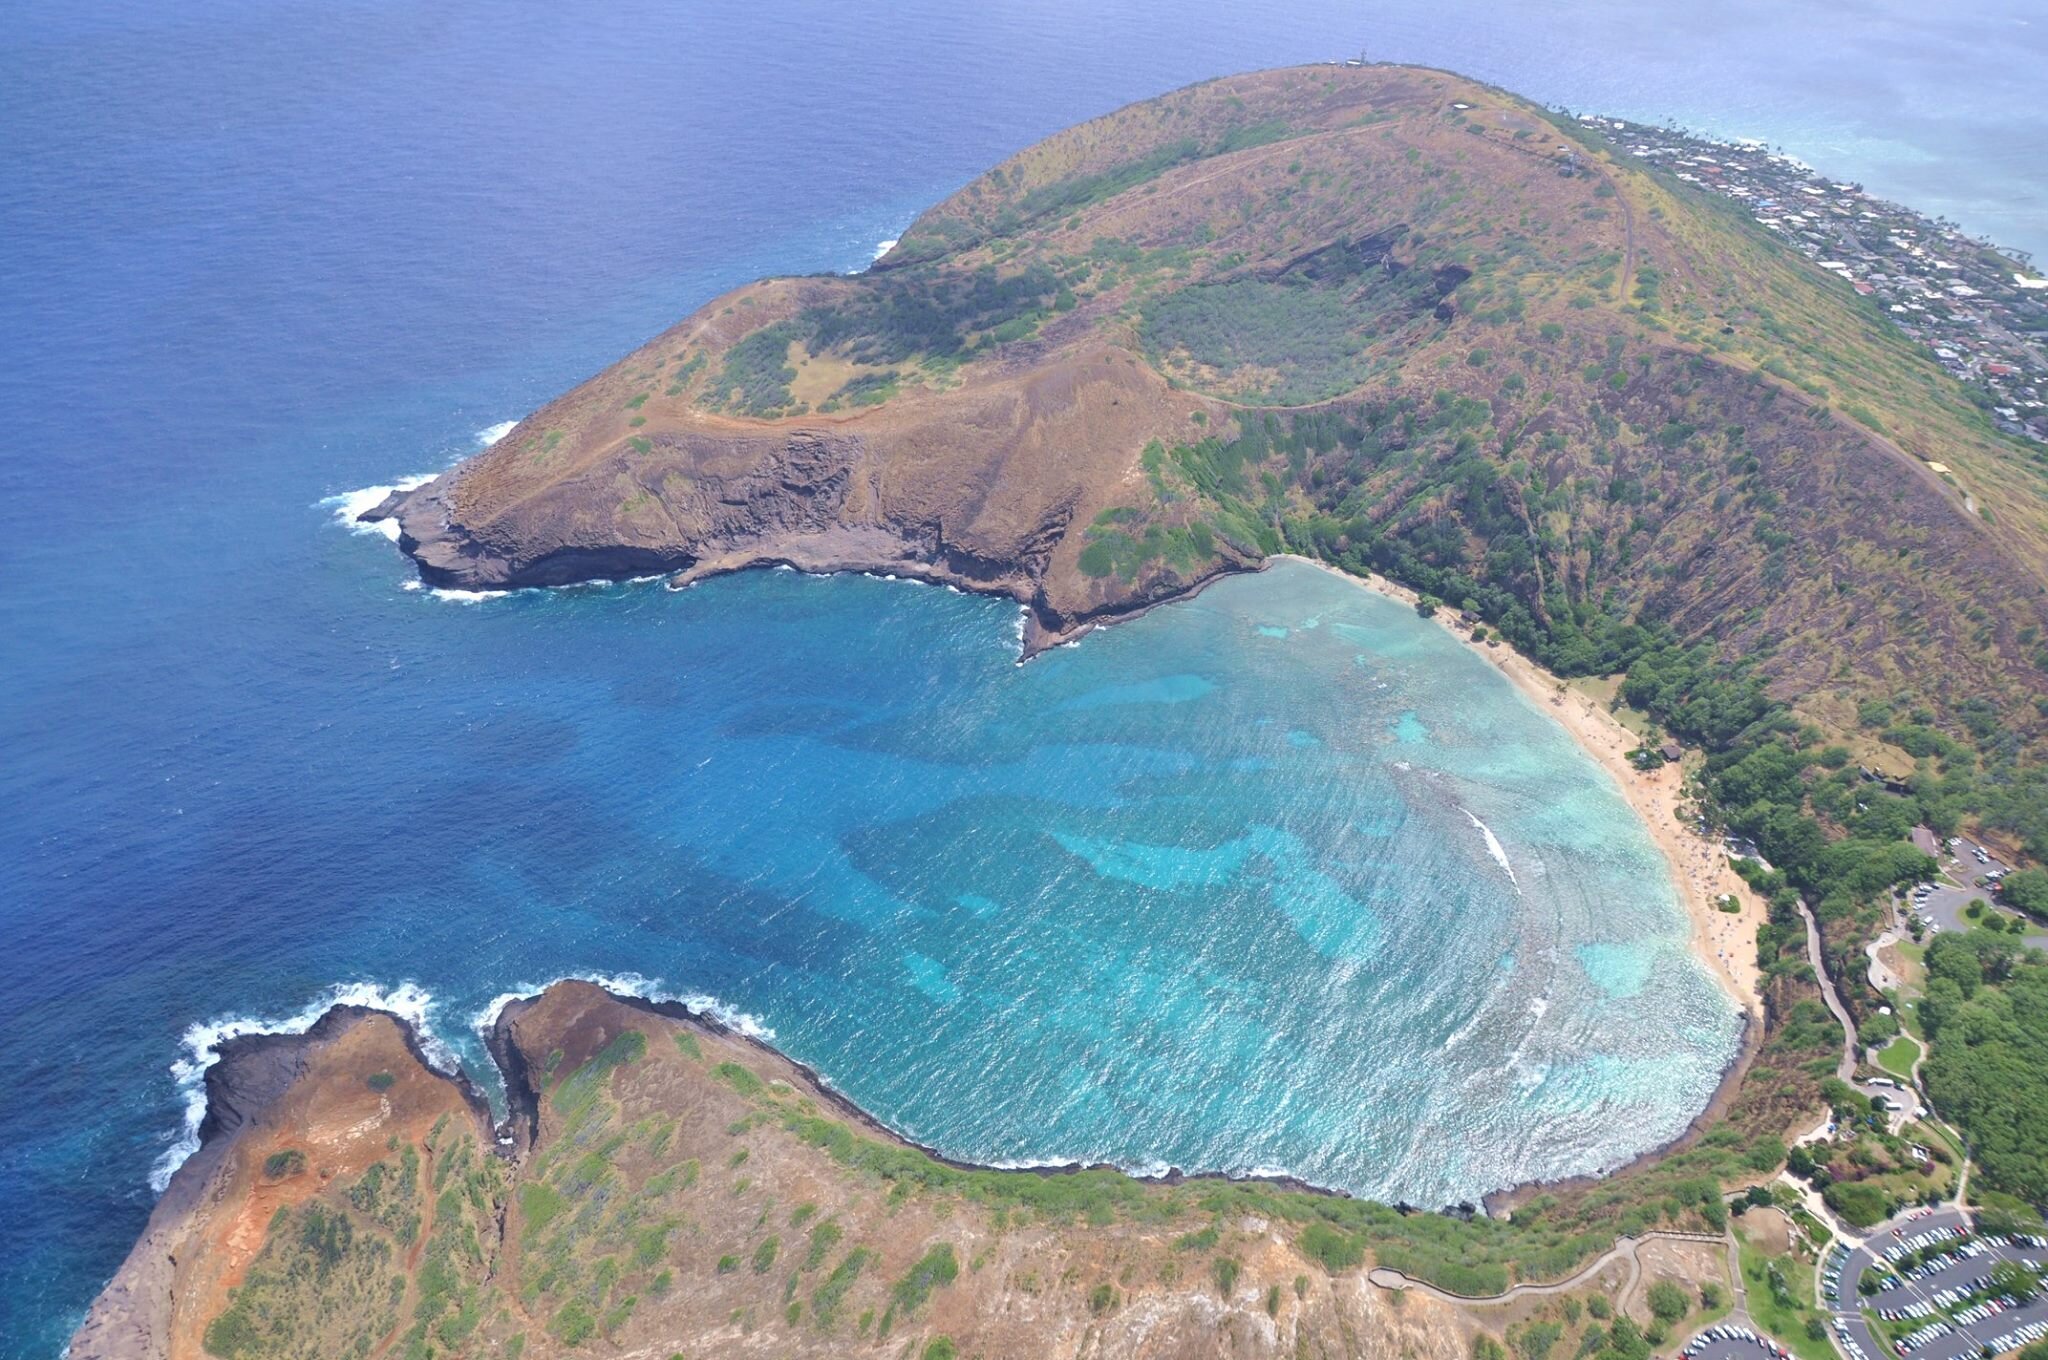
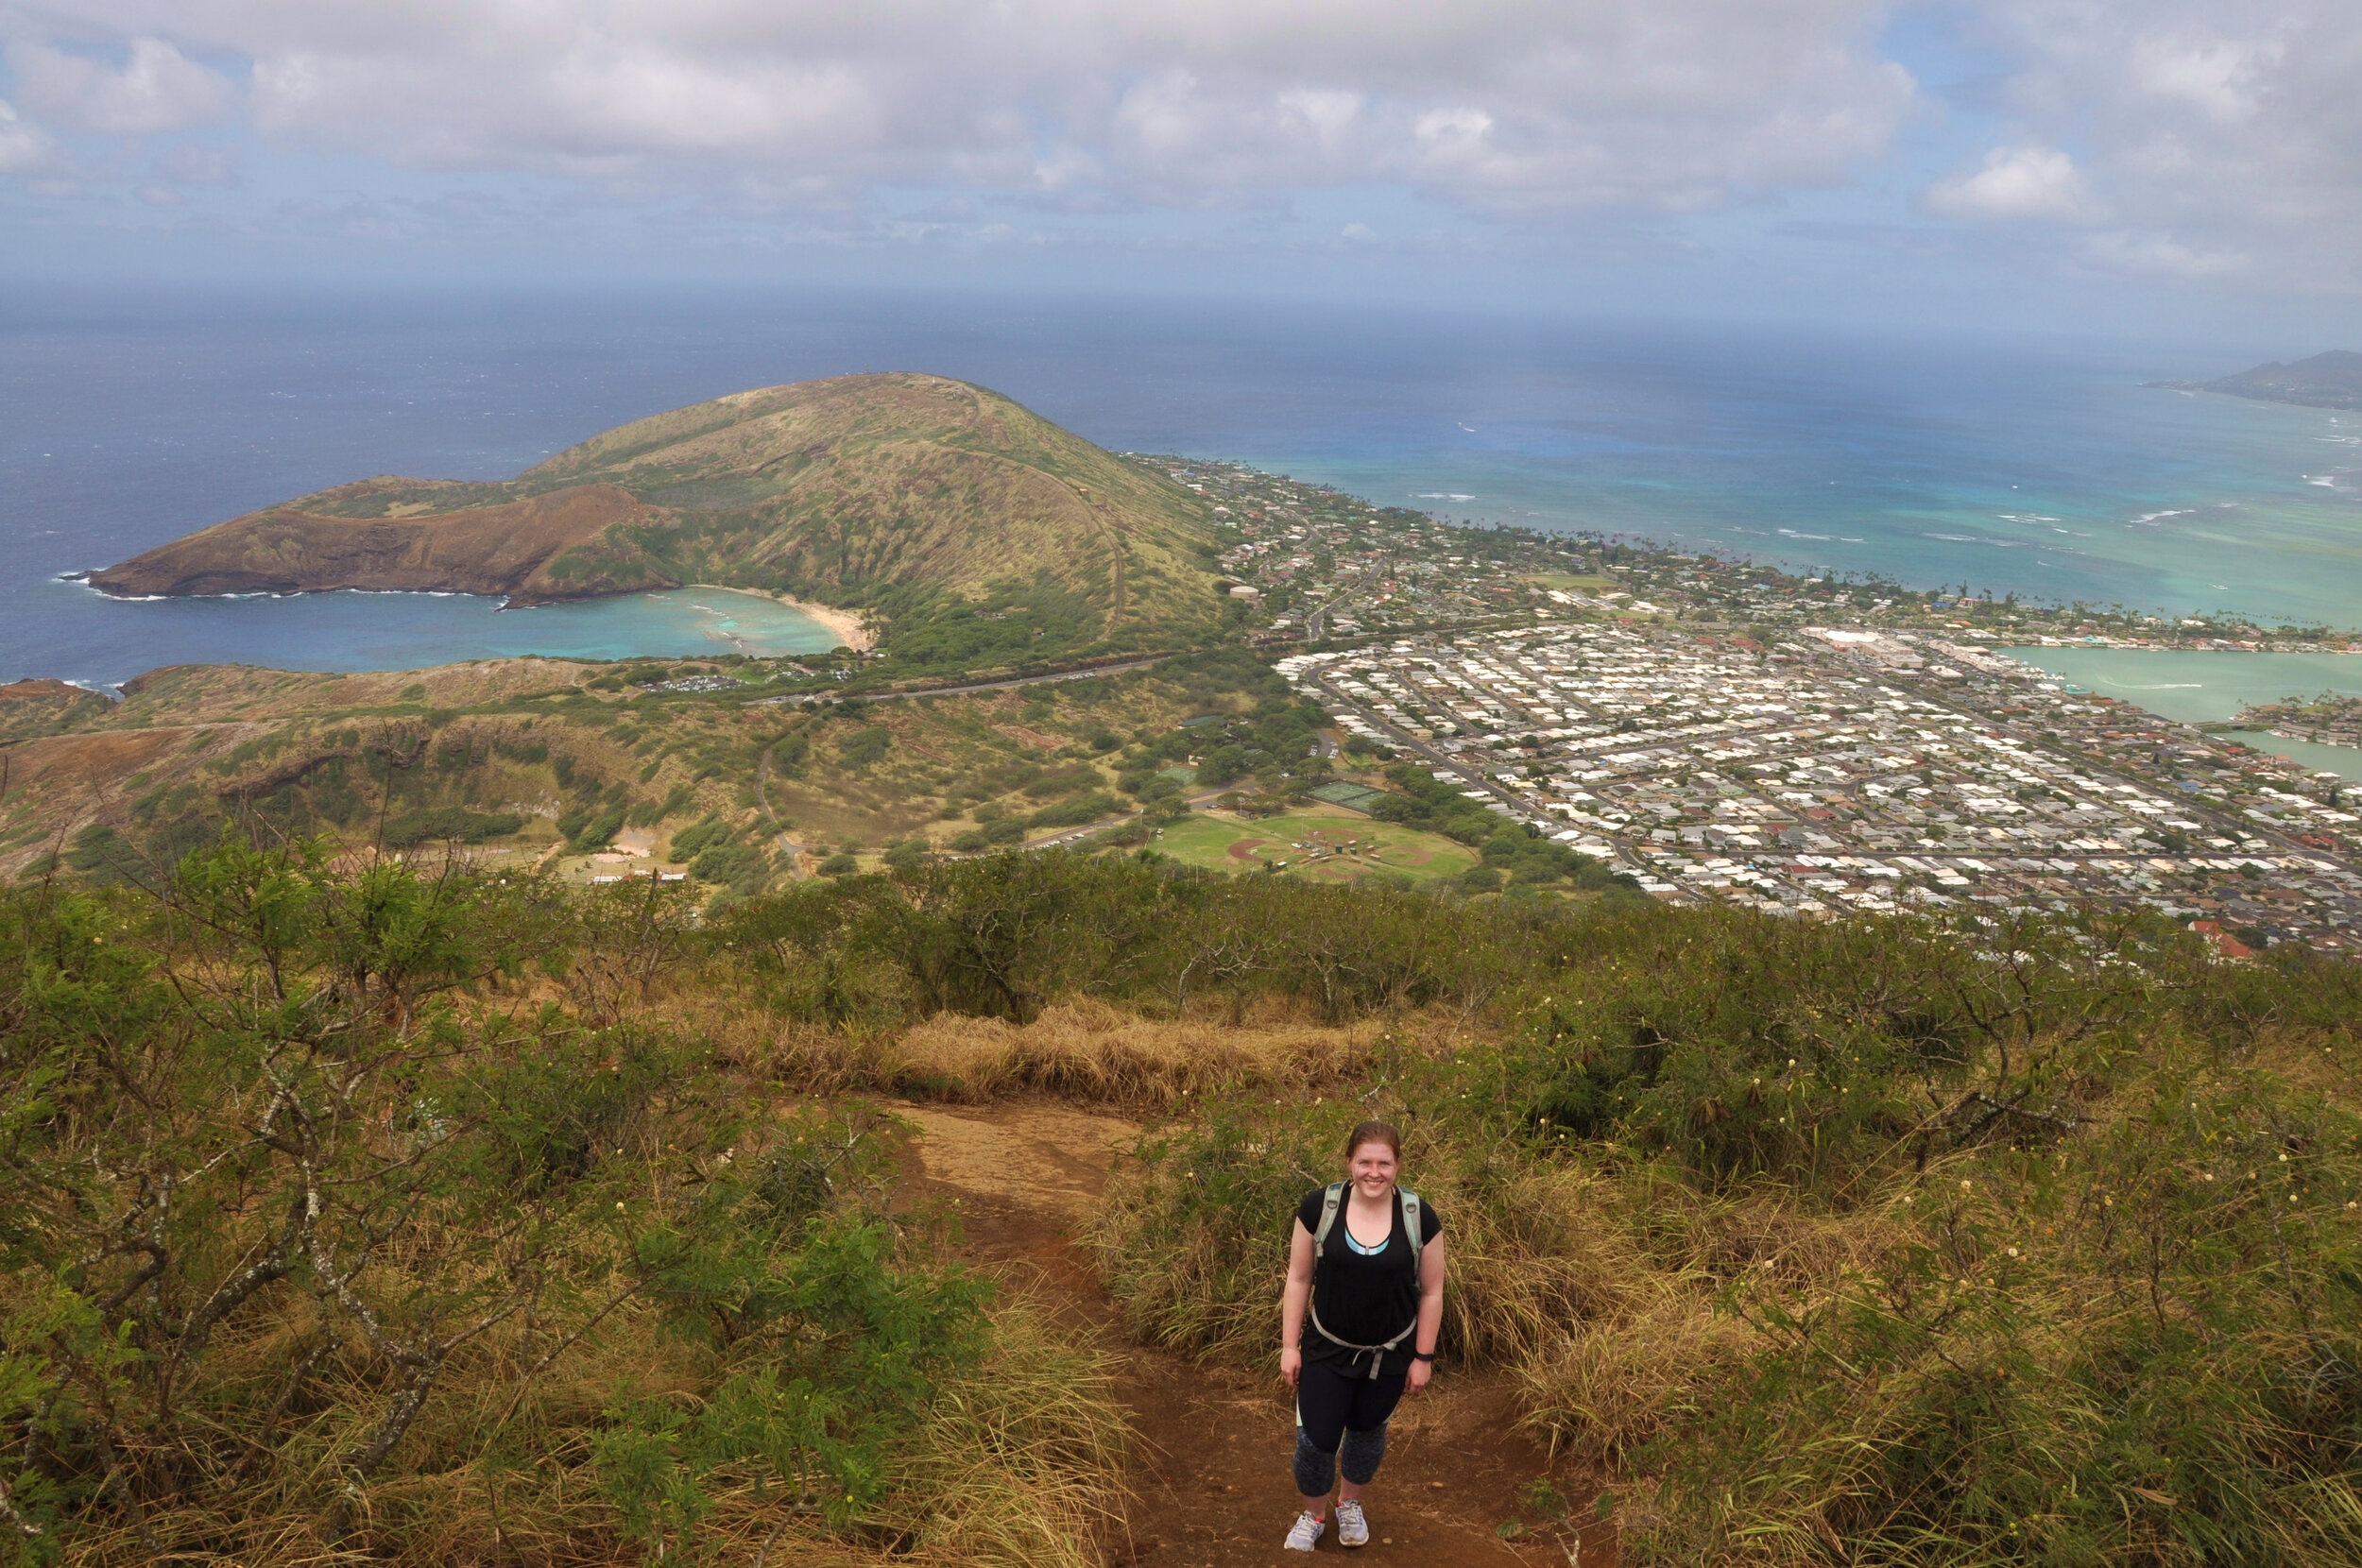
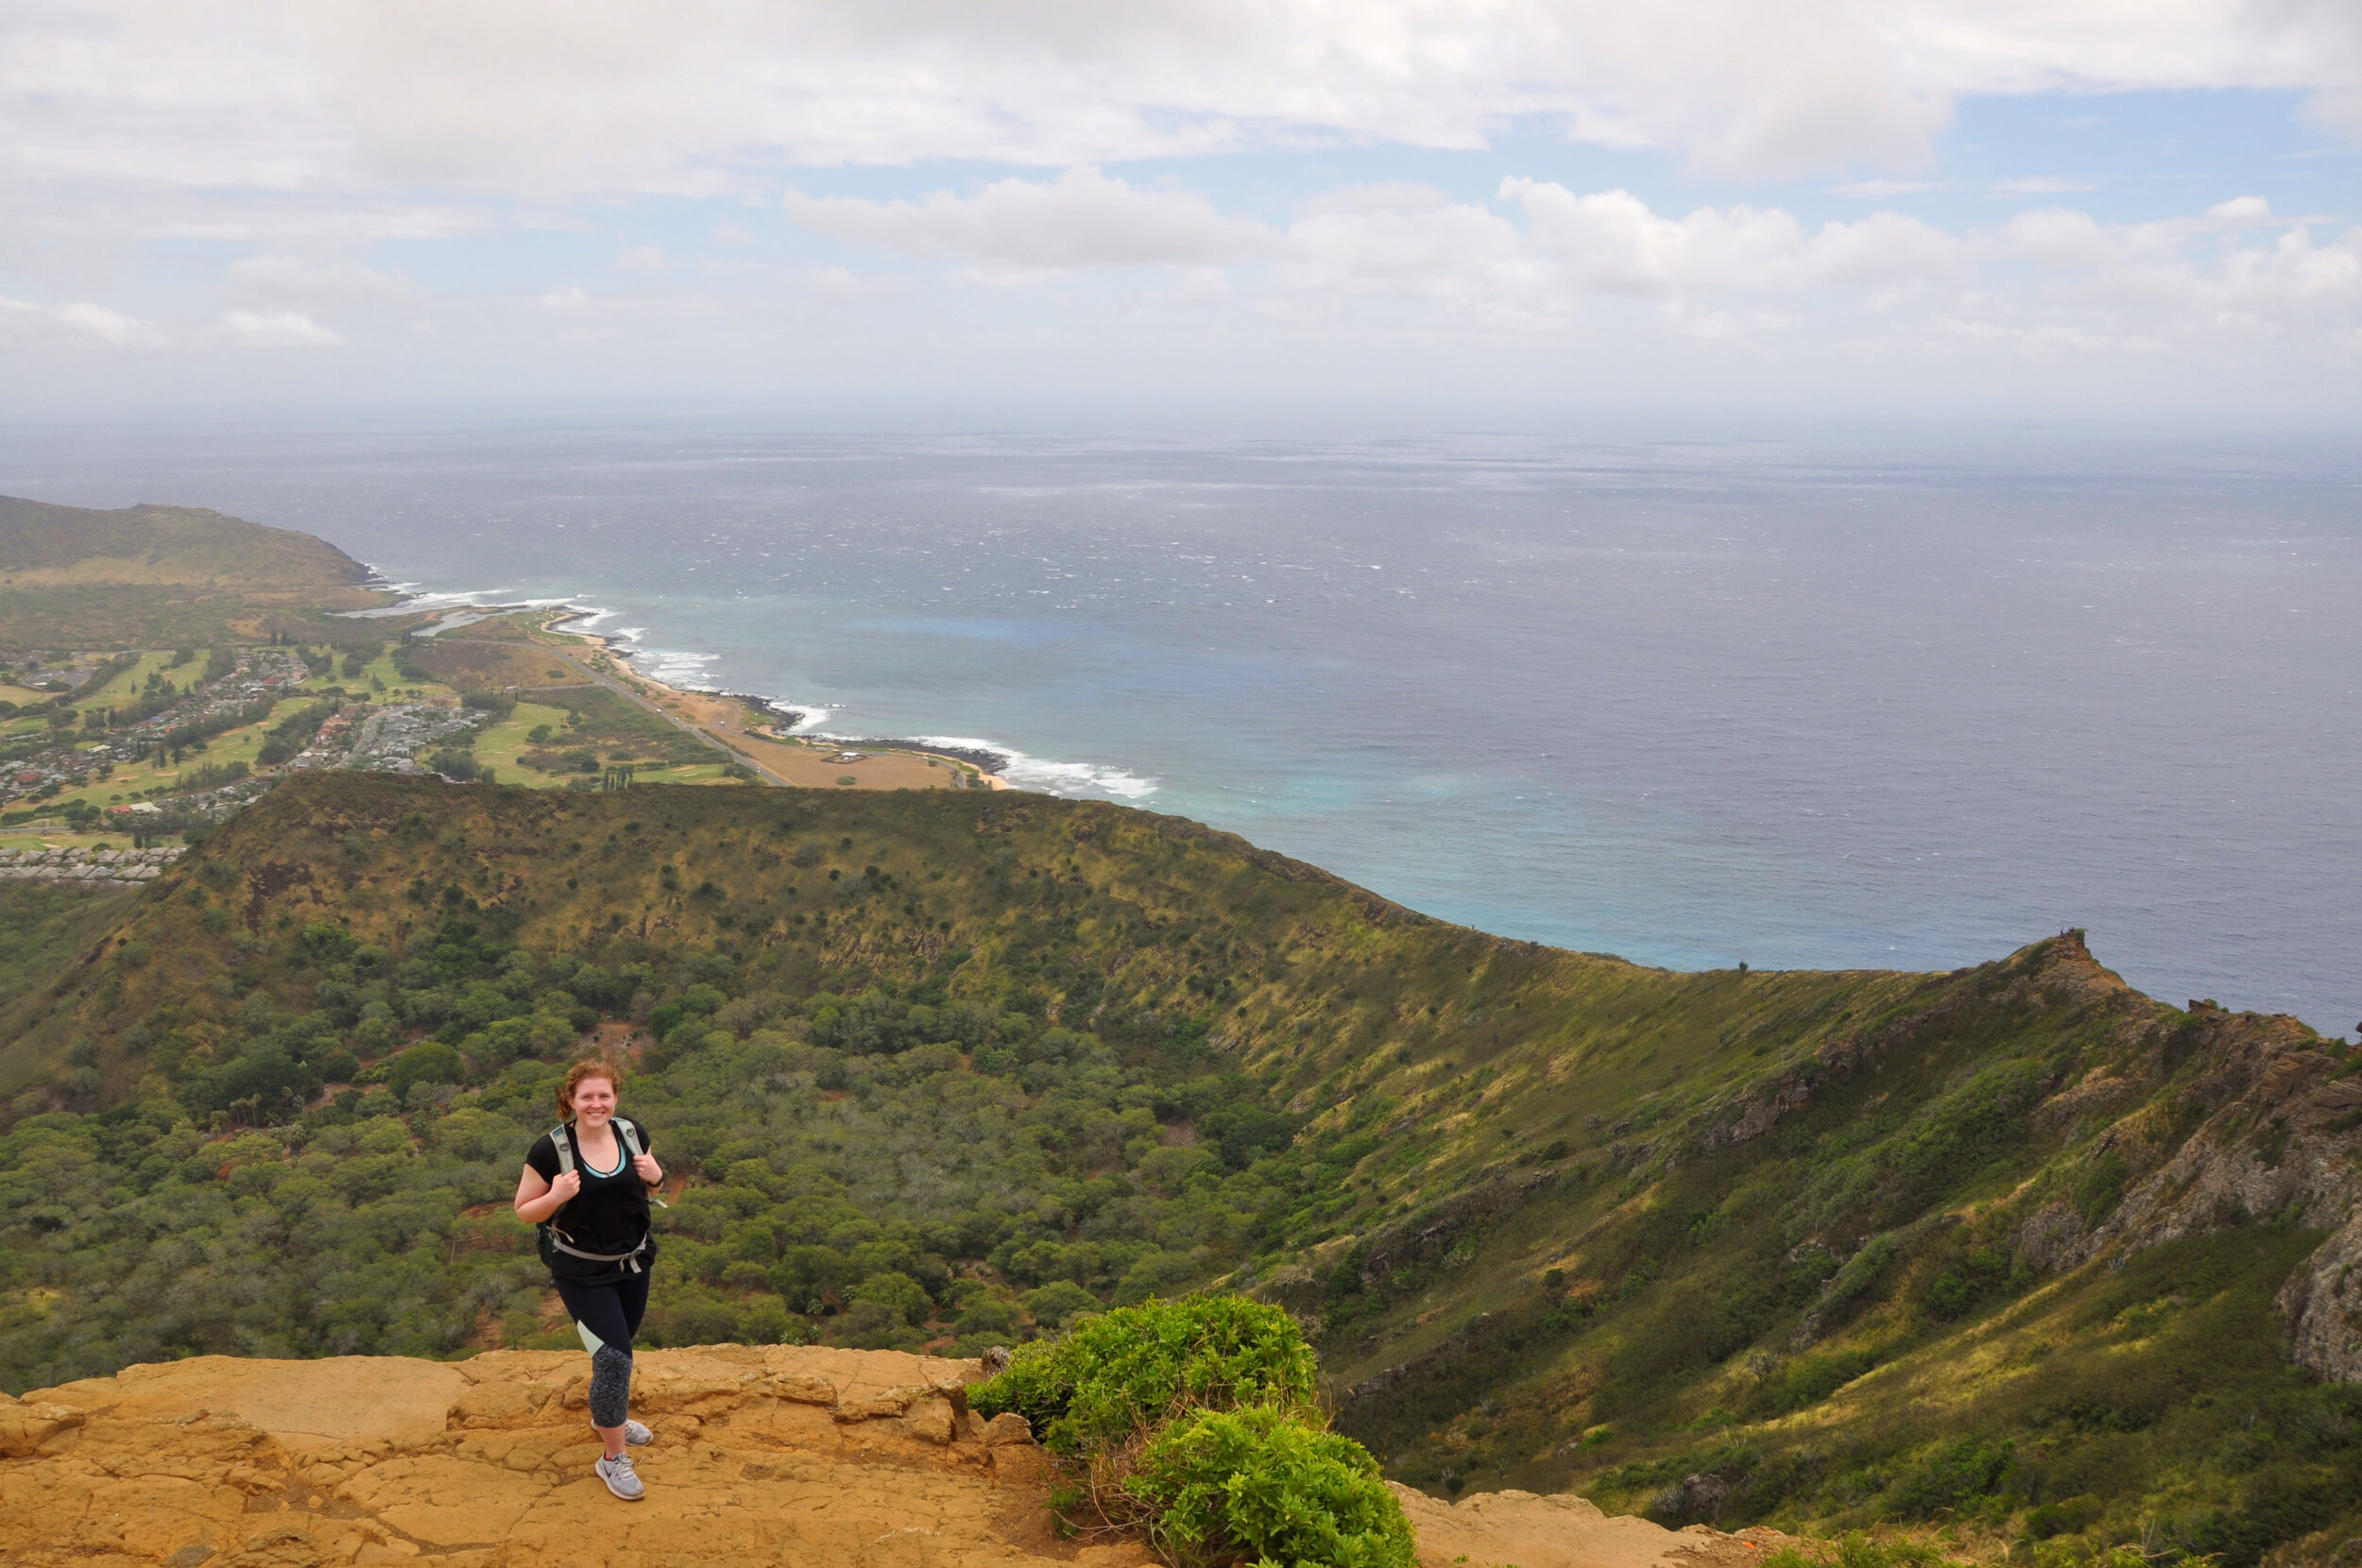
4. Take the Stairs to Koko Crater
One early morning I drove out to the Koko Crater trailhead and began what I thought would be a scenic hike. As had been the case the entire week in Hawaii, this little island continued to exceed my expectations.
About 1,000 stairs (an old railroad no longer in service) up led me to incredible vistas of this island. The trail is easy to follow from the parking lot and it is right by Hanauma Bay for all your snorkeling excitement after this toasty climb.

5. Catch a North Shore Sunset at Turtle Bay
Turtle Bay Resort is the only resort on the island, but thanks to my local friend’s tip: it’s open to non-bougie visitors, like myself. Skyla and I went to catch the sunset one of my last nights in Hawaii. She said there was nothing quite like a Turtle Bay sunset. We sat outside by the bar that is open to the public and were mesmerized by the sunset. It was my first time, that I can remember, watching the waves engulf the sun fully into the ocean.
Newcomers to Solo Hiking: 6 Perfect New Hampshire Hikes to Take on Alone
One of the perks of teaching is having the month of July off to travel. I spent one July a few summers ago living in southern New Hampshire with a friend. I was so pumped to live near the Whites, even though I had only hiked the Franconia Ridge a year earlier.
With my new proximity to the Whites, I set my sights on hiking. The only problem? My friend spent the summer working, so I was on my own. I had no problem traveling alone or exploring new places by myself, but hiking in unknown terrain with limited cell signal was not a habit of mine. How things would change in the coming years…
I didn’t hike a 4,000 footer once that summer. I was too afraid of the what if’s.
I look back now and regret how close I was to the mountains and how I didn’t take advantage of them. I did spend that July starting out what would later be a weekend regular: hiking alone in the Whites.
I researched short hikes that were clearly marked. I wanted to leave no room for error. Here are the hikes I did that summer (along with a few extras I did later on) that are ideal for first-time adventurers, low-on timers, beginner hikers, or short-on-hiking-pals trekkers:

1. West Rattlesnake Mountain
A 2-mile hike with a little less than 500 ft elevation gain. Beautiful any time of day or year with this view of Squam Lake.

2. Artist’s Bluff
Less than half a mile to this beautiful overlook in the heart of the Whites in Franconia Notch with a bit of a steep incline. I’ve been here a handful of times and the view never gets old.

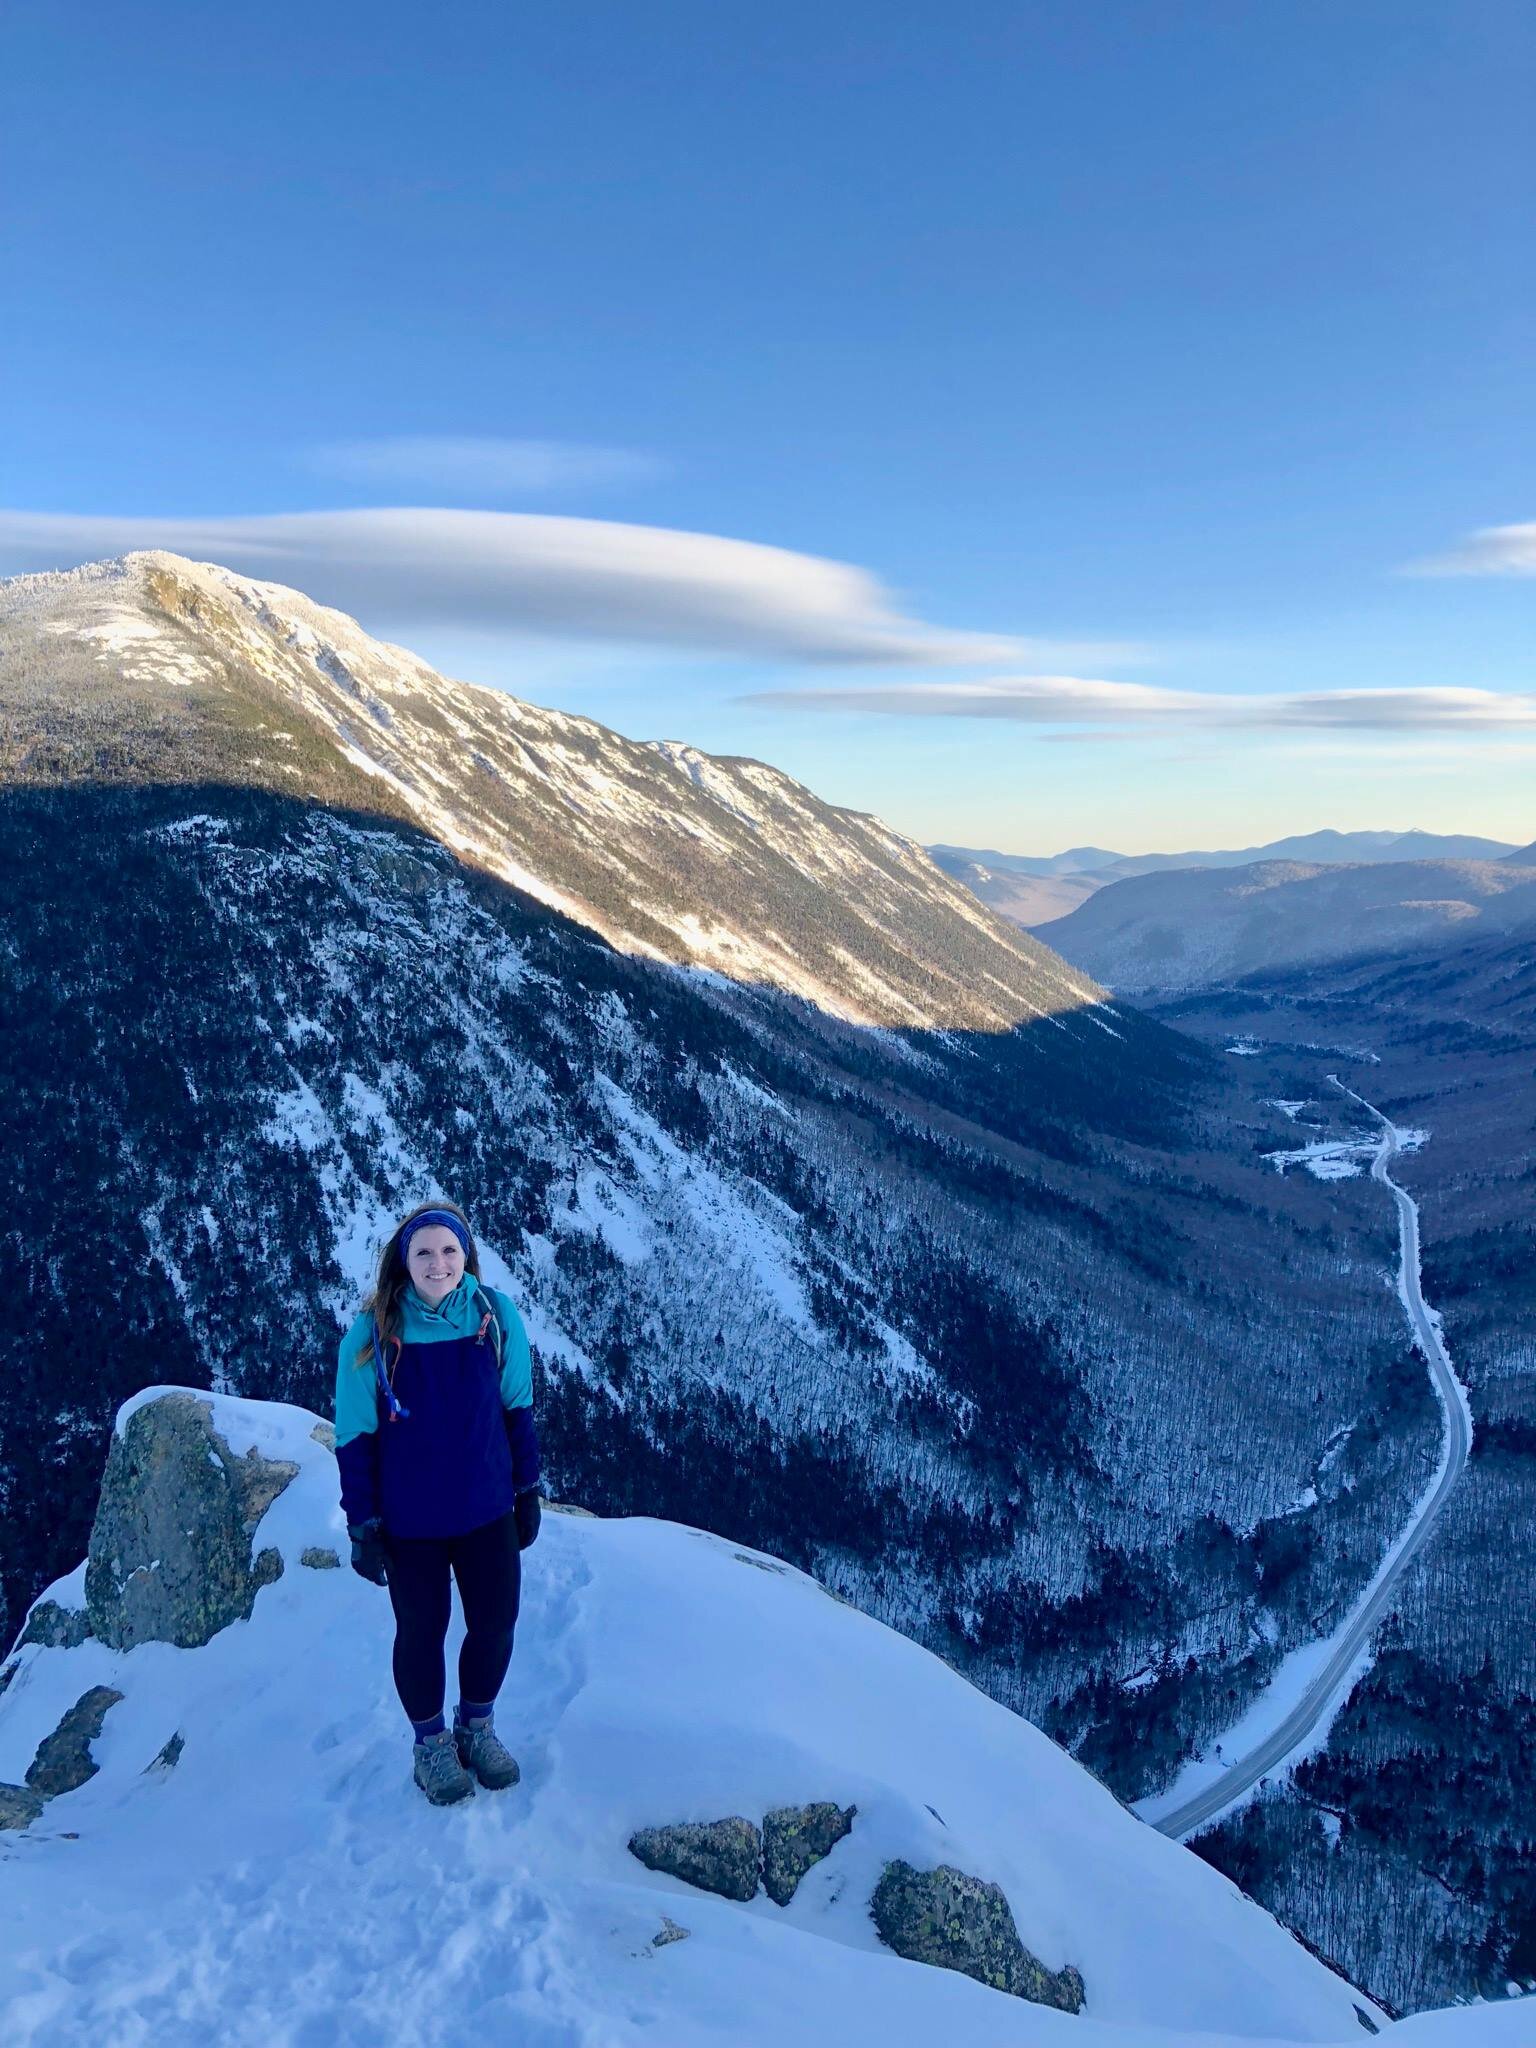
3. Mt. Willard
Another fan favorite in Franconia Notch is this beautiful 3 mile, out-and-back trail. Perfect for all levels and a jaw-dropping view every time.

3. Mt. Willard (continued)
Same view, different season. A major perk of winter hiking is less hikers along the trail. I hiked Willard with a friend a couple years ago in negative temps and we only crossed paths with a set of hikers at the summit.

4. Welch-Dickey Loop
This was my first attempt at prepping for 4,000 footers. Welch-Dickey is a loop of a little over 4 miles with a little under 2,000 ft gain.
This was also my first experience with NH’s namesake as the granite state, which I experienced in rainy conditions. I wouldn’t recommend this hike in running shoes on a rainy day.

5. Mt. Major
Another under-5 mile hike loop outside the Whites with stunning views. This hike is pretty popular any time of year, so it’s ideal for new solo hikers.
6. Mt. Pierce
A 4,000 footer that you can totally handle. Though this wasn’t my first 4ker, it was the first one I hiked alone. I spent an April break in the mountains and Pierce was first on my list. Three miles up to the summit on a bluebird day led to me bag Eisenhower nearby in the same day, but Pierce alone is well worth the trek.
It is one of the NH 48 with a little over 2,000 ft elevation gain. The climb is well-paced and there are endless views of the presidentials at the summit, including good ol’ Washington.
Have you made it to any of these summits? Which ones do you plan to add to your list? Let me know if you’re going to tackle these summits soon.

4 Spiked Up Tips to Start Your Winter Hiking
Gear is crucial for those bitterly cold, outdoor adventures. As a gal from Texas, I was clueless about gear. I set out for my first winter hike a few winters ago with hiking boots and what I considered to be a thick jacket. Thankfully, my New Hampshire-native friend Kim came prepared.
We were heading to Camel’s Hump one weekend up in Vermont and spent the night before in downtown Burlington. As much as I love the mountains, I love quaint New England towns almost just as much. Kim encouraged me to buy microspikes, which I thought would be a frivolous purchase. I kept the receipt and the box they came in because surely I would not need them in November. In Vermont. In winter. Shockingly, I was wrong.

Camel’s Hump is easily recognizable from afar. It’s aptly named. As the third highest peak in the state at 4,083 feet, with a 2,500 foot climb, it wouldn’t be an easy trek in winter. Kim and I made our way slowly and as luck would have it (of course, not actual luck but Kim’s incredible expertise), a mile or so in, spikes were necessary.

I wobbled my hiking shoes into my new microspikes and I sure was glad I did. Not only was I uneducated about spikes, but about winter wear in general. Kim had an extra scarf and I found my ear warmers in my car. I looked like a marshmallow all bundled up at the summit.
It’s awesome looking back now on that first winter in New England and how naïve I was in the mountains. In the wintery wild.
Here are my four tips for anyone looking to dive into winter hiking (and not wanting to look like a marshmallow man):

1. Research
Search up the mountain you’re hoping to climb online on various platforms. I often look at mountains on Instagram under hashtags or locations, as well as read up on a handful of blogs for reviews. Reading AllTrails is also helpful for most recent hiking conditions. Fellow hikers help each other out by leaving a quick review (often times noting if spikes were needed).
2. Bundle Up
Winter hiking means a fuller pack, but it’s well worth the weight. I wear a base layer, followed by another layer under a winter jacket. Fleece-lined leggings and thick socks keep my legs warm and not boggled down on the trek. You often don’t realize how warm you’ll get on the hike, but going without an extra layer may mean discomfort at the summit, where conditions are drastically different than the first mile in.
3. Bring Spikes (and Snowshoes)
I don’t own snowshoes, and I’m not the biggest fan of carrying additional weight, so I often go without snowshoes even when it would’ve helped tremendously. As a result, I fall deep into snow (or as hikers say, postholing). Lessons have been learned and I often pick more popular trails that are likely to be packed down. Microspikes though will always be my go-to winter hiking essential. That trusty set I bought in Burlington five years ago is still holding on strong.
4. Check Weather Constantly
Growing up in Texas, everyone often joked that you can experience every season in a typical day in Texas. If you didn’t like the weather, just wait an hour. From an icy morning to 80 degrees and sunny all in a matter of hours. The irony is that I moved to Massachusetts and turns out, the same phrase is said up here. A morning snowstorm is entirely forgotten about by 11 A.M. Leaving us to wonder how we got a snow day when there were no remnants of the morning conditions left. The same mentality applies in the mountains. One minute you’re sweating in the sun, and in the next there could be torrential downpour and wind gusts that sweep you off your feet. It may sound dramatic, but on one beautiful, summer hike atop the presidentials in the Whites, it started hailing.
As a result, I frequently check the mountain I plan to hike days before and of course the morning of on https://www.mountain-forecast.com/. You enter in the mountain range or region, then you can tailor your search to which summit or area you plan to hike more specifically. I often lose services in the mountains, so checking this before I head on the trail is helpful.
Have you used any of this trips for recent winter hikes? What tips do you have to add for hiking in the winter? Let me know!

Twins Zealand Bonds Traverse
You know those mornings you’re so eager to wake up to? The ones where you wake up moments before your alarm in utter anticipation? One Sunday, this past October, was exactly that kind of morning for me. We cooked a hearty breakfast before dawn and loaded our packs for our adventure to snag my final 8 peaks of the 48.

The Route
After looking at which peaks I had left, I stared at a map trying to decide the best way to go about bagging them all. We headed up to the Twins on the North Twin trail, starting the morning with a steep ascent. North Twin to South Twin to Zealand to West Bond, Bond, and Bondcliff. We did this as an out-and-back, but skipped West Bond and Zealand (outlined in red on the map) on the return trip.
Elevation map below for the traverse.


North and South Twin
We parked at the North Twin trailhead at sunrise and began the two mile walk before the big climb. About a mile in, I turned on the trail and found myself encountering a moose face-to-face. A full-fledged, antlers as wide as the trail, moose. I felt pure awe. And shock. We slowly stepped backwards, off the trail, and watched him continue his Sunday morning stroll until he was out of our eye view.
I’ve patiently waited for a moose sighting for five years. To the point where I hoped one would cross the road when I drive past moose crossing signs on highways. In hindsight, it’s probably for the best I didn’t have my first encounter in that situation. Multiple trips to Maine, countless to the Whites, and even a two-week cross-country road trip out to Big Sky country didn’t help me cross off this bucket list item. This hike was off to an incredible start and it was only the first two miles of the day.
North Twin’s summit was well worth the arduous climb. I finally understood why hikers say the Pemigewasset wilderness is a Whites’ gem. The solitude alone was dreamy. We had each summit from North Twin to the Bonds to ourselves (aside from the finale at Bondcliff).

Zealand to the Bonds
From North Twin, we faced a muddy mile to South Twin, followed by a detour to Zealand where we were met with three relentless greyjays. Zealand was a tough addition to this traverse because we did it out and back before we headed to the Bonds. All the better for our return to avoid detours.
West Bond was incredible, but I started to hesitate at finishing this traverse due to daylight escaping us swiftly with Bond and Bondcliff still left on the itinerary. I kept on with descent down to Bondcliff. Honestly the views were jaw-dropping (fitting as we dropped hundreds of feet in elevation that we’d have to climb back up to get home). The bittersweet joy I felt heading into my final peak was met with glances over my shoulder to see that massive drop we made.

Bondcliff lived up to its hype and I couldn’t have picked a better day, partner, or peak to finish with. I set out to hike to 48 in August 2018 when I hiked up Lincoln and Lafayette with my roommates. On that hike, one of them said she’d love to hike the 48 before moving. I had never heard of the 48 before then, but I’m so glad that seed was planted that day because a little over two years later, I became an NH 48 finisher.

A 22ish-mile, ~7,000 ft gain, 15-hour day ended in the darkness of the Pemi wilderness. I don’t love night hiking, but it did present the opportunity of witnessing a mountaintop sunset on South Twin that did not disappoint. There may be more night hikes in my future to see sights like that again.
Until next time in the Whites.