
Hike the Adirondacks’ Great Range Traverse in One Day
Hike 8 of the ADK 46 over 20.8 miles and 8,300 feet along the Great Range Traverse. Do it in a day for the Northeast Ultra 8! Here’s all you need to know about the GRT.

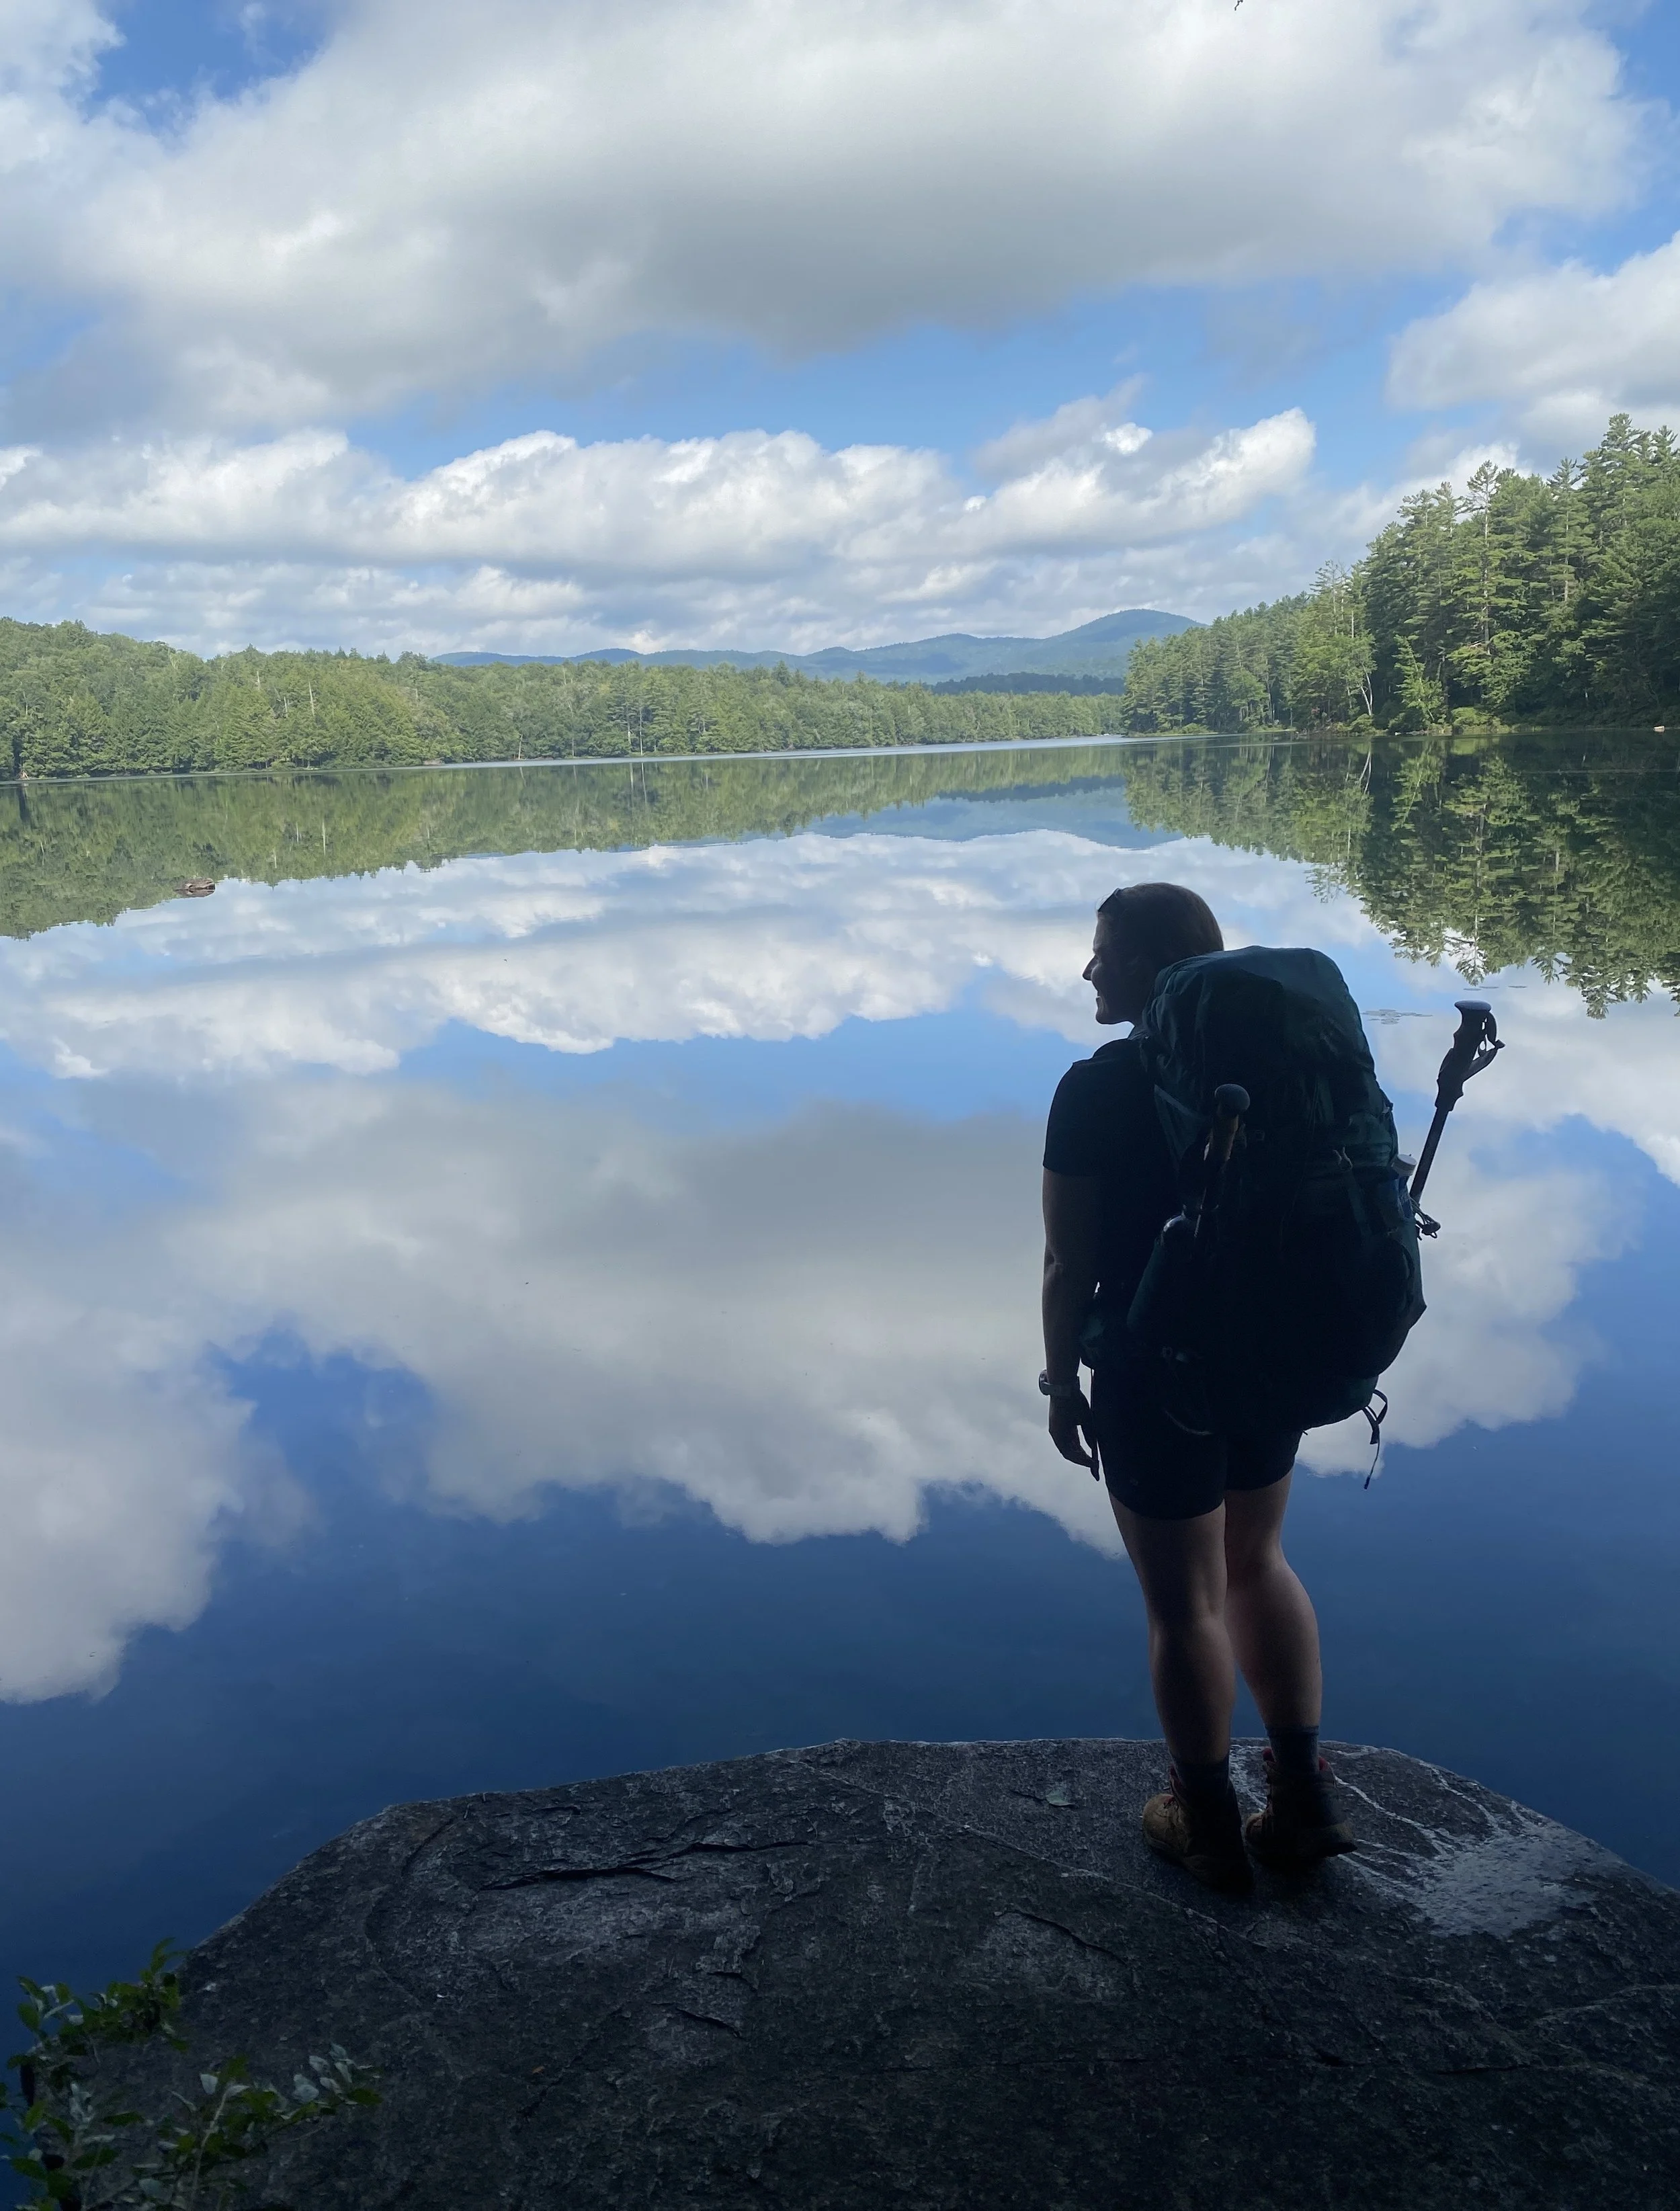
Summit of Haystack in the Adirondacks.
New Year resolutions never stuck for me, but for the past several years, goals I set on my birthday have. With every passing year, my individual goals differ, but the categories stay the same (hiking, traveling, fitness, and finances). 2023 was the year I took my hiking goals up a notch.
After wrapping up the New England 67 4,000 footers, I had the Adirondack 46 on my mind. When I first moved to Massachusetts, I hiked one of the 46 a year. I thought I’d keep that up to have a lifelong hiking goal. If I started hiking them once a year at twenty-five, I’d have a goal to pursue past retirement. I should have known better. I always considered the Adirondacks rugged. The trails aren’t as easy to navigate as the Whites, and the mileage increases tremendously with the 46. The Whites were challenging sure, but the times I spent in the Adirondacks I rarely came across other hikers, particularly on the grueling days.
I made my way up to 19 going into May, but I was still too scared to officially write down “become a 46er this year” on my list. So I didn’t. I kept it to myself and decided any free weekend off of summer school I had, I’d drive to my favorite place. And that’s exactly what I did. By the end of September 2023, I only had six remaining peaks. I couldn’t believe it. These six 4,000 footers happened to also all be along the Great Range, and like my NH 48 finish, I knew I wanted to end on an epic adventure.
That’s where the single-day Great Range Traverse came in. Roughly a twenty-mile hike with around 9,000 feet of elevation gain. I have had longer days and bigger climbs than this one, but the Adirondack terrain is truly on a different level. Particularly on this one with the famous Saddleback cliffs. I knew I wanted company not only for morale, but as a safety measure. Thankfully, there are others out there who love these mountains and who jump right in when it comes to these challenges instead of shy away. Tom joined me, despite already being a 46er, because he was working on his Northeast Ultras. Completing this hike would not only make me a 46er, but it would also complete another of the Northeast Ultras. The NEU is a list of nine intense hikes in the Northeast that range from 20-52 miles. Told you I wanted an epic adventure, right?
We agreed to start hiking by 3:30 am, so I started the drive from Western Massachusetts a little before midnight to arrive at the trailhead. After dropping one car off at the Rooster Comb trailhead, we made our way to the Adirondack Loj for our official start. Car parked at the start of the Van Hoevenberg Trail and bags packed. We were ready.
Van Hoevenberg Trail > Mt. Marcy (5,305’)
Darkness kept us company as we began our hike along the Van Hoevenberg trail. We made our way to Marcy Dam way faster than I imagined. We chugged along, and then our ascent to New York’s highest point truly began. And so did some stomach issues for me.
Slowly but surely, we made our way. Shockingly, we made it to the summit in time for sunrise. Sadly, spikes were required as winter welcomed us at 5,000 feet. It was a socked in summit, but the sun was visibly rising. It looked like a fireball in the sky. The only other time I experienced a moment like this was atop Sugarloaf in Maine for a New England 67 hike. I had the summit to myself as the sky burst into fiery flames.
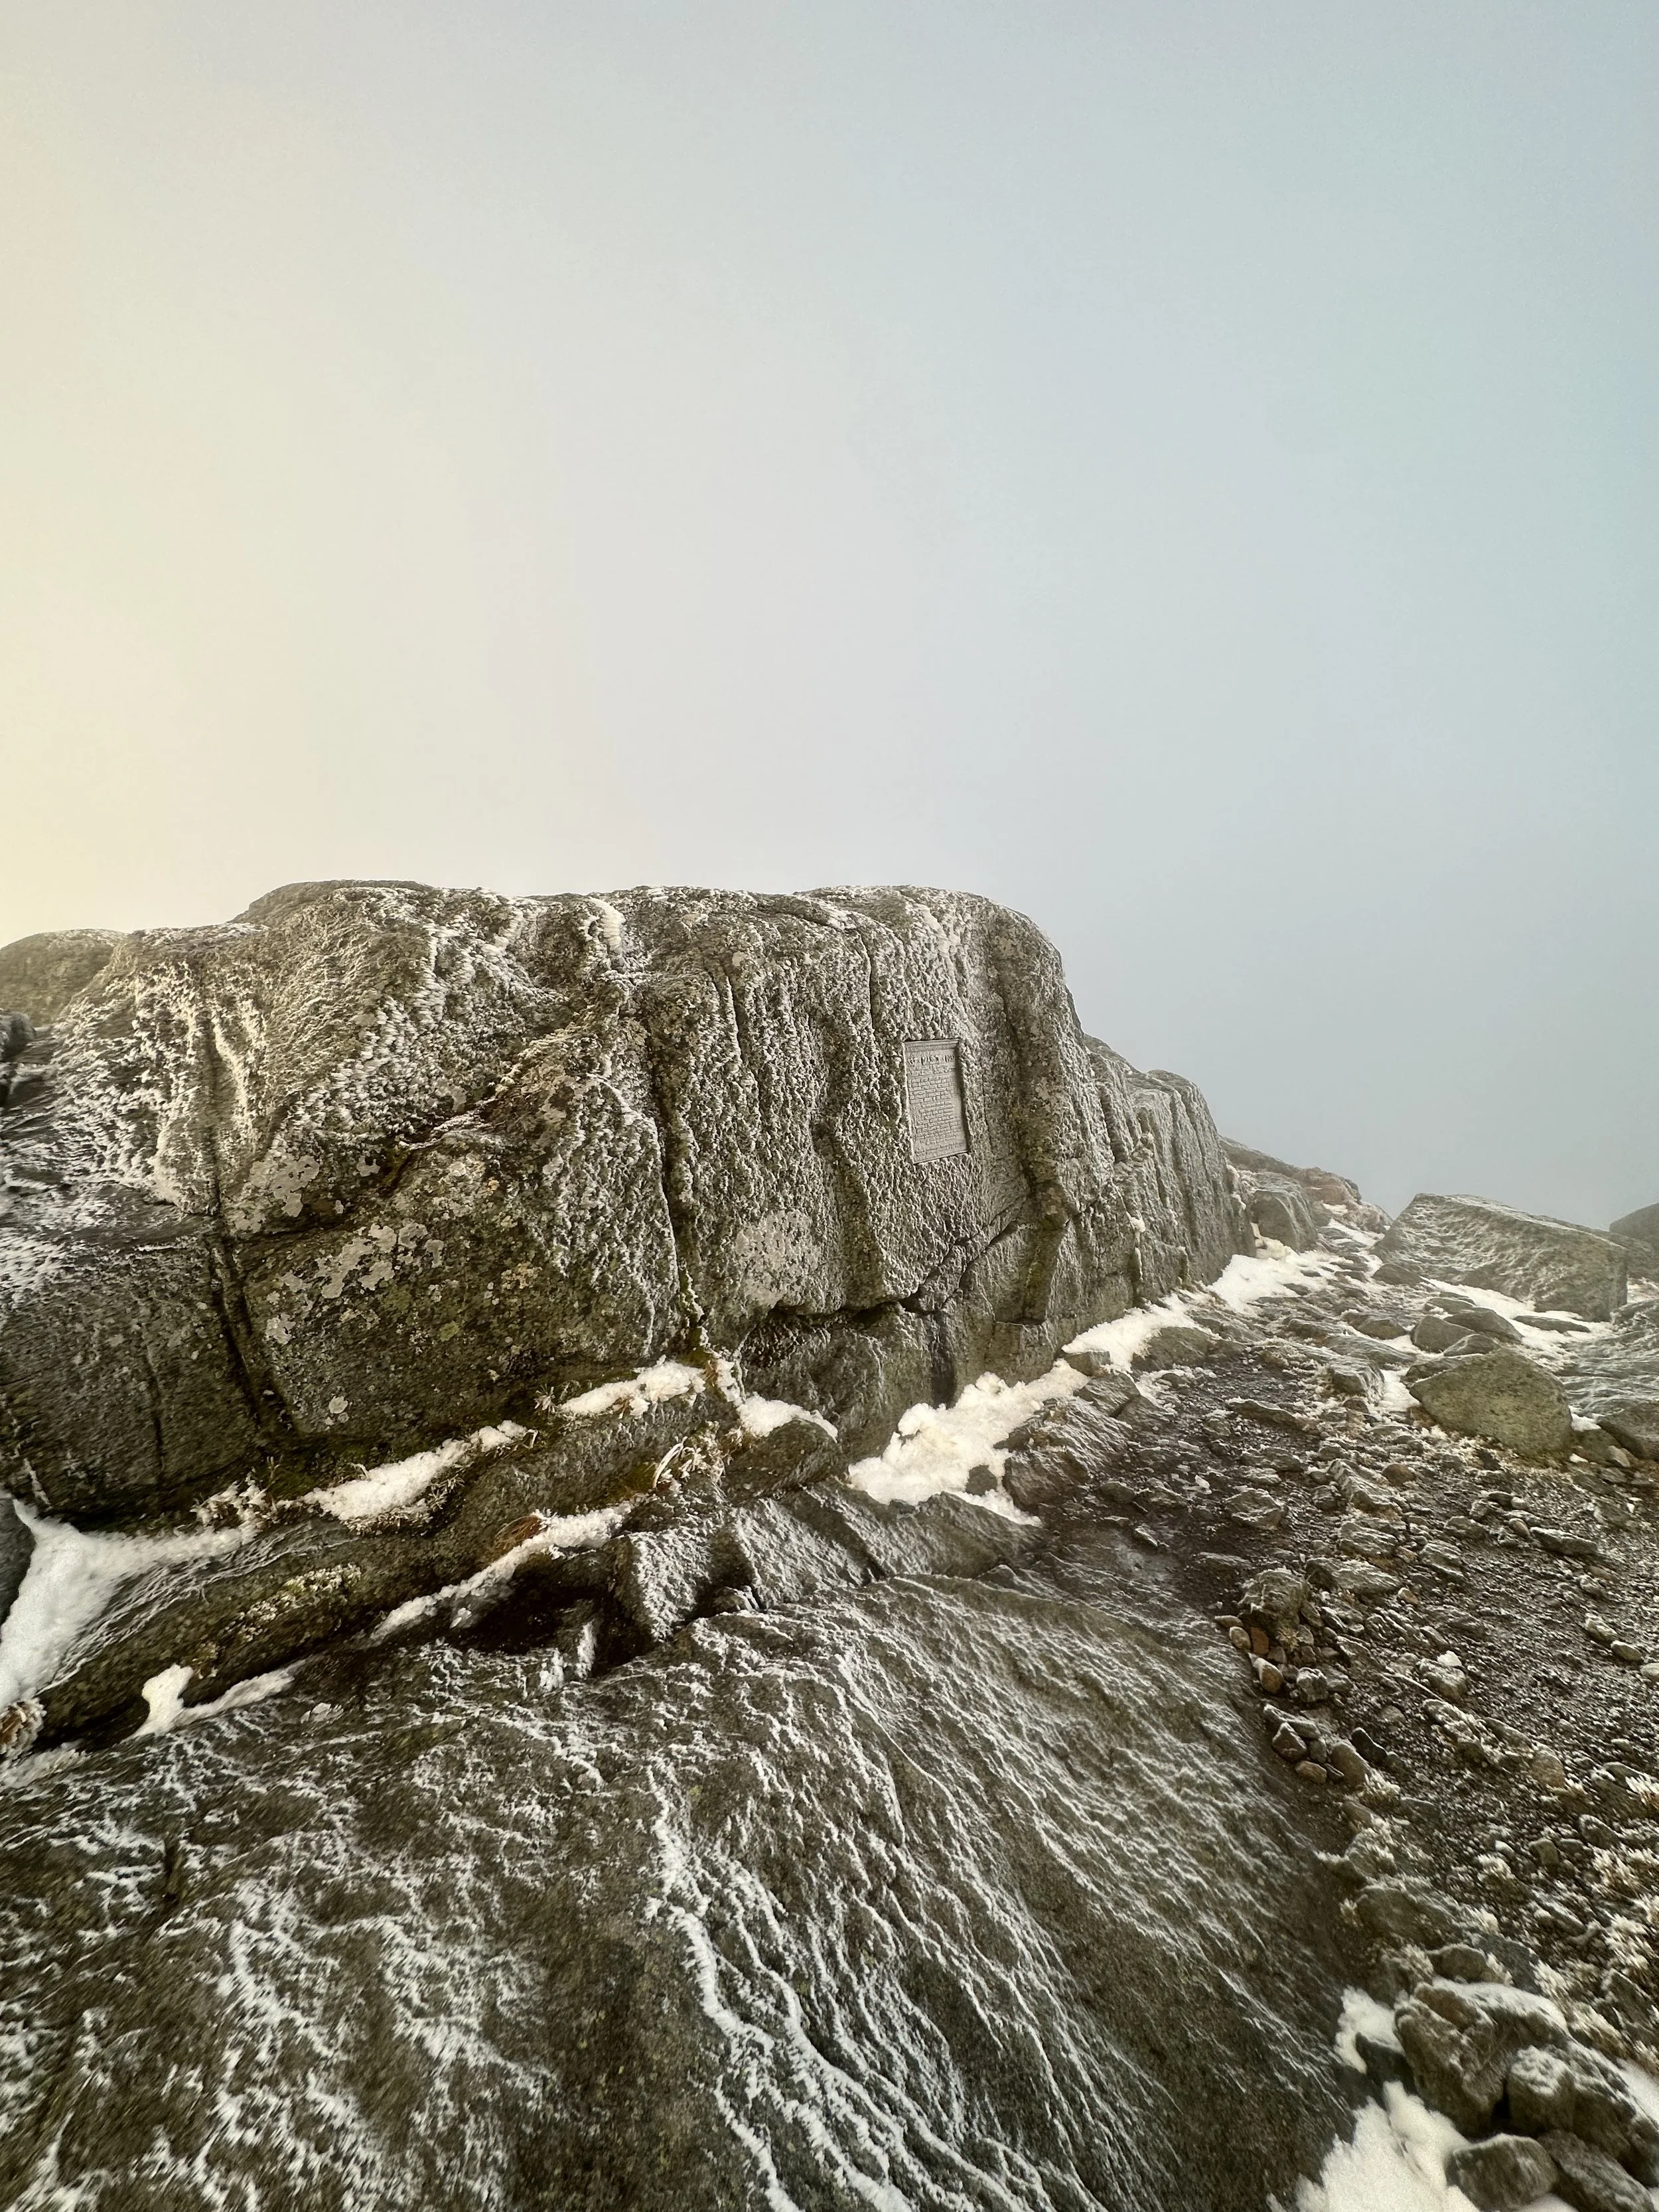

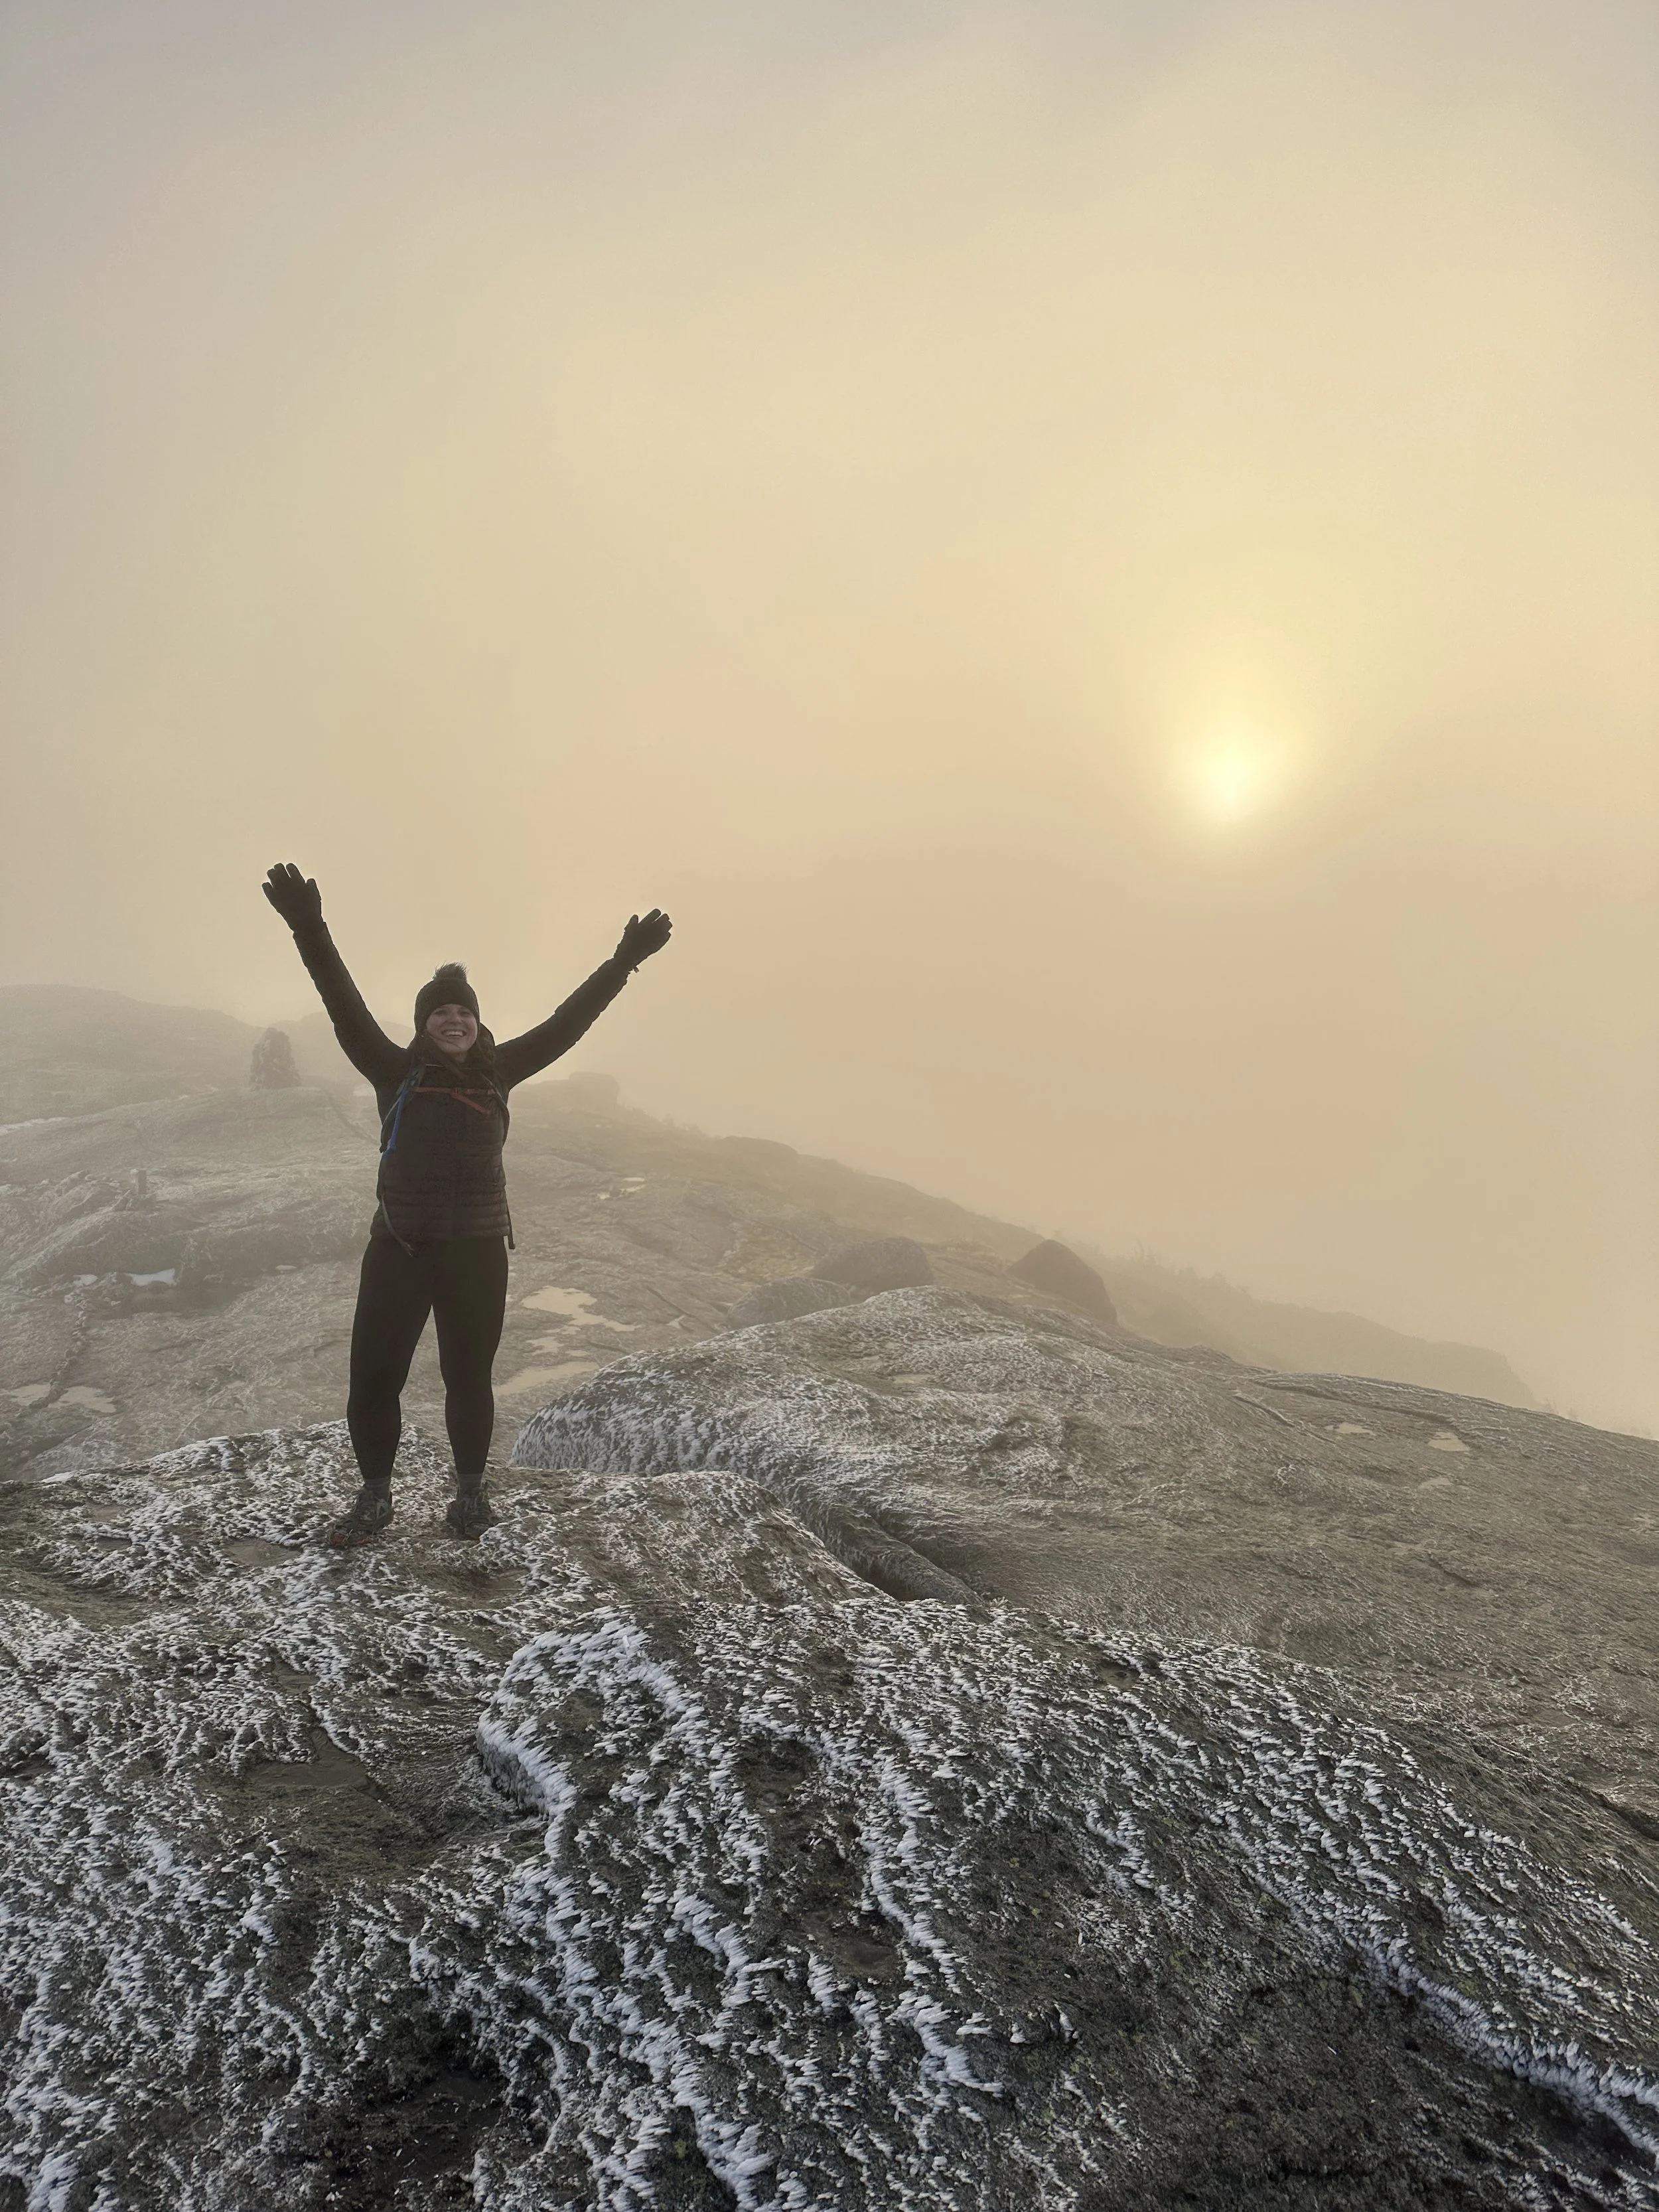

Again I found myself at a summit, with Tom this time, that felt like we were on another planet. We took it in for a moment. My hands were frigid and the winds were whipping, so we headed back down. Once we were under tree line again, we took a longer break. Tom let me borrow his warm gloves and we headed to our next summit: Haystack.
Mt. Marcy via Van Hoevenberg Trail > Phelps Trail > Haystack (4,915’)
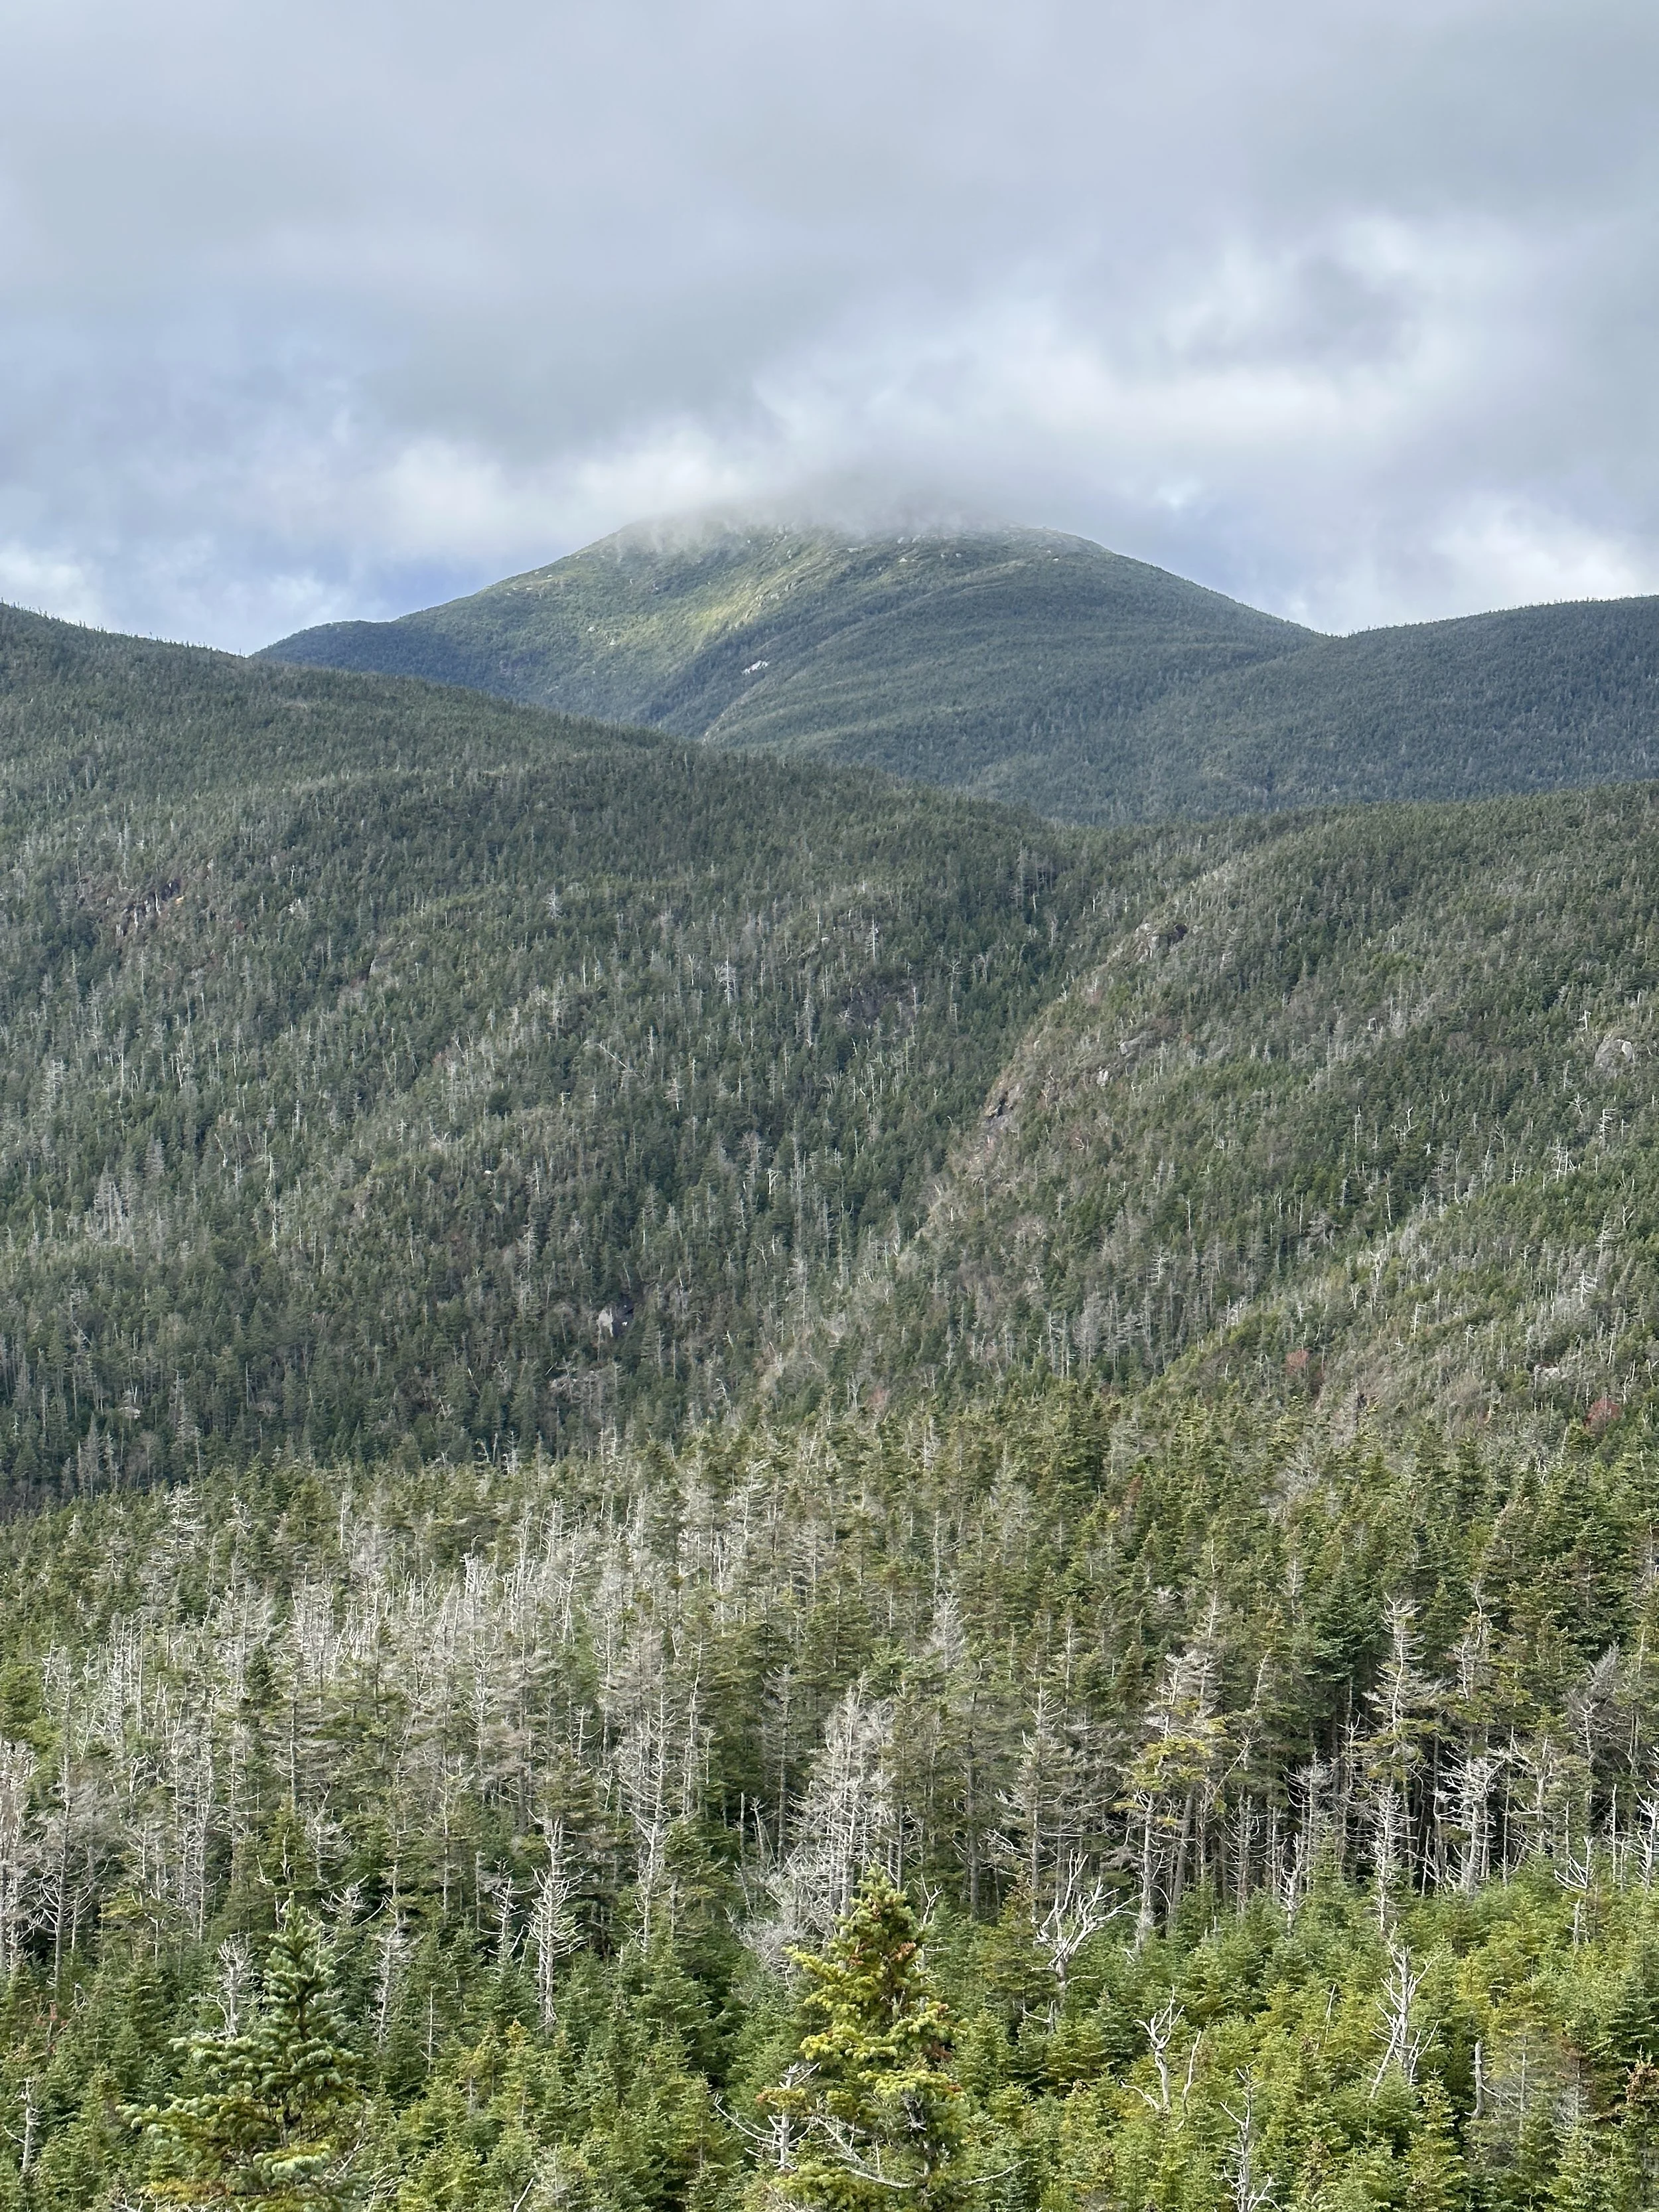
We descended over 1,000 ft before having to summit Little Haystack (4,662’) en route to Haystack. The last stretch along the Haystack Trail led us there. Haystack stands at 4,915’ and was a new summit for me. This one came with a sliver of an opening in the sky’s parting clouds. Some bits of foliage remained in the distance, and we could see Mt. Marcy was clearing up a bit as well.
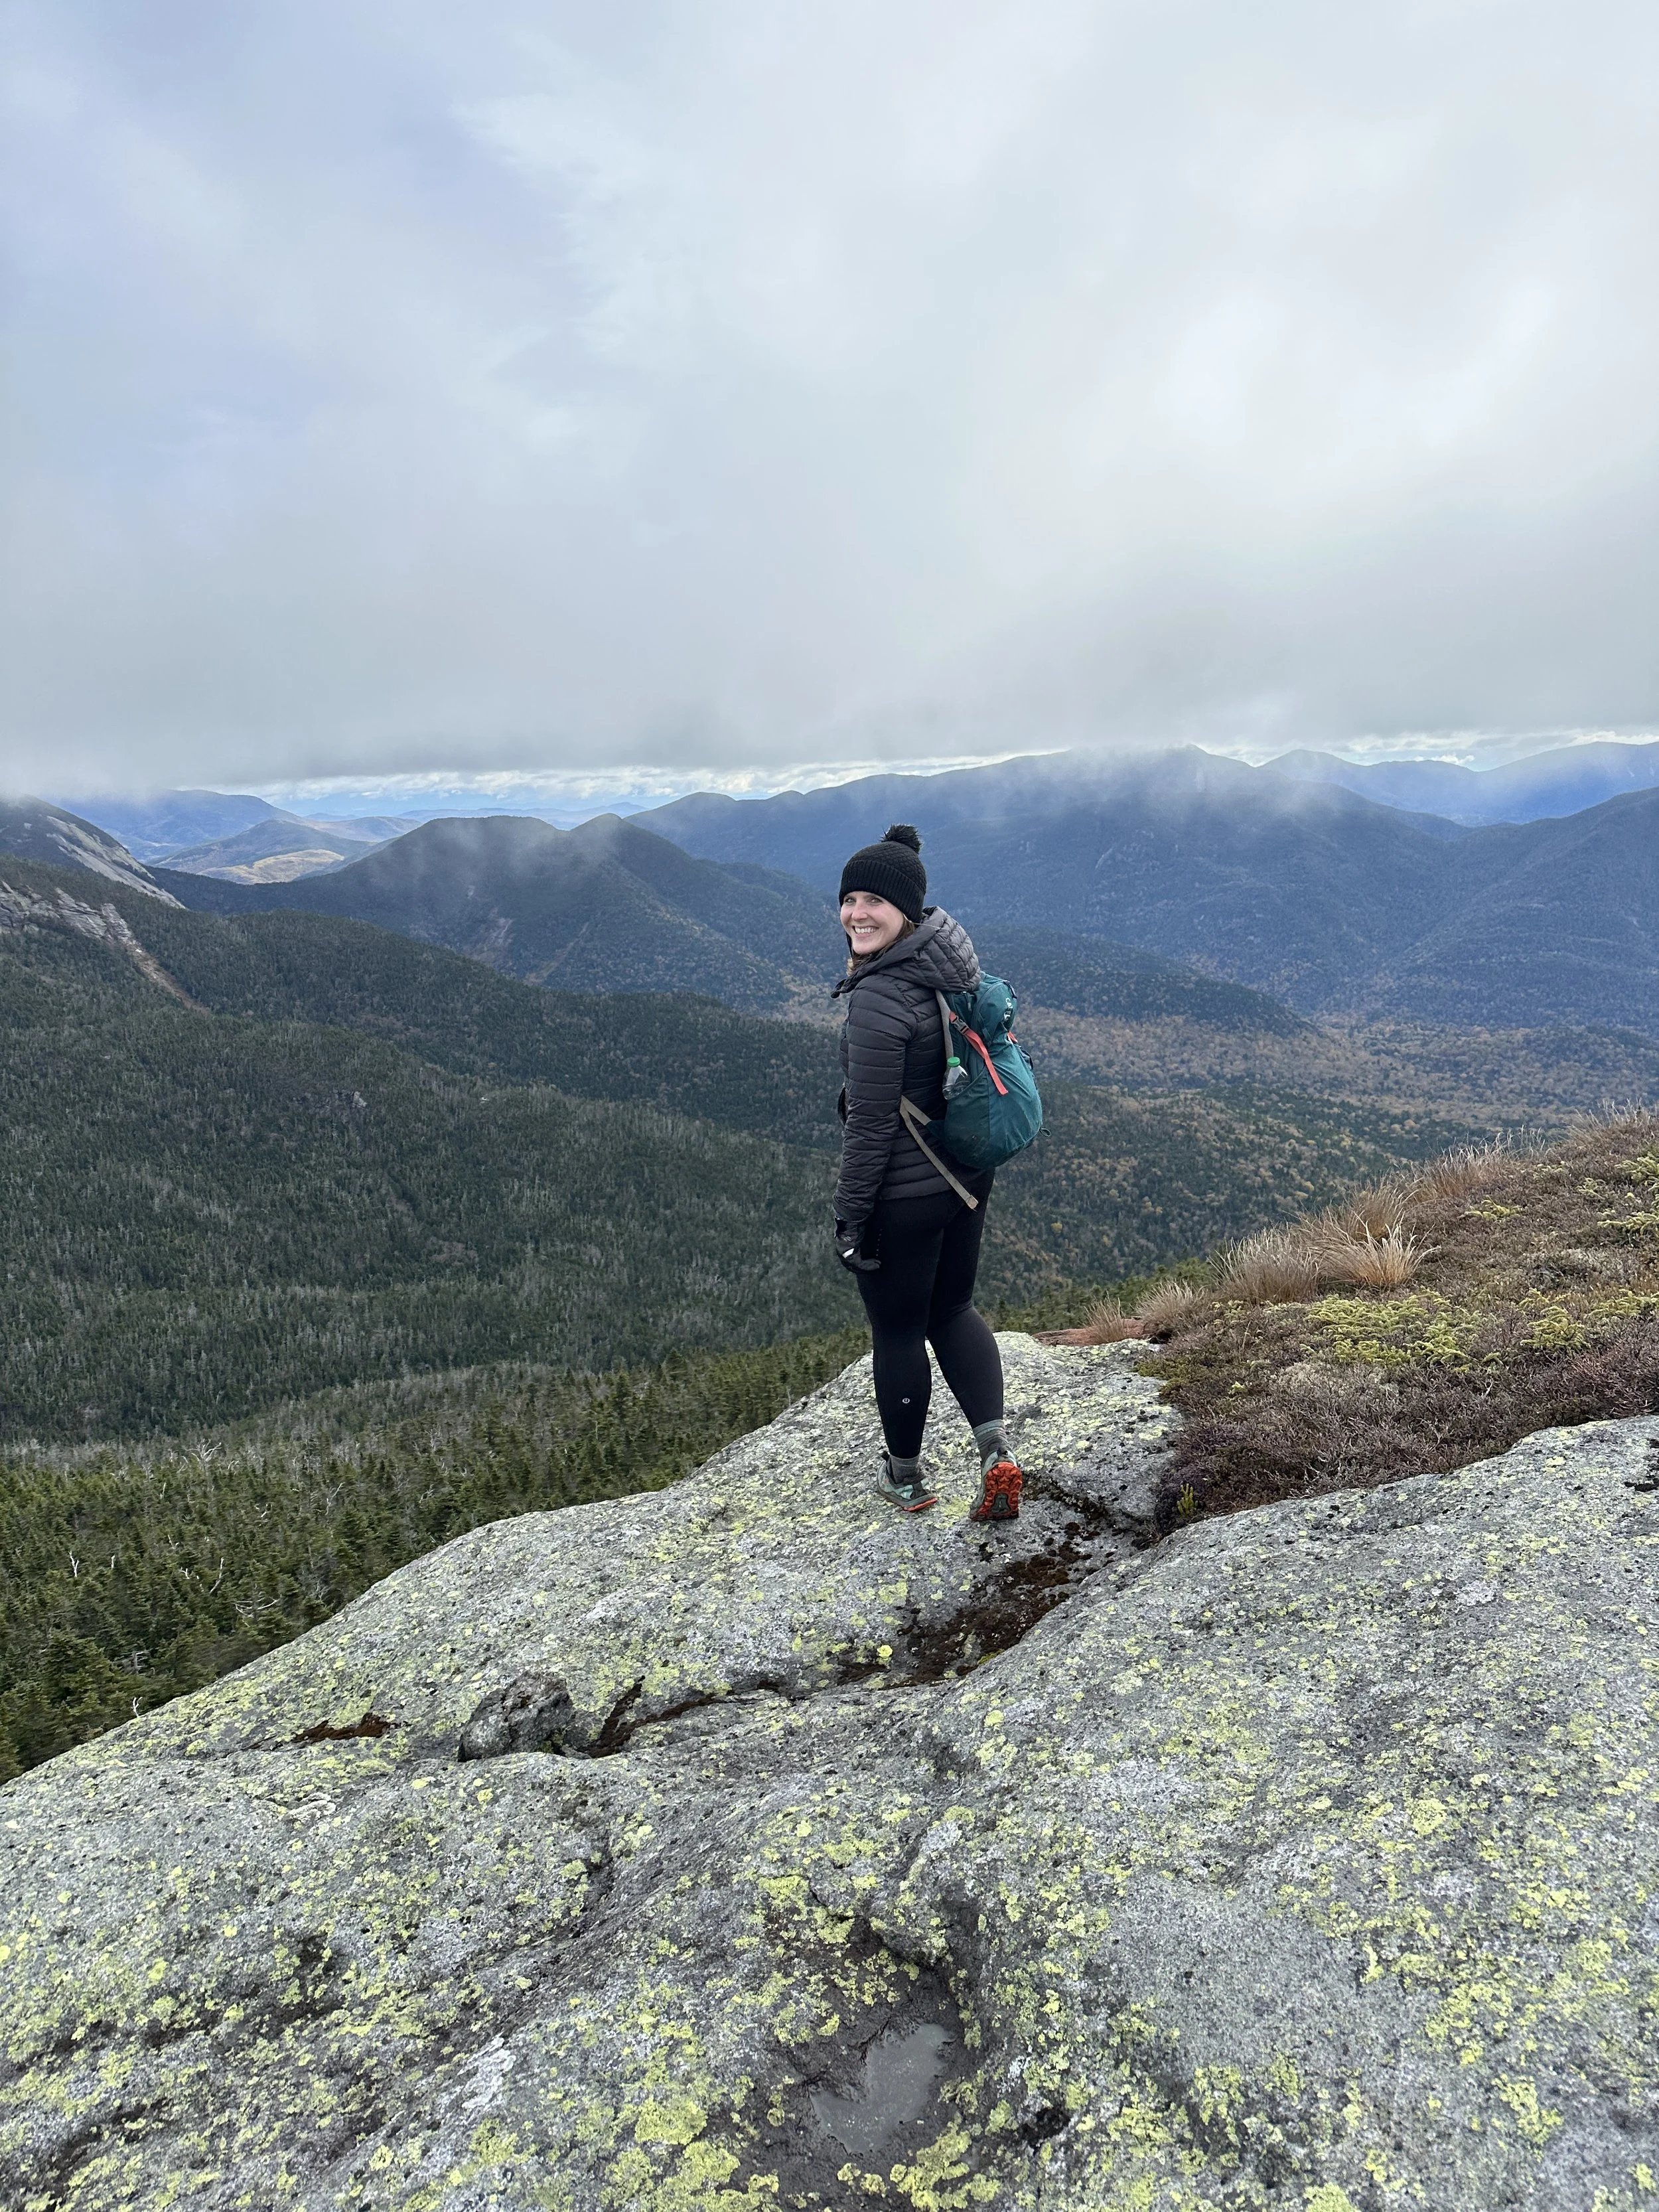
The sky cleared up a bit for us atop Haystack.


Haystack > Basin (4,817’) >
Saddleback (4,511’)
Haystack was an out-and-back, like Marcy, so we went back down the Haystack Trail and back onto the State Range Trail. That was our last out-and-back on trail. I didn’t feel great because I wasn’t eating, but also mentally I knew the toughest part wasn’t over yet. I’m glad we hiked Marcy first and went the route we did because a large amount of climbing had already been accomplished, but the part I psyched myself out the most by was approaching: the Saddleback cliffs.
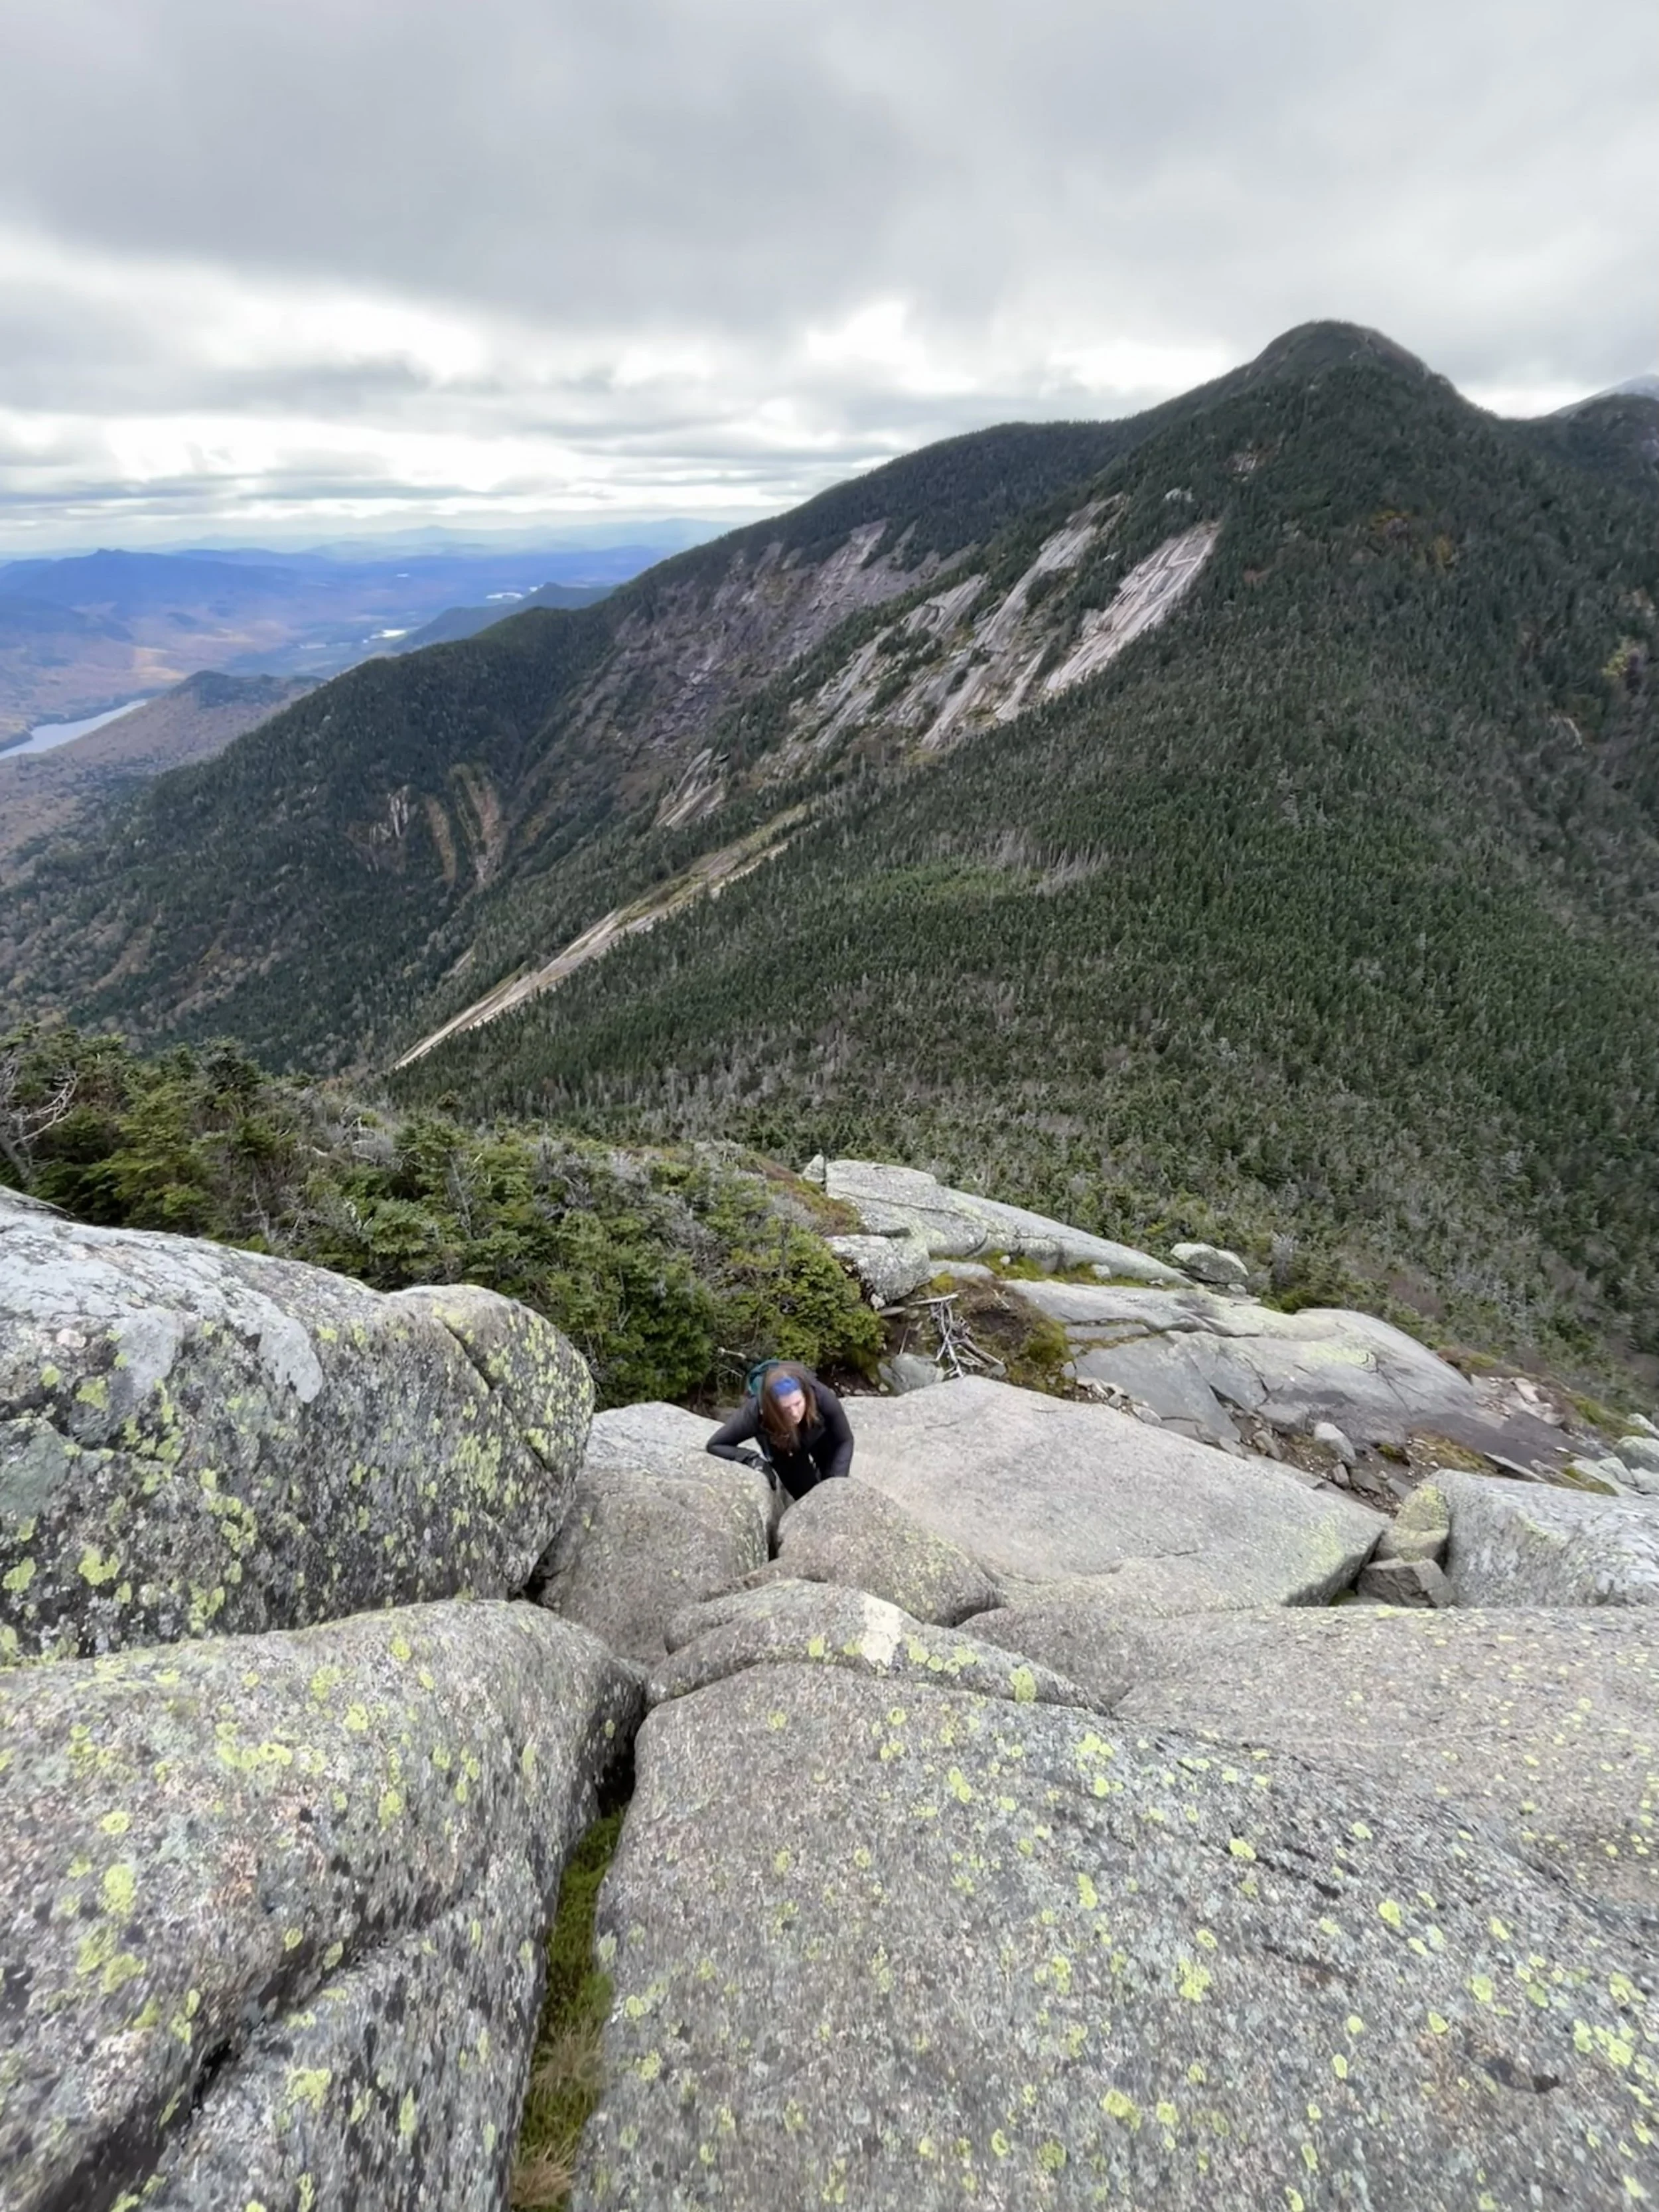
A small section of the Saddleback cliffs.
Saddleback > Gothics (4,675’) > Armstrong (4,331’)
The cliffs were no joke. I’m not tall, so it was very helpful to have Tom go first and I watched his hand and foot placements. Even with him in the lead, I was terrified. I watched a few videos of the cliffs and chatted with hikers around my height who went up the cliffs, but nothing really prepares you. Already hiking a few mountains prior to this moment probably didn’t help. I saw my life flash before my eyes a few times, but I did it. At the top, we sat and ate a bit. That was when I realized my hands were still shaking. I’m not someone with a fear of heights at all, so that was definitely alarming. As we took our break, other hikers approached us, telling us someone had fallen and they assisted them with a rope that hiker had packed. Safe to say I won’t be repeating this section for some time (re: ever).
I was just grateful the “tough” section was done. I told myself the cliffs were the worst part and it would be smooth sailing after that. The Adirondacks, of course, are never smooth sailing.
Next up was our approach to Gothics. I hiked this one years before, very early on in my 46er journey. I was a beginner hiker looking for great foliage views and I found them! I hoped to do Sawteeth at that time too, but hikers at Gothics’ summit told me they crossed paths with black ice, and I played it safe since I didn’t have spikes at the time.
Since I had already been up Gothics and wasn’t traumatized back then, I thought I was in the clear. Then came the cables. I focused so much energy and research on the Saddleback cliffs that I didn’t realize Gothics had its own exciting adventure. Physically I was already weak from the hours we had been on trail, so when I saw a straight incline where using cables was practically a requirement for a great stretch of trail, I realized I was in for quite the arm workout.


As we ascended, a couple hikers descended. I was just thankful to not have to descend this section. Another moment of gratitude for taking the route we did. It looked worse than it was and soon after we headed to Armstrong. I wish I could say more about Armstrong, but I have no memories of this point. I was just glad to be done with the challenging sections.
Armstrong > Upper Wolfjaws (4,203’) > Lower Wolfjaws (4,177’)
With Armstrong under our belts, we had a couple climbs left. At this point, we were chasing the sun. We ascended Upper Wolfjaws and went onwards to Lower Wolfjaws. Neither were too memorable until we found an opening on Lower Wolfjaws just after the sun set behind the mountains. Tom gifted me a 46er patch so I officially became a 46er then. What a moment.


Lower Wolfjaws > Hedgehog Mountain (3,376’) > Rooster Comb Trailhead
I finally felt relief that the day was over, despite us already watching the sun set on the day. It was defeating to realize about five miles of trail remained and we’d have to descend roughly 3,000 feet. My feet were wrecked. Mentally, I was exhausted. Tom took the lead on the descent. We headed down the W. A. White Trail toward Hedgehog Mountain, followed by the Hedgehog Trail, and lastly Rooster Comb Trail. Tom safely got us back to the Rooster Comb trailhead. Honestly couldn’t have gotten out of the woods without him.
I felt an amalgam of emotions as we drove back to my car. Delirium was the strongest feeling in that moment because I hadn’t eaten and I was absolutely exhausted.
Days later I realized what I achieved.
I had just finished the 46. I was officially a 46er – something I never saw myself achieving. People usually laugh when they find out I finished on Lower Wolfjaws (a rather unimpressive peak), but then I mention it was part of the Great Range Traverse that day. Not only did I accomplish the goal I set for myself, secretly years prior, but I also climbed another rung on the ladder toward being a Northeast Ultra 8 finisher. The Great Range Traverse was my second of the Northeast Ultras.
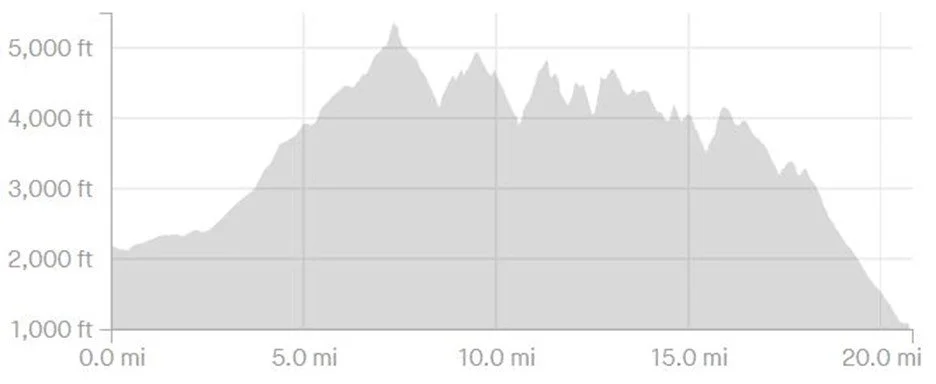
Overall, I’m glad I experienced the Great Range Traverse, but don’t think I’d want to rush these mountains in the future. Of course I wanted to complete them for the ultra, and I’m thrilled I did, but it was a long day. By the end, we hiked 20.8 miles with 8,300 feet of climbing. Our moving time was eleven hours, but our breaks totaled a handful of hours over the course of the day.
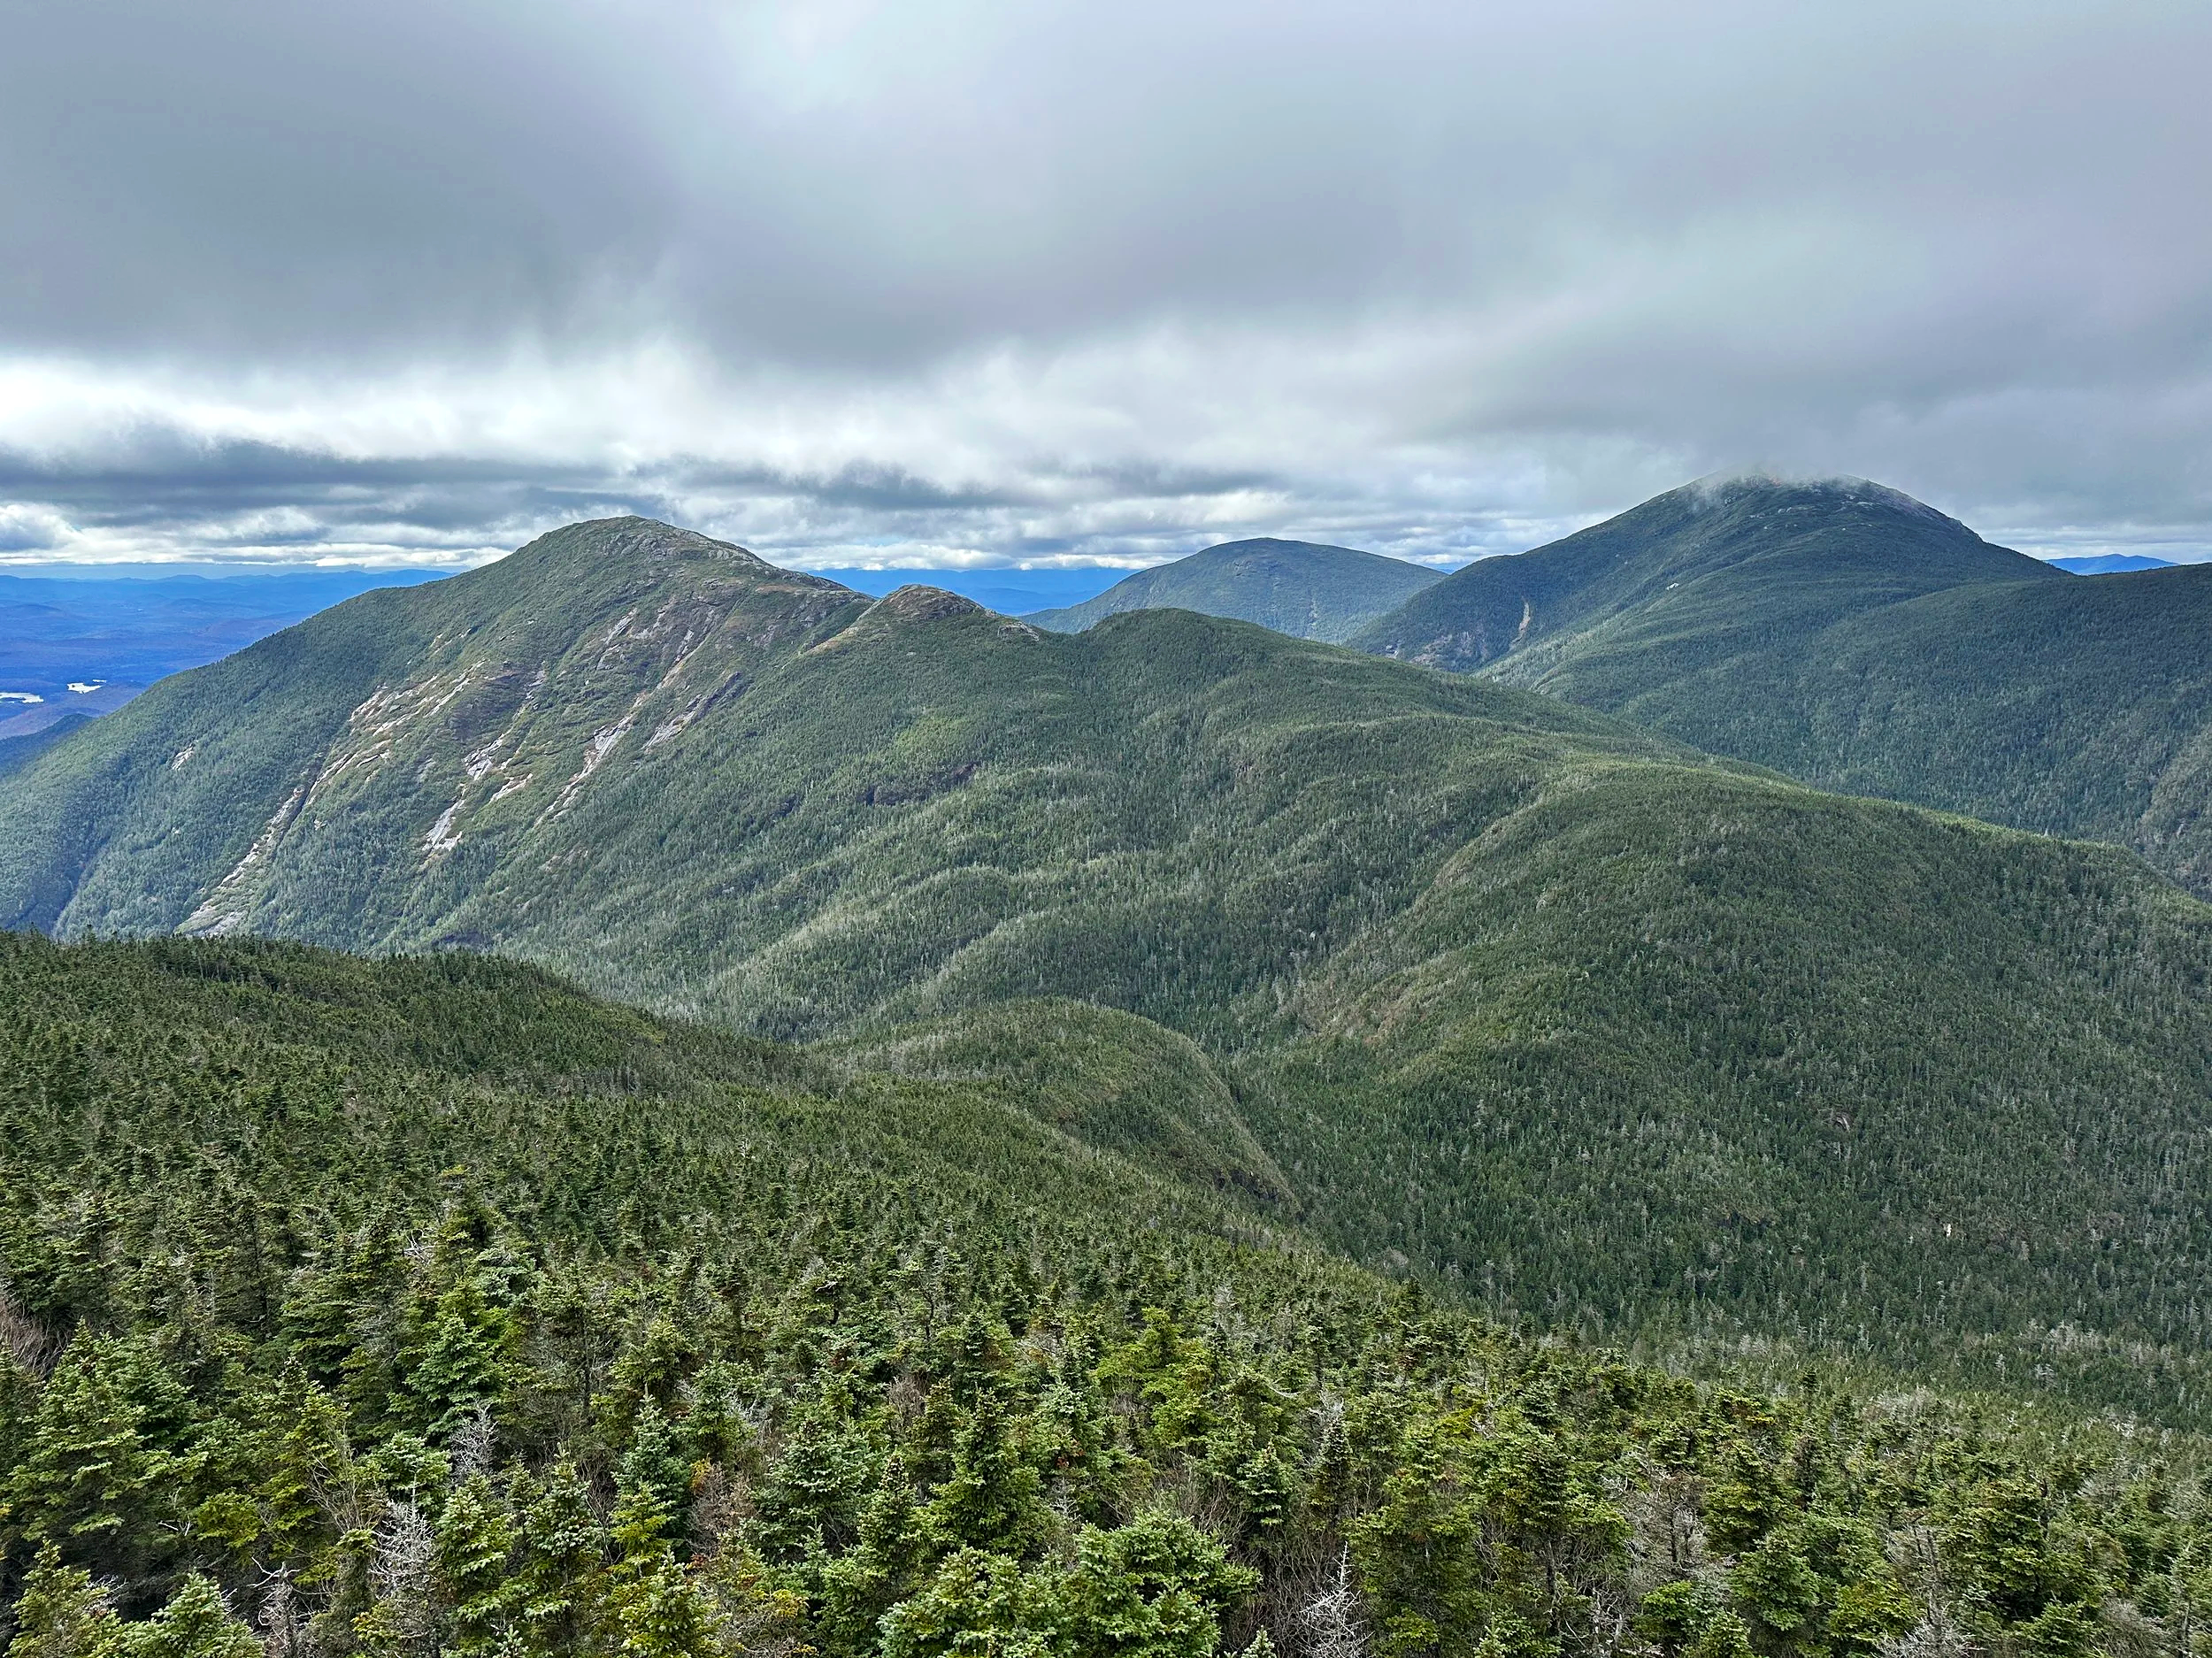
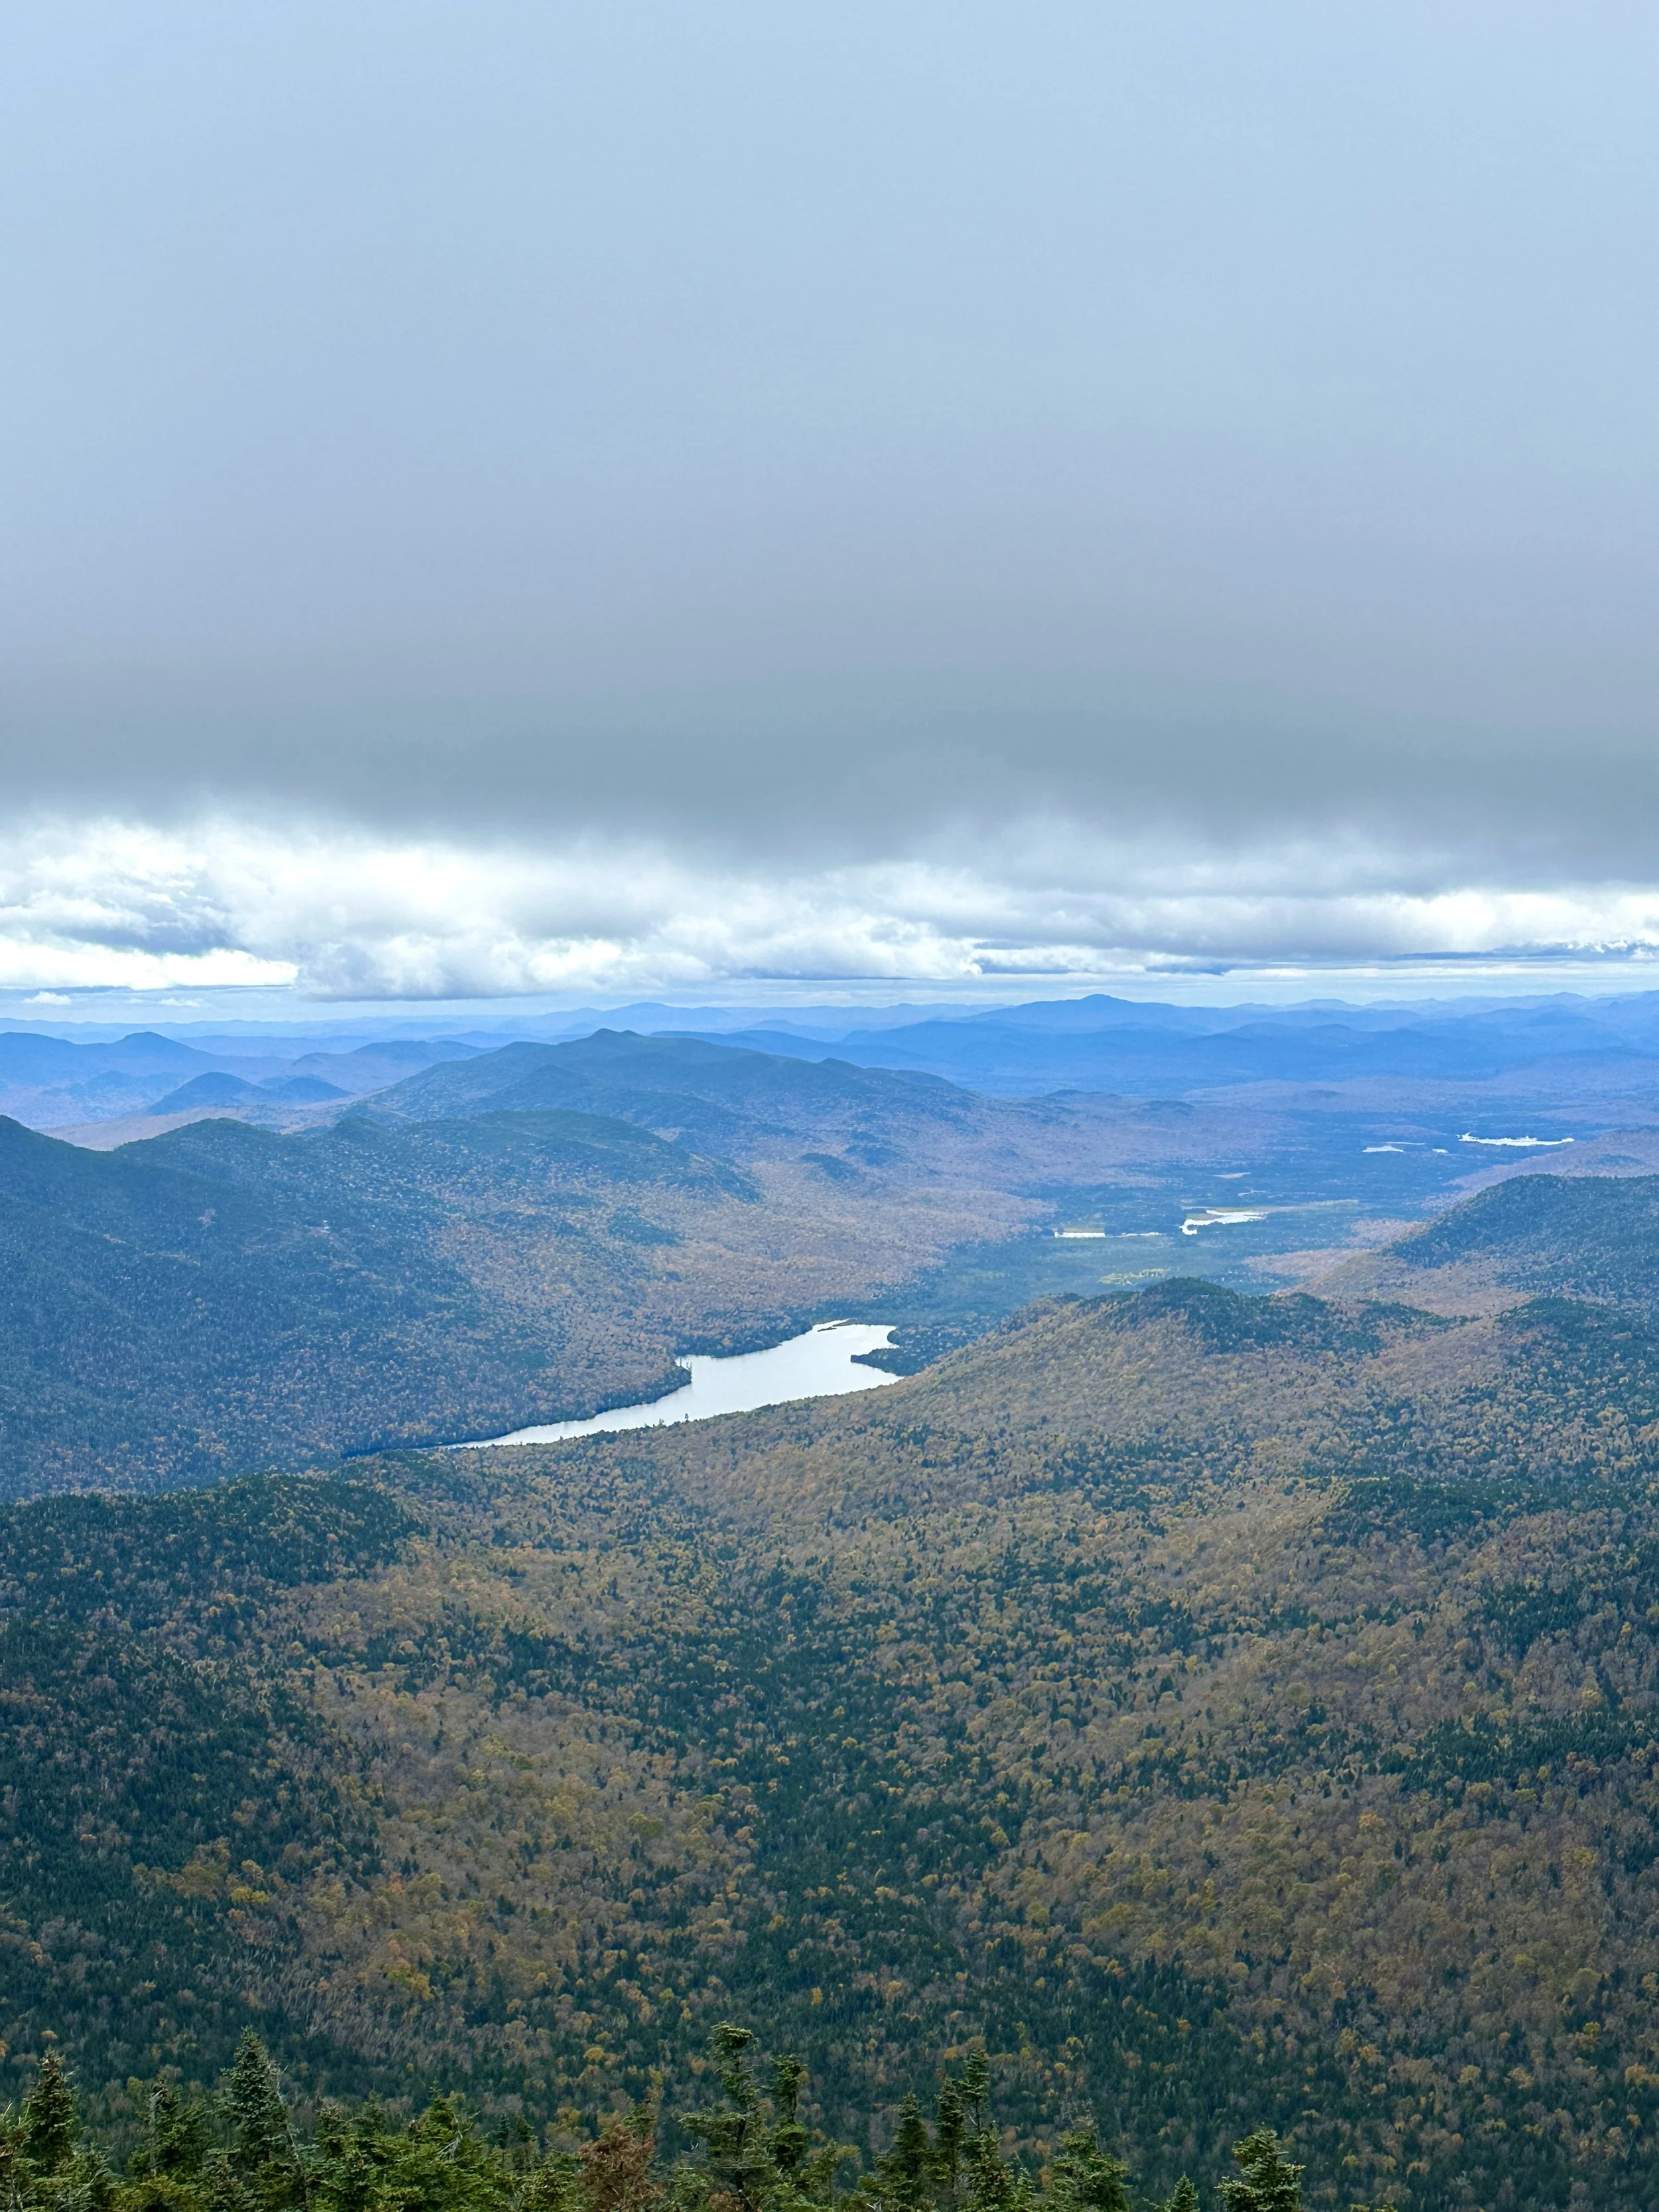
The magical Adirondack mountains.
With the Adirondack 46 complete, I also became a Northeast 111 finisher. Naturally, attempting the rest of the Northeast Ultras was up next.
Have you considered hiking the Great Range Traverse? Would you take on the challenge of completing it in one day?

Taking on the Tongue Range: Lake George’s Best-Kept Backpacking Gem
In the midst of the Adirondacks’ best season, we took on the Tongue Range to summit 6 of the LG12. Here's how we hiked them all in one overnight trip...

As a lover of lists, I found myself without a hiking one for the first time in what felt like forever. I chased summit after summit across the Northeast for years, but after completing my hardest challenge yet (the Northeast Ultra 8) this past July, I hadn’t thought of what was next.
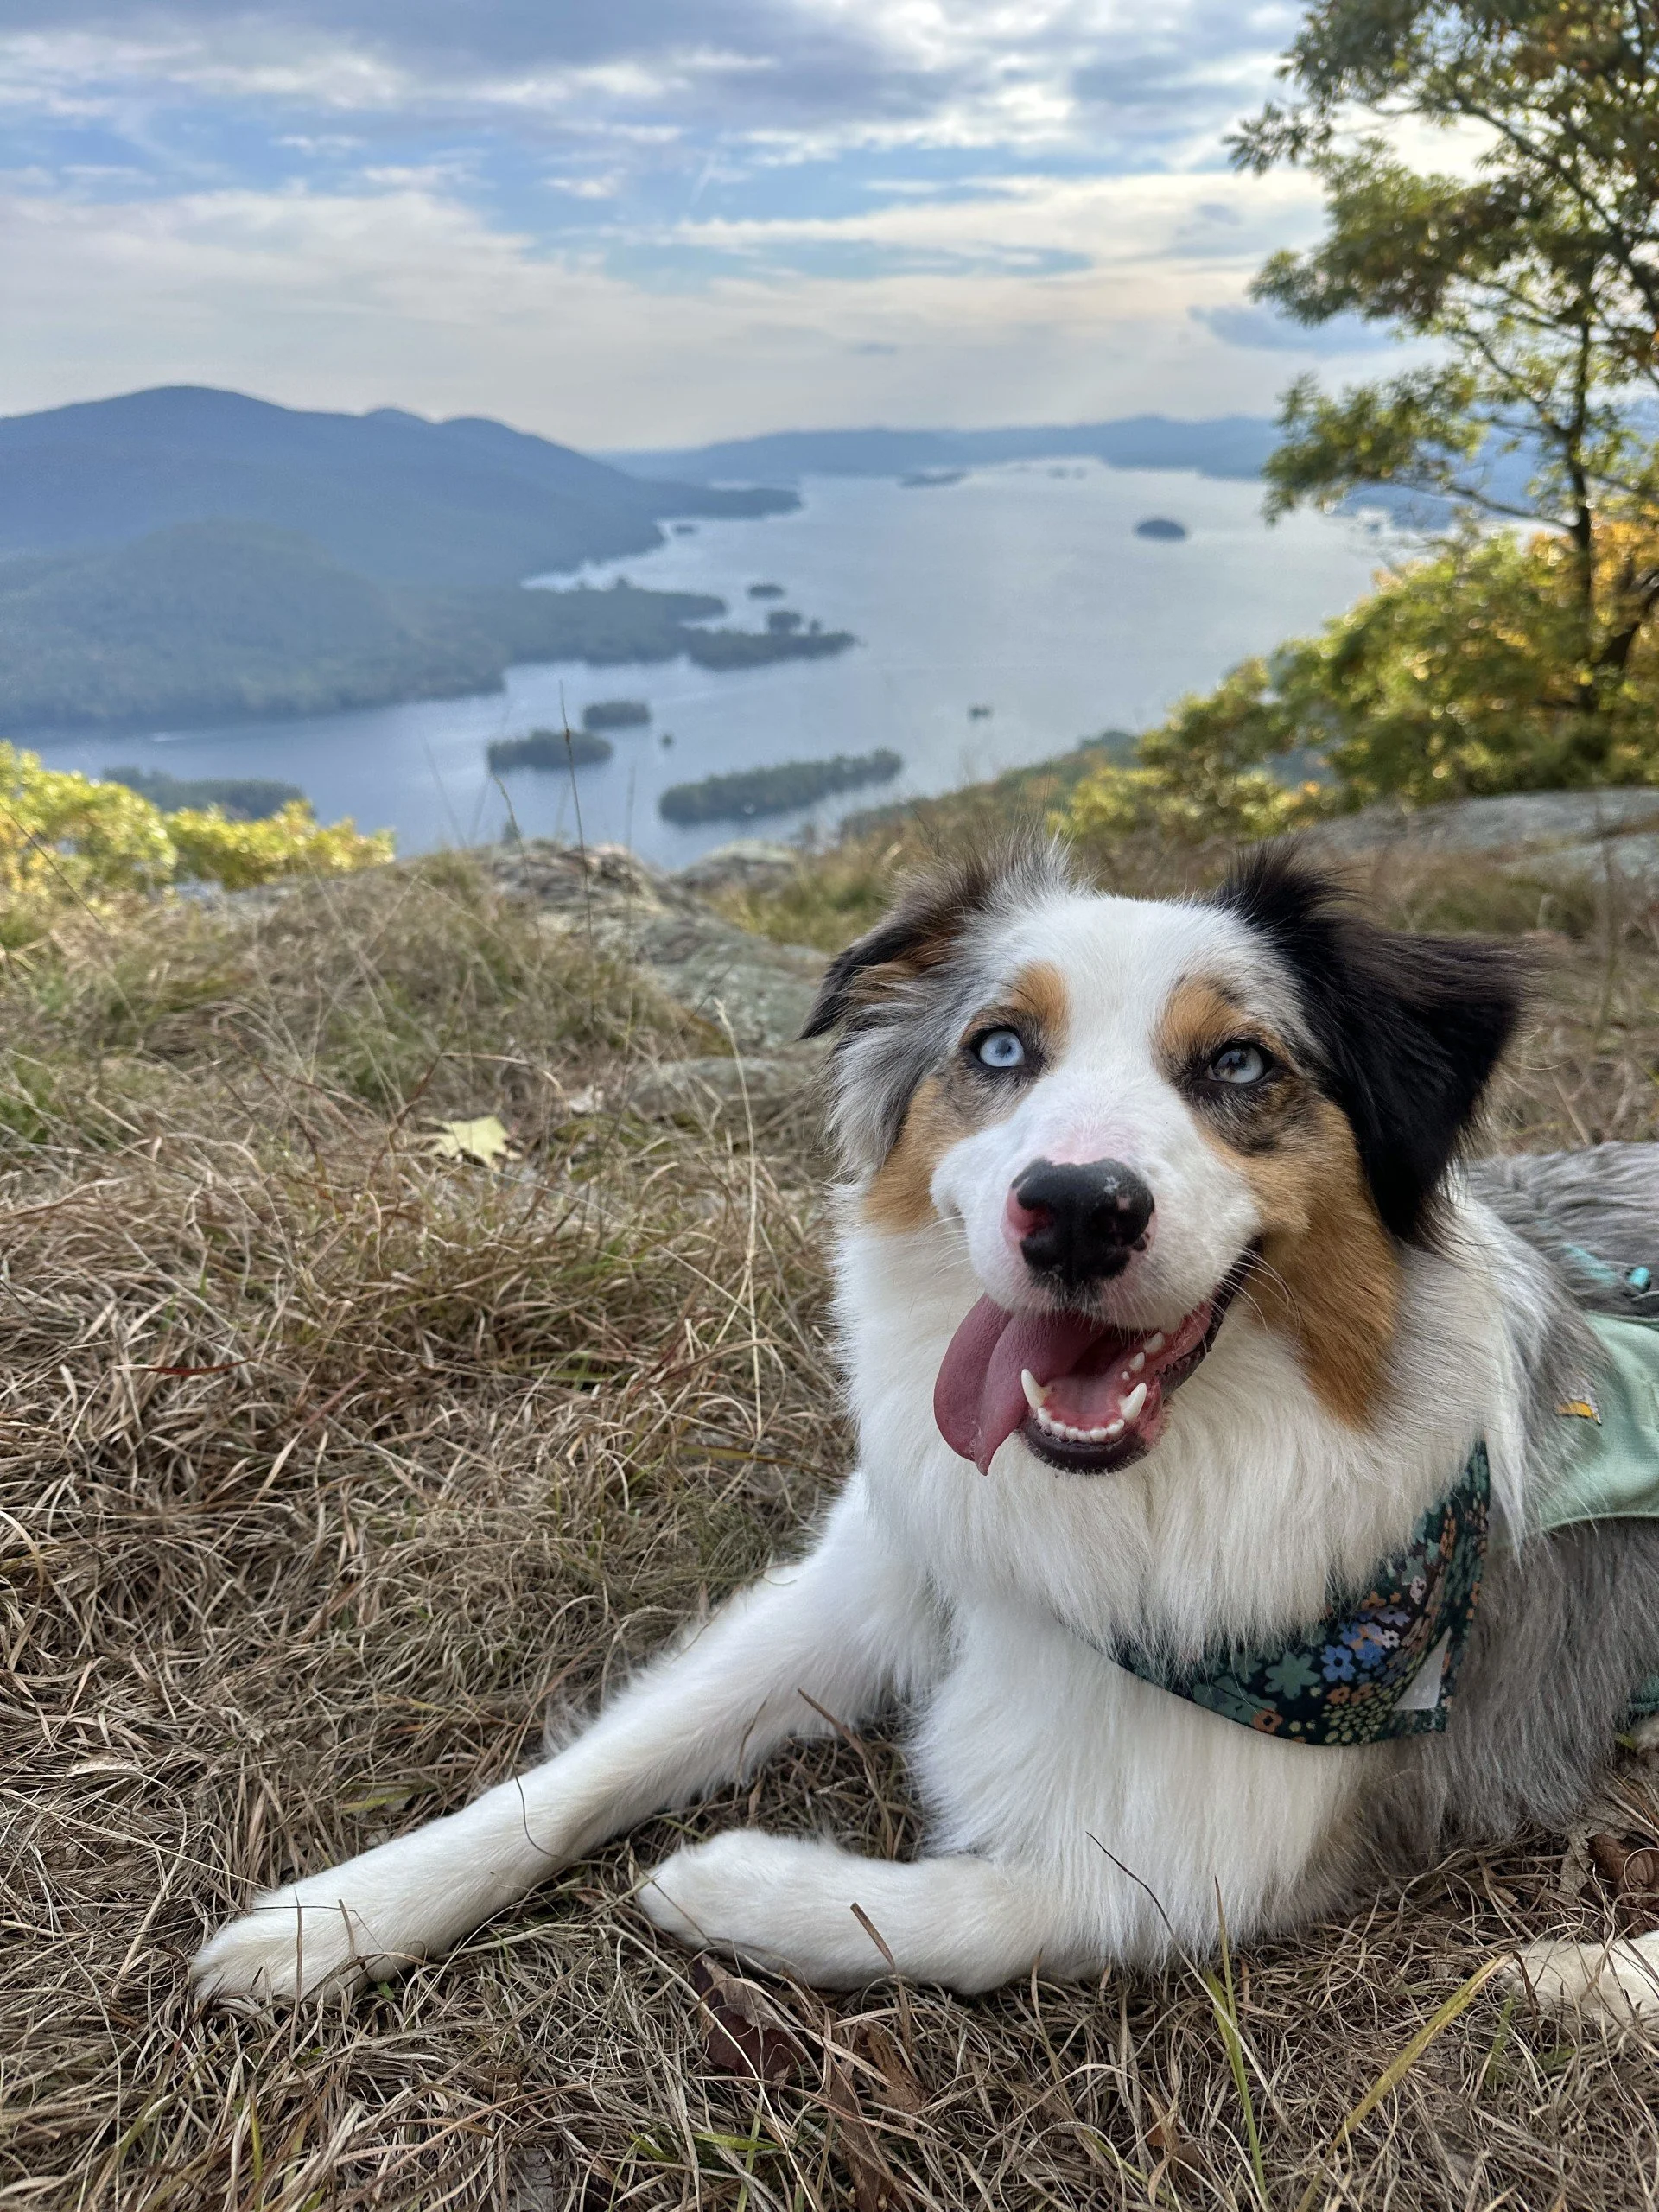
I knew I wanted a new goal, but a doable one with my dog Poppy. My friend Liz suggested the Lake George 12ster. My only true experiences in Lake George were of Stewart’s stops en route to the Adirondacks, so I hadn’t really stepped onto the trails there. But as with every area I decide to explore, I’m constantly impressed by what I find when I don’t have many expectations. After two incredible camping trips in Lake George in August, Poppy and I were halfway through the list.
As luck would have it, Liz and her friend planned to wrap up the Lake George 12ster with a fun-filled finale – backpacking the Tongue Range. I instantly asked if we could join in on the adventure. Turns out, I had the Tongue Range saved on my list of future hikes for the last few years after seeing a few beautiful shots on trail—never really realizing it was part of a challenge at all. I kept pursuing other longer days and pushing this one further down the list. It’s a beautiful moment when things come together because now I found myself with this hike at the top of my list that I get to hike with the friend who urged me to go for those mountains.
In the midst of the Adirondacks’ best season, four of us (and Poppy) met at Deer Leap to take on the Tongue Range. Here’s how it went:
SATURDAY
9 AM- We left one car at the Clay Meadow Trailhead (Lake Shore Dr, Bolton Landing, NY 12814) and another at Deer Leap (Silver Bay, Deer Leap Trail, Silver Bay, NY 12874). We embarked on Deer Leap with heavy packs and full hearts as we were thrilled to be outside during foliage season. It’s tougher as we’re getting older to plan a weekend away that aligns with everyone’s schedule and the weather conditions. We were in for a treat it felt like.
That treat melted a couple miles later as we warmed up. Packs felt heavier. Fall felt like summer. It’s been an unseasonably warm start to autumn, but with no rain in the forecast, our spirits remained high.


Making our way along the trail, we summitted Brown (1966’), Huckleberry (2232’), Five Mile (2256’), and finally, Fifth Peak (1813’). Four mountains on the Lake George 12ster list. The only memorable peak of this part of the range was the finale – Fifth Peak. Our home for the evening after six miles and 2,000 feet of elevation gain.
It was around 1 P.M. when we settled into the Fifth Peak lean-to. We unloaded our big packs and took out what we needed to our smaller day packs.
1:30 PM- We headed out for the afternoon portion on the itinerary – featuring more hiking, more sweating, and more eating. Essentially what backpacking is. This leg of the trip would be much lighter gear-wise. We planned an out-and-back to French Point (1756’) and First Peak (1586’), the final two Lake George 12ster peaks in the Tongue Range. This was arguably the toughest part of the day, but it came with the best views. The out-and-back was a total of 7.3 miles with 2,800 feet of elevation gain. We took breaks at the summits to take in the view, rest our legs, and eat snacks before heading back to camp.


At this point, none of us were excited about the back portion of the out-and-back. We descended and ascended a lot, and knew very well what that would mean. Thus, we weren’t looking forward to it. Especially knowing we’d make it back to camp after dark.

But as all hiking goes, we put one foot in front of the other. We were all chatting and before we knew it, we found ourselves on a bit of exposed rock in a small clearing, with about a mile to go. We looked up and realized we stumbled upon an open view of the sunset. I gave up on my hope to see the sunset from a visible spot earlier in the afternoon based on where we were and the time of day. The day had been an adventure already, so I told myself, onwards and upwards. When we reached a spot where we had a wide opening to watch the sunset, I couldn’t believe it. It made the moment all the more memorable.
It started out tame. Just a subtle, faded pink. Then the sunset came alive with a blazing fire of deep purples and oranges encompassing the entire sky above the stacked layers of deep blue mountains in the distance. We spent some time soaking it in. I ate my first Nerds cluster. What a time.


After the sun set behind the mountains, we took out headlamps and hiked back to our lean-to.
7:30 PM - It was my first time sleeping in a lean-to! The Fifth Peak lean-to felt new because of how well-maintained (or untraveled) it was. We packed a tent, in case the lean-to was occupied, but thankfully we didn’t need to use it. As a result, no tent breakdown in the morning. We called it a night after preparing some delicious dinner, Peak Refuel’s White Chicken Chili for me (with a single serving of Cholula’s of course) and Oreos for a little sweet treat.
SUNDAY
6 AM- We woke up to sip hot coffee and watch the sunrise. This was my first time trying out Alpine Start’s instant coffee and it was perfect!


Our bodies ached, but our hearts were full, knowing what we accomplished yesterday. The lean-to is eastward facing, so the sunrise was seen through the trees. Fifth Peak’s summit slowly began to wake up with the sun. There’s a small viewpoint down from the Fifth Peak lean-to of a sliver of Lake George encompassed by fog that was a lovely sight to see.


The slow pack-up process began. It was slow going because we did not want the trip to end, and because we should have stretched before bed. Packing was so much easier this time around than it was when I first backpacked on the Northville-Placid Trail. We drank all our water by this point and ate all our food (aside from small snacks). Our packs were instantly loads lighter.

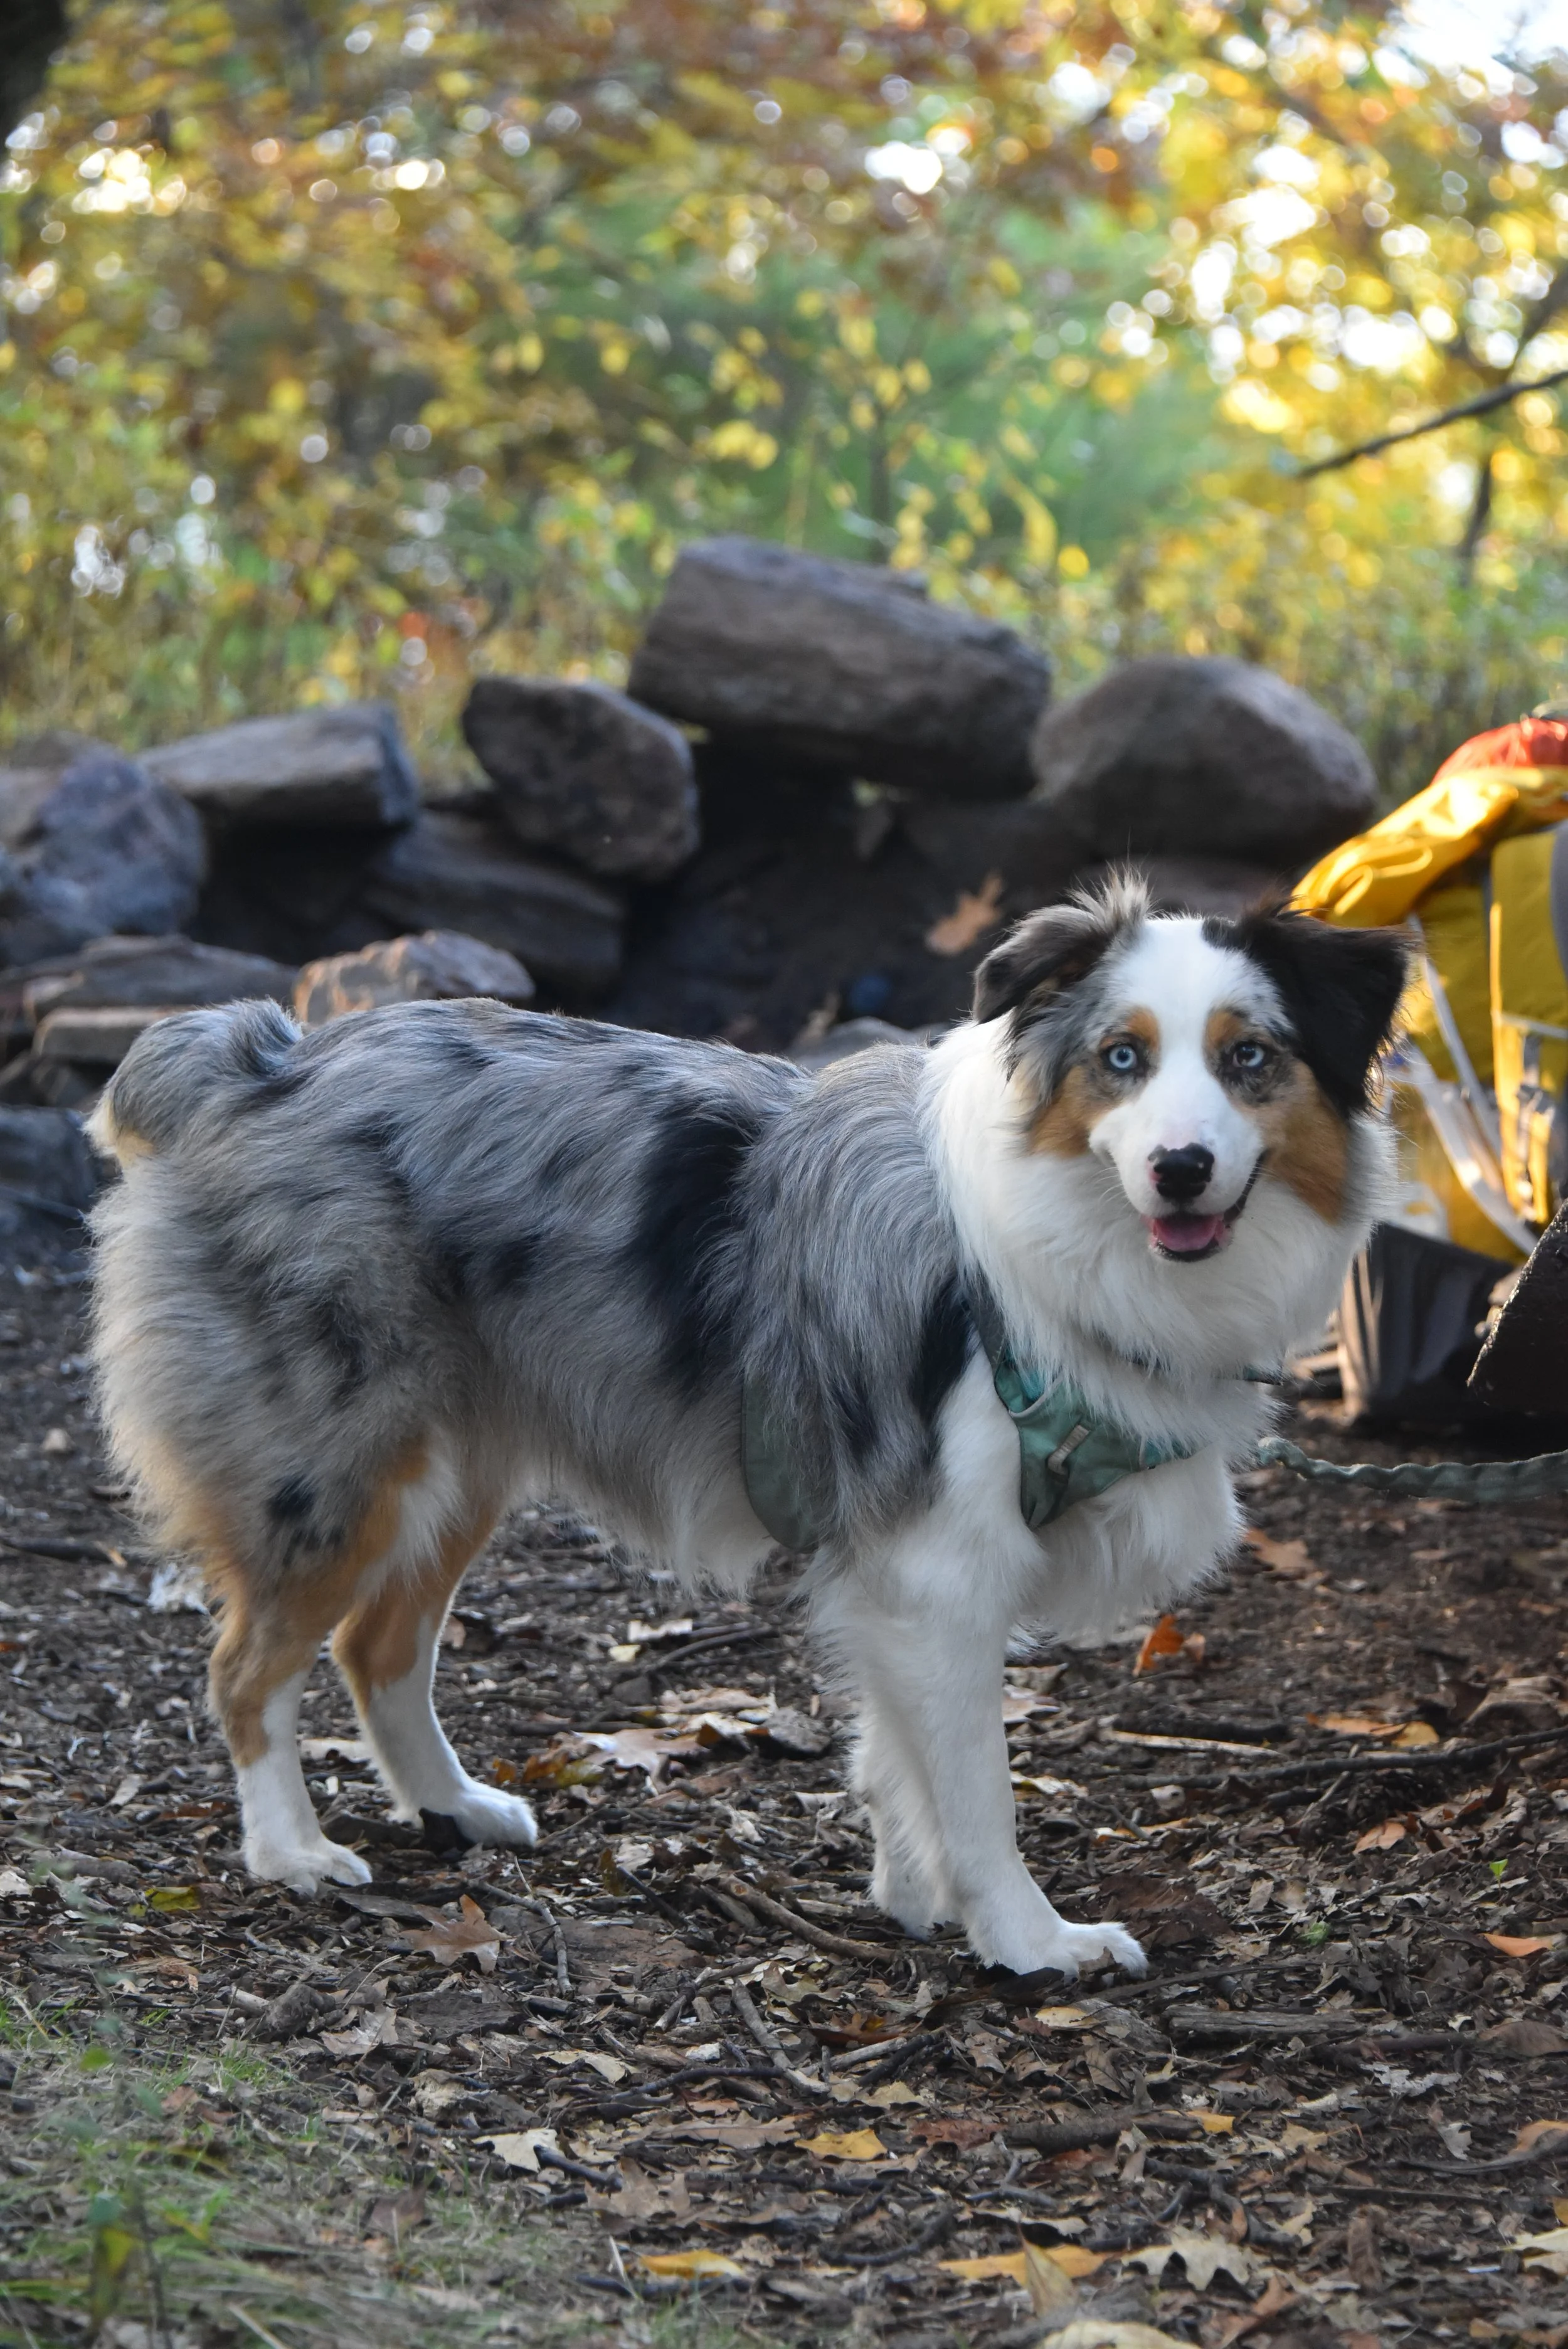
Poppy rocked her own pack on the trail. This was her first backpacking trip!
7:45 AM- We hiked down the .2 miles along the Fifth Peak Lean-to Trail to the fork, continued another .5 along the Tongue Mountain Range Trail, and finished with two miles on the Five Mile Point Trail to our car parked at Clay Meadows. A total of 2.7 miles and only 175 feet of elevation gain. We dropped nearly 1,500 feet though.
9:30 AM – After a drop-off at our other car spot, we were off to a nearby diner for a well-earned breakfast before all heading home.
Notes:
Rattlesnakes and bees - The Tongue Range is known for its rattlesnake habitat. Given the time of year, we weren’t worried about this, but it is something to keep in mind dependent on the season. Additionally, bees and wasps were abundant.
Rough terrain - The Tongue Range can be made into a loop. I did not hike the loop. Part of the Tongue Range, if you’re completing the loop, was wrecked by storms two years ago, and there has been a wonderful amount of trail maintenance to improve the trails on that section since. However, some hiker reviews still mention the damage. The out-and-back we did was in an effort to be able to drop packs off at the lean-to, and to avoid the rougher part of the Tongue Range.
Is the Lake George 12ster on your list? Would you tackle the Tongue Range in a day, or take it all in with an extra day?
If you’re also a list lover, check out these hiking challenges in the Northeast:

The Ultimate Alaska Road Trip: 3 National Parks in 9 Days
My last state to visit was the last frontier. A dream come true.
Here’s my 9-day Alaska itinerary, including visits to the only national parks accessible by car:
Day 1 – Anchorage to…
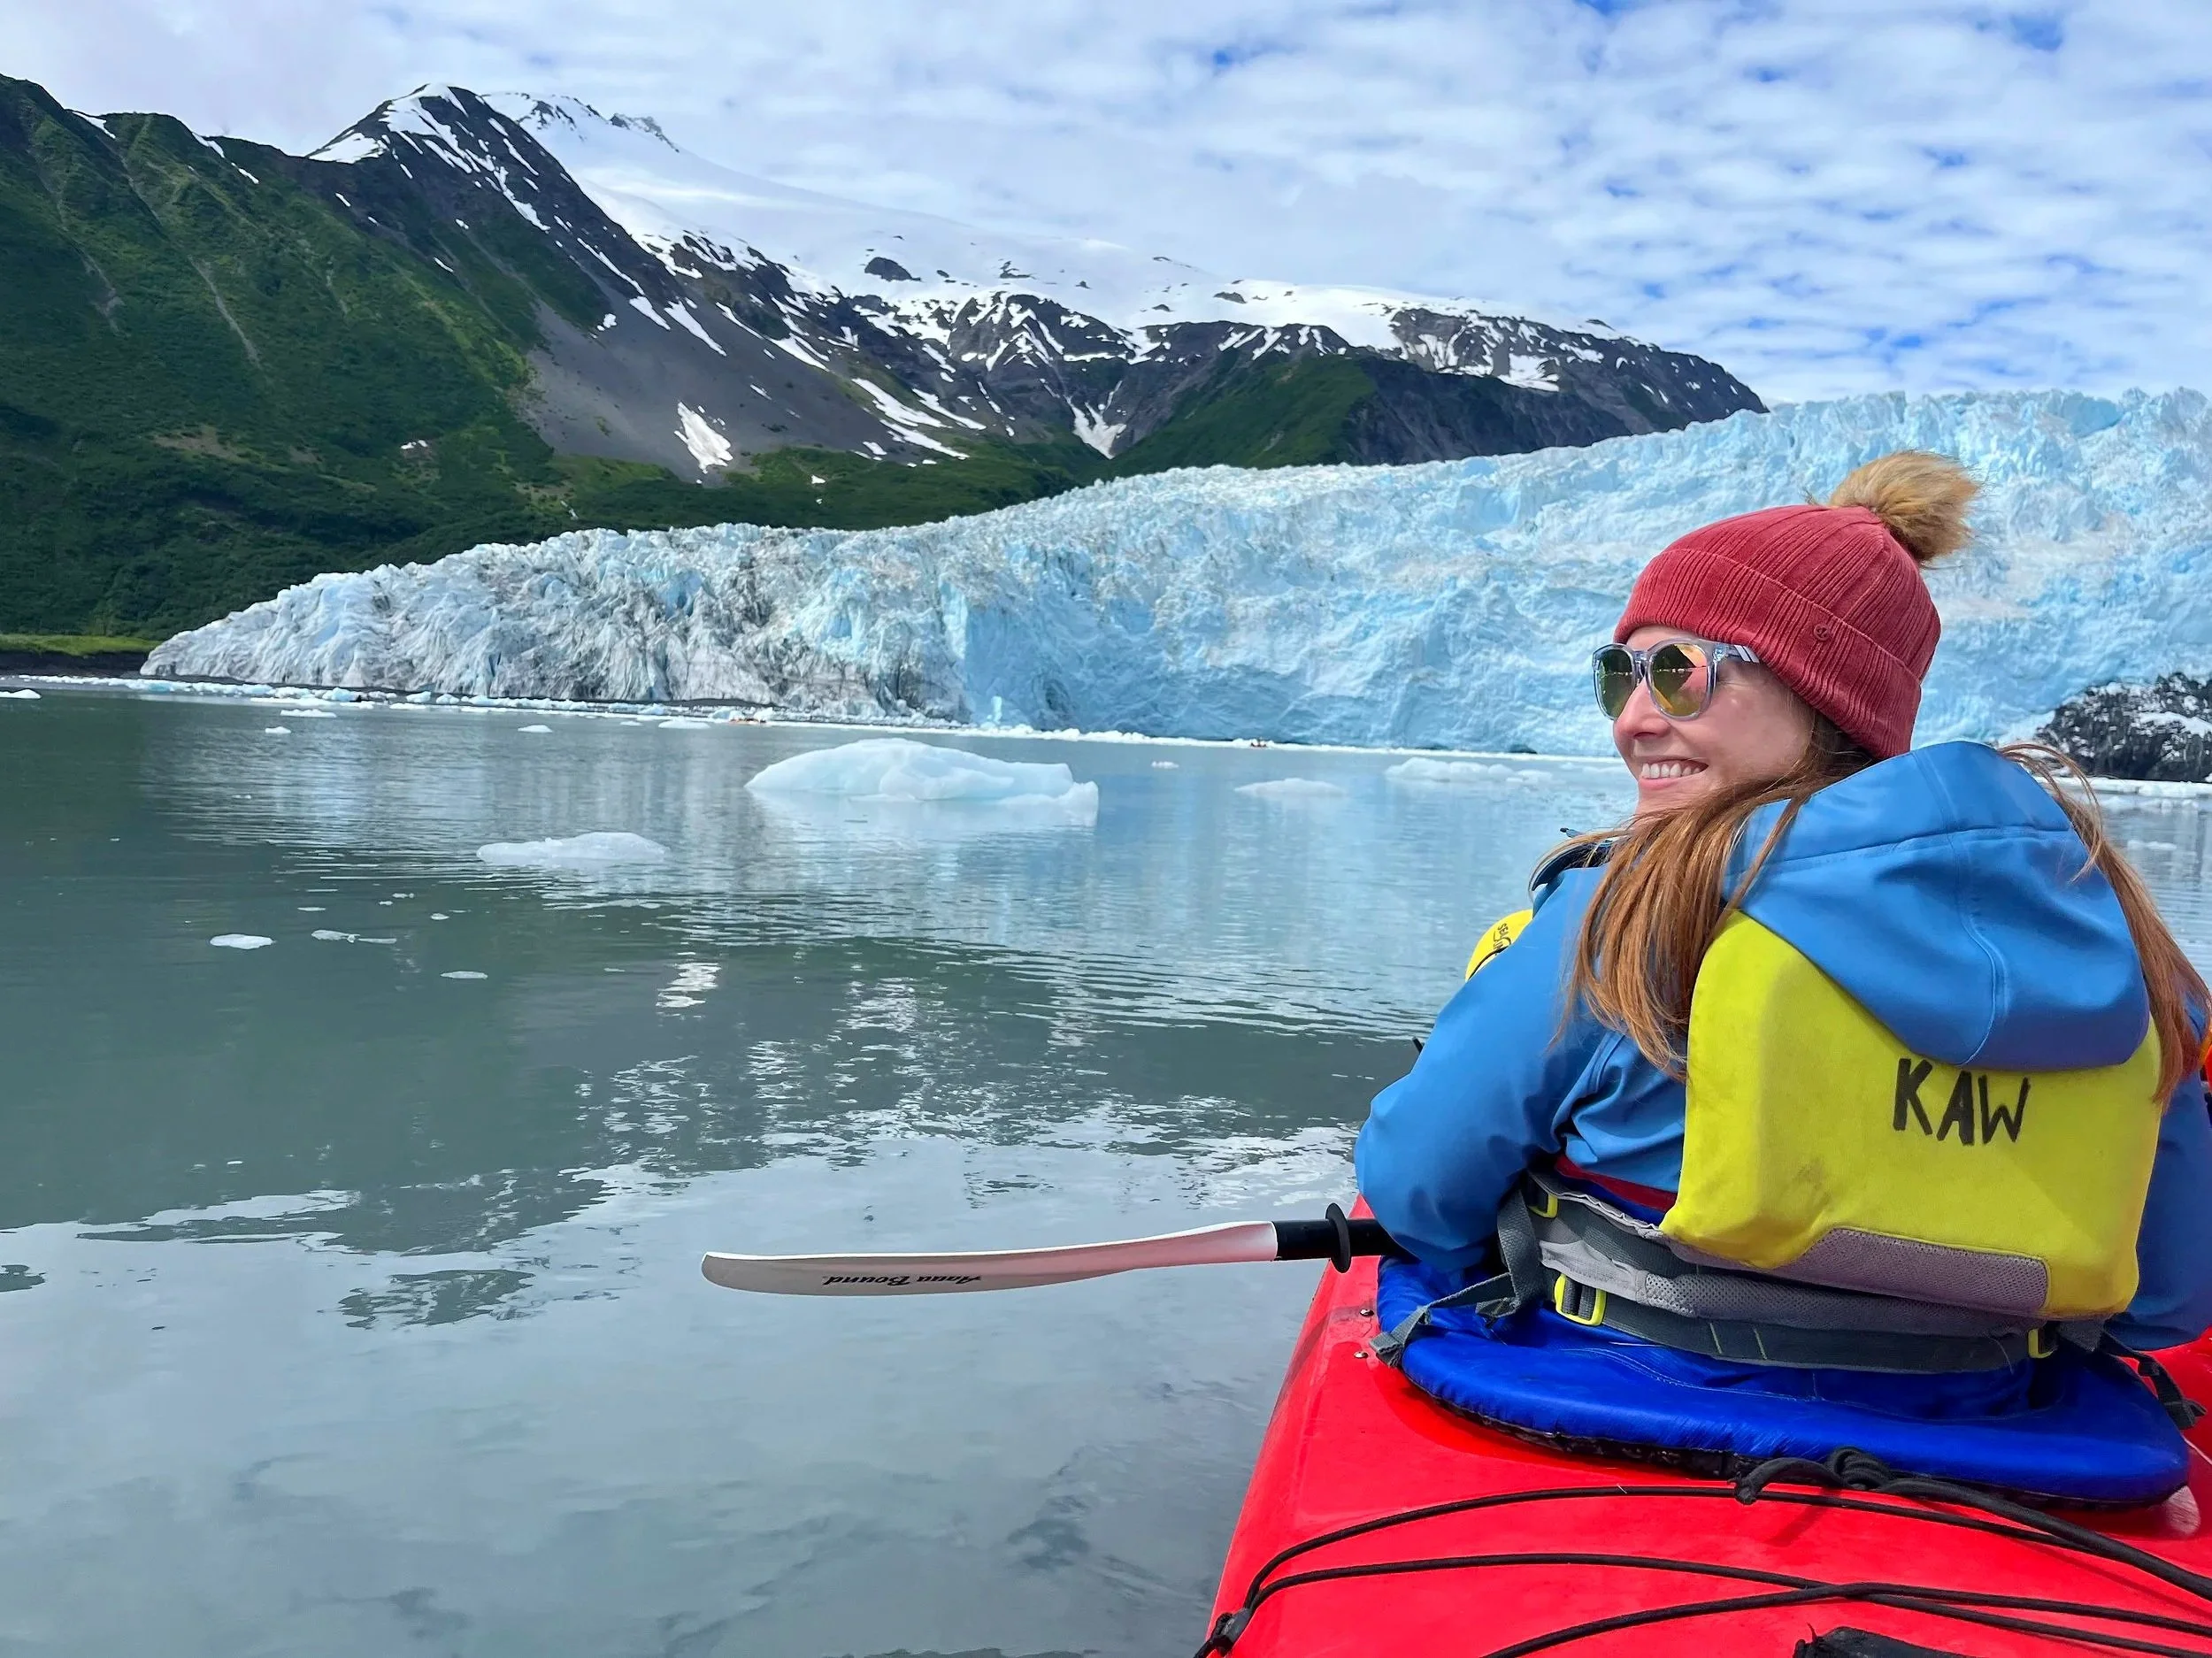
Kayaking alongside Aialik Glacier in Kenai Fjords for my 48th national park visit.
I've dreamt about Alaska for as long as I can remember. After visiting forty-nine states, the last one on the list happened to be the last frontier. It felt like this year may finally align to turn my dream into reality. For years my dad told me to book the flight. And for years, I made excuses. This time around, I didn’t hesitate. My flight was officially booked.
There are always a few hiccups in the planning, but Alaska truly felt like a different beast. I spent this past April feverishly researching and preparing for what I hoped to be the trip of a lifetime.
Here’s my 9-day Alaska itinerary, including trips to the only three national parks accessible by car:
Day 1 – Anchorage to Denali
After a day of traveling from New England to Anchorage (with a lucky, long layover in Dallas to visit my family), we arrived in Anchorage. We landed late at night, so our first official day started the next morning. A major perk of road trip travel is cutting down on food and time expenses. There’s always a time to splurge and try something new food-wise, but going out a couple times a day eats away at time I’d rather spend exploring.
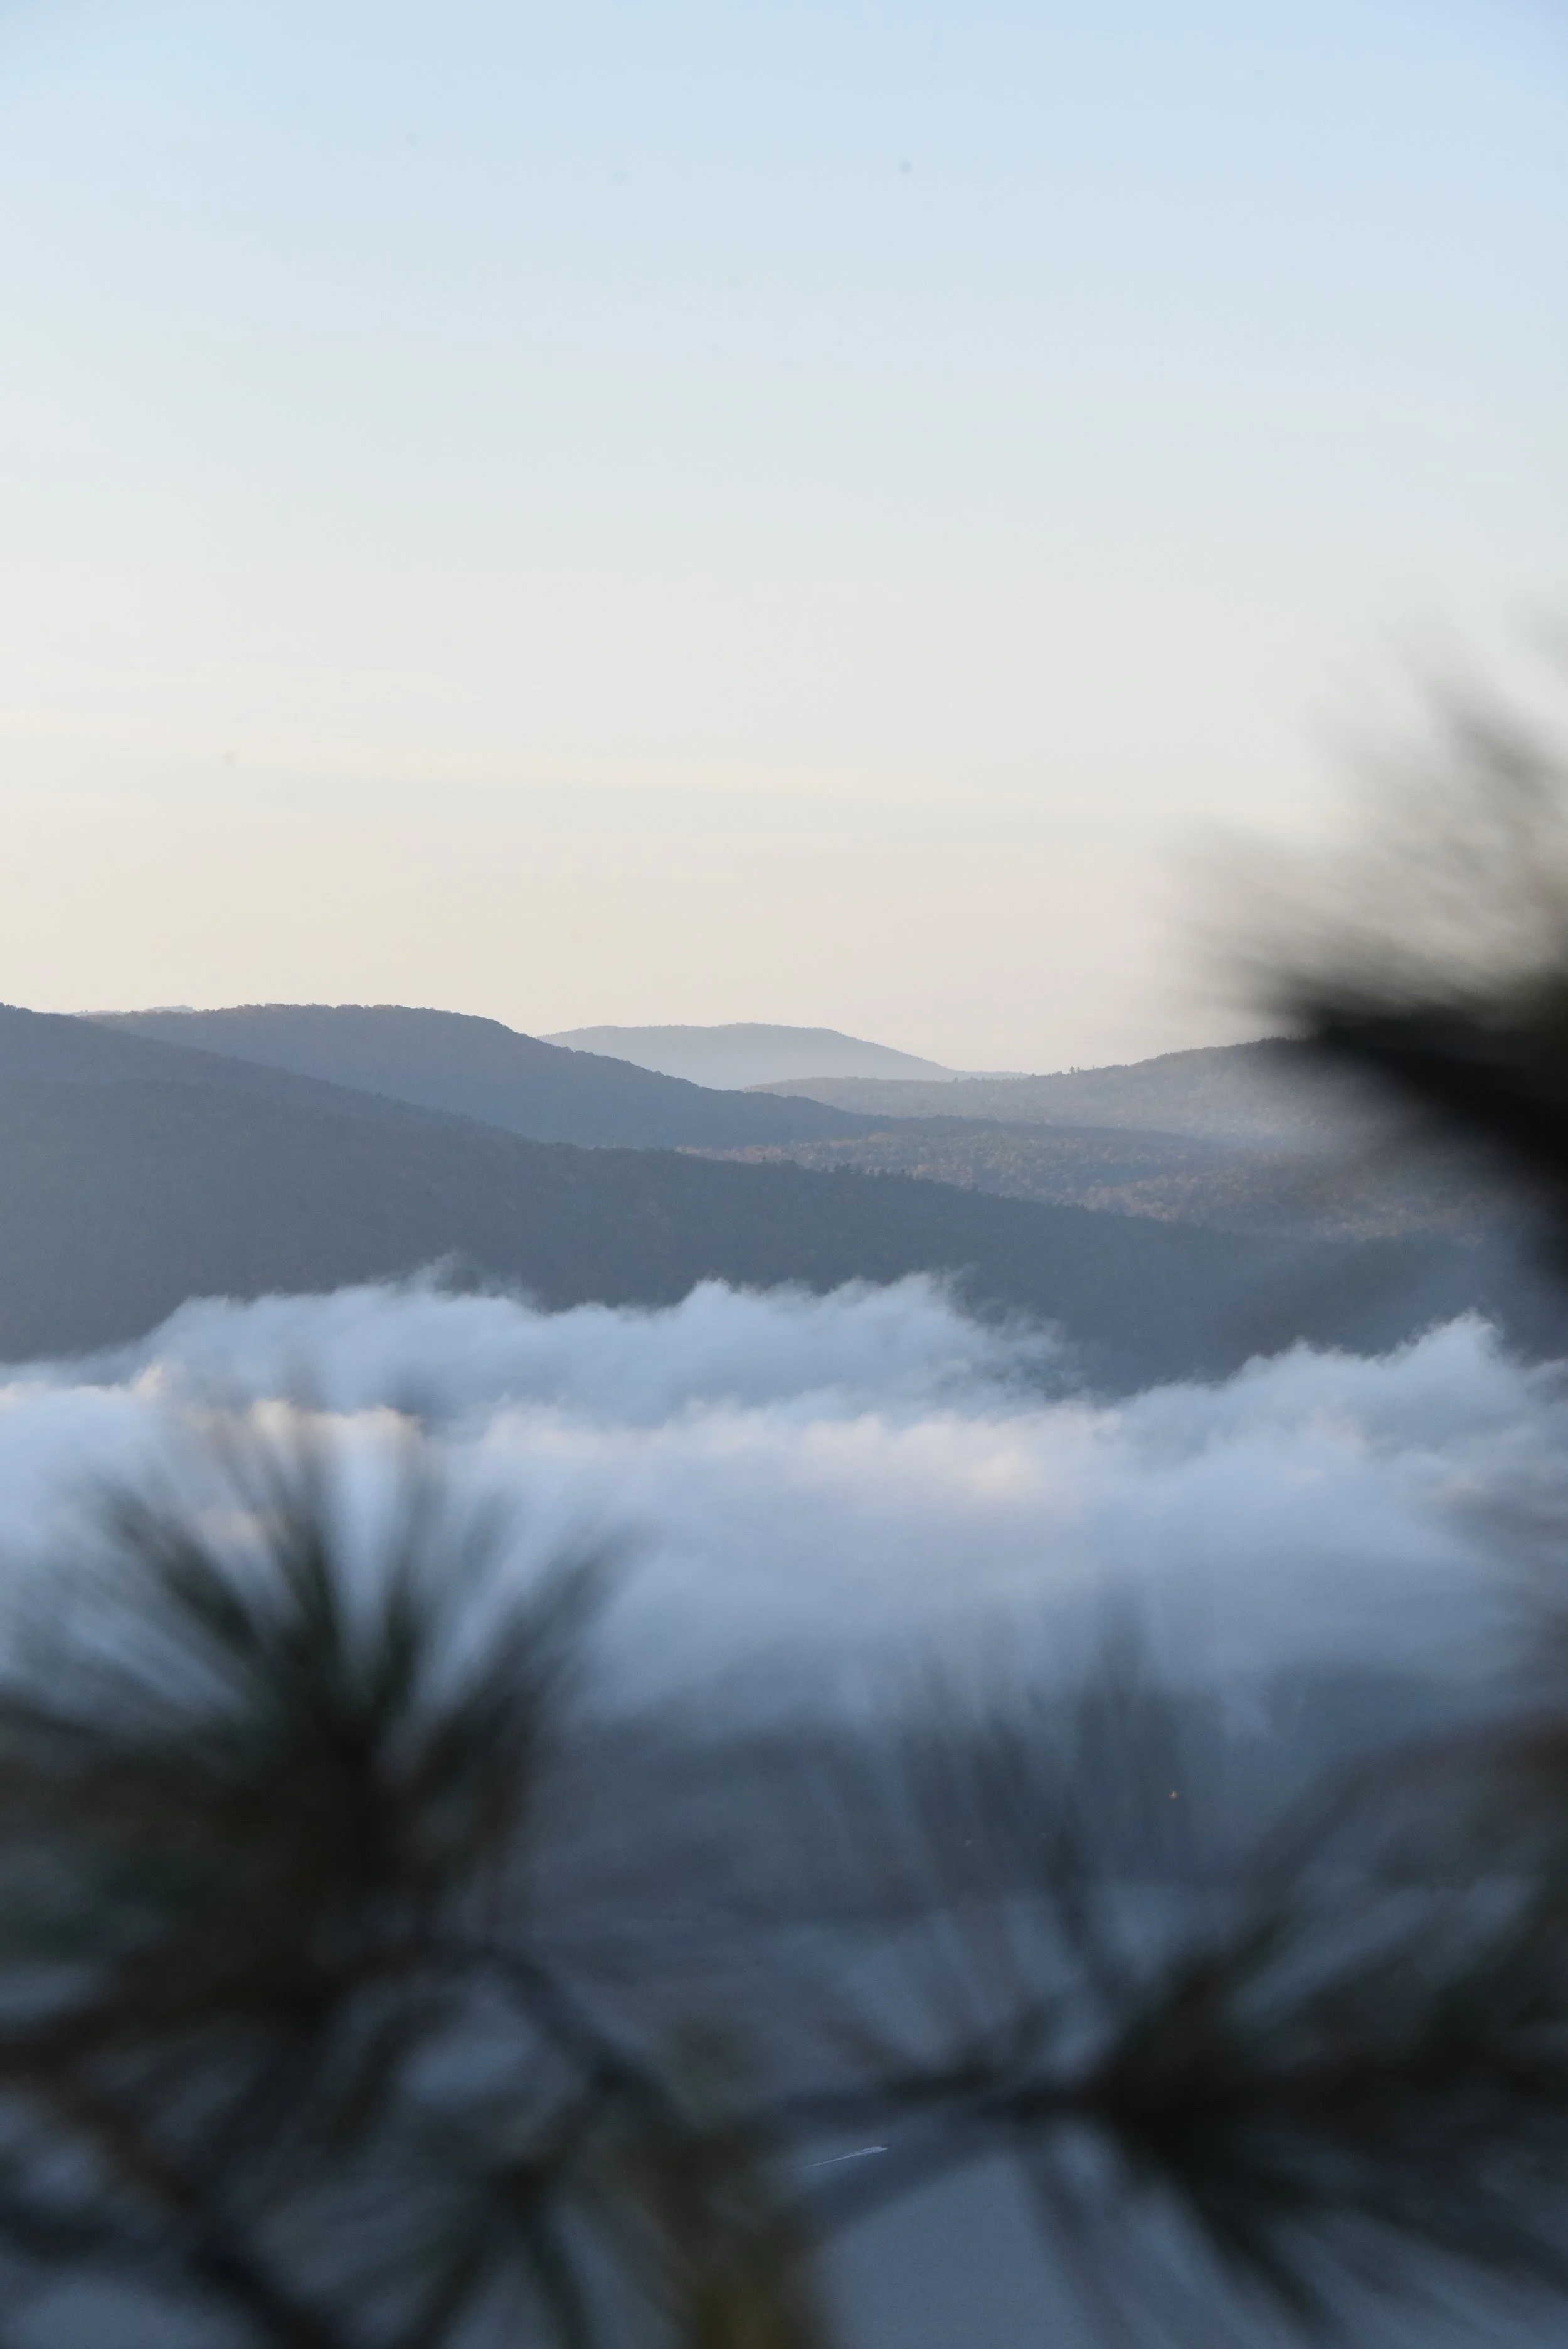
That’s why our first stop on the great big Alaskan adventure was the grocery store. After stocking up on chili, peanut butter and jelly, and tuna (among other goodies), we drove from Anchorage to Talkeetna, a tiny town with a lot of charm. We scored free parking at the Talkeetna Riverfront Park next to the town’s campground (if you see paid parking, keep driving to the end of the road). We stretched our legs, checked out a few shops, and continued to our final destination for the day: Denali.
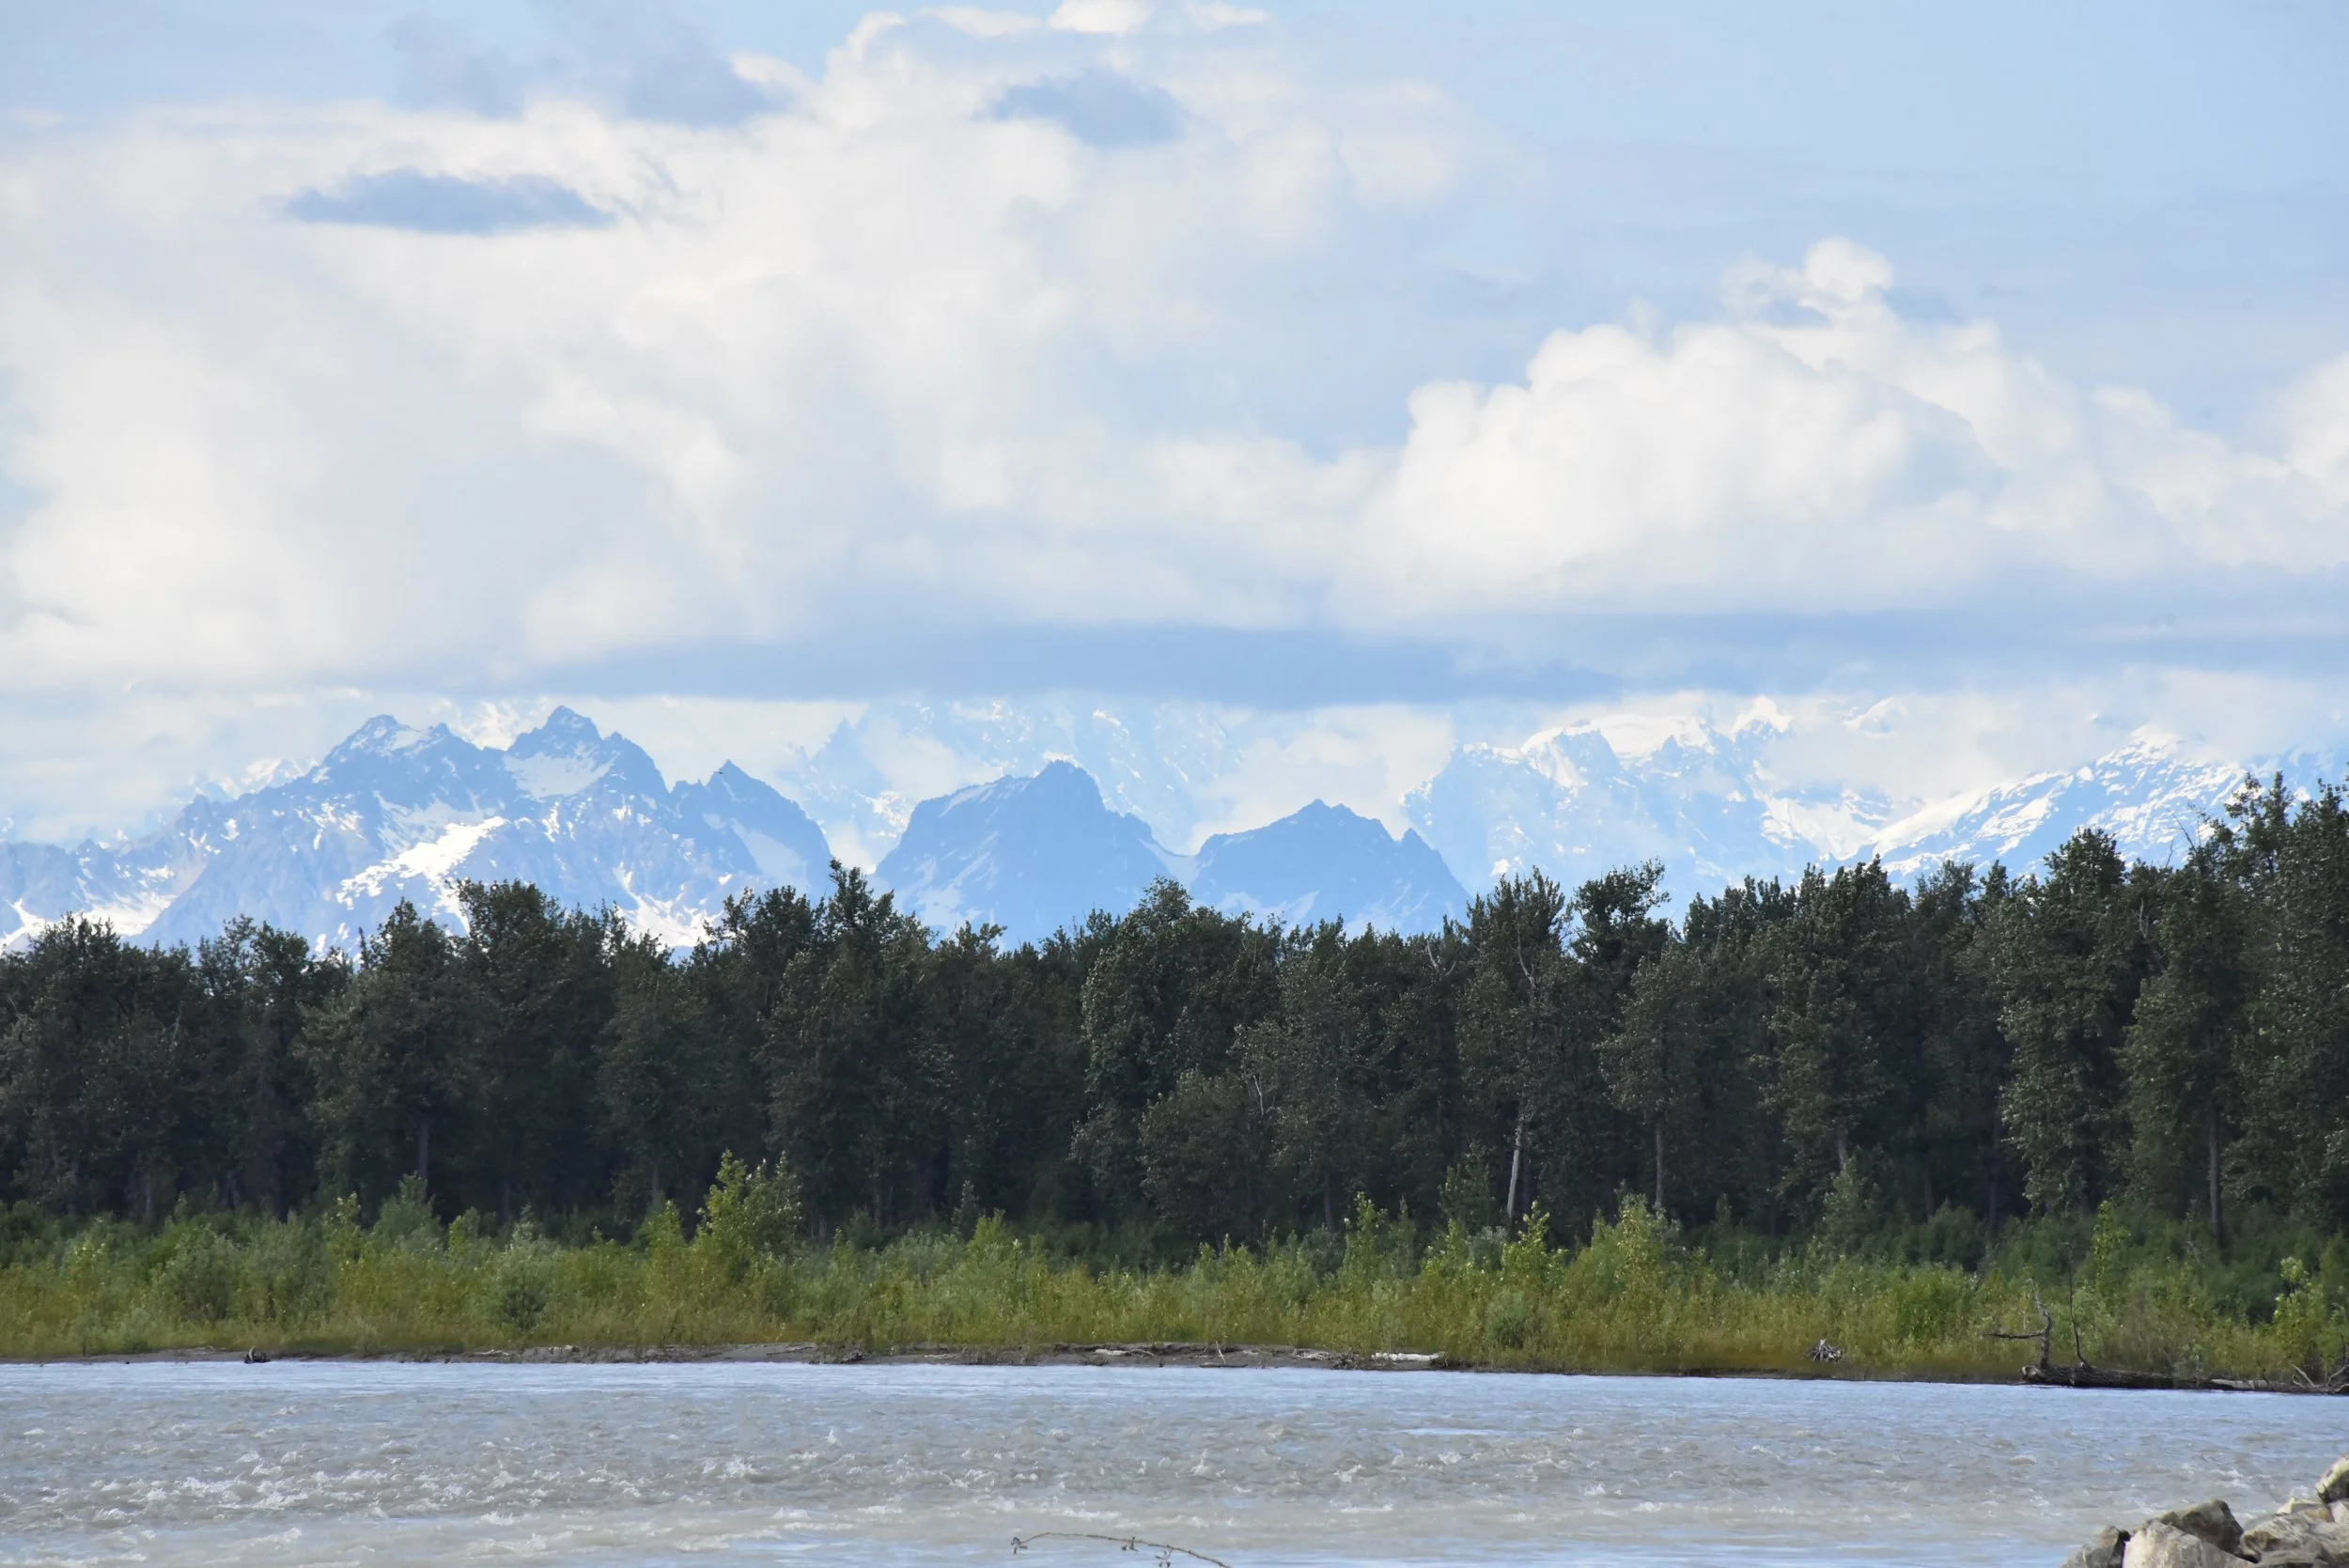
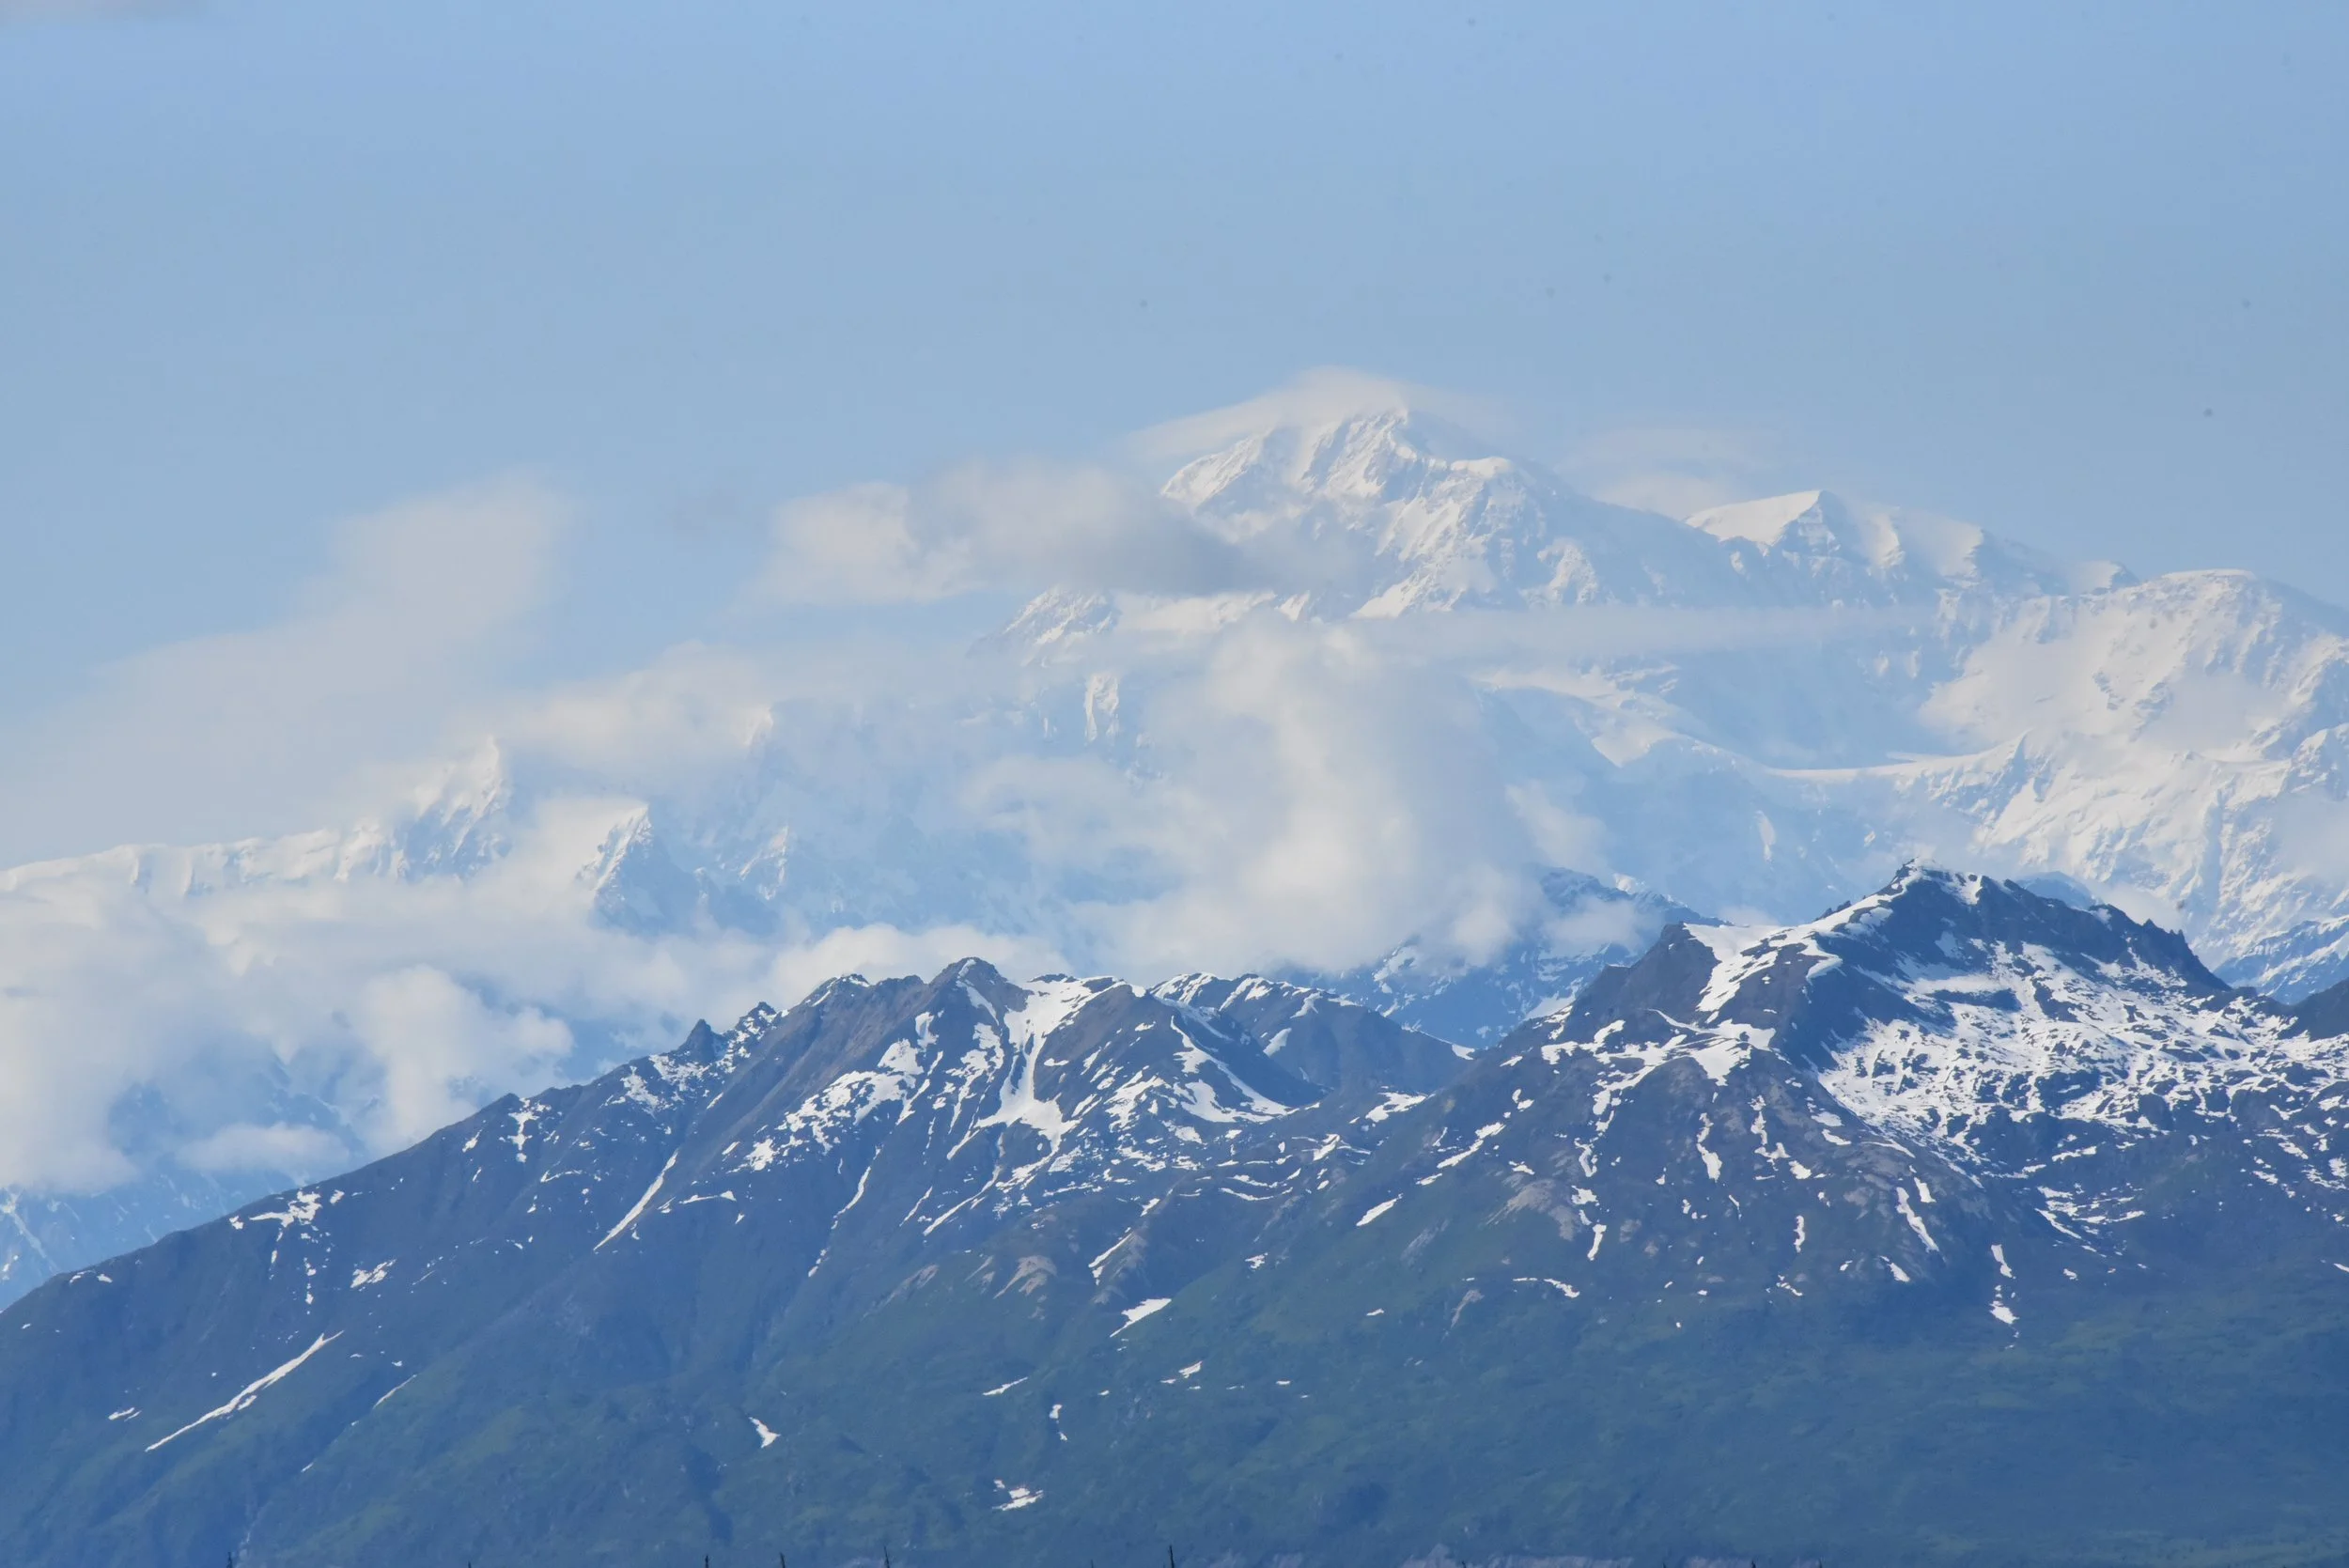
Talkeetna was a sweet stop where three rivers meet with a backdrop of Denali (though the pinnacle was covered for us, as seen in the first picture above). If I was short on time, I wouldn’t have made the stop. The superior stop is the Denali South Viewpoint when you’re almost inside Denali National Park. On a clear day, which we were fortunate to have, Denali in its entirety is visible. It is at mile 134 on the Parks Highway (the picture above on the right).
We called it a night at Denali Park Hotel and set our alarms for an early wake-up. Tomorrow, we’d dive into Denali.
Day 2 – Denali National Park
3:30 A.M. would typically feel early to me, but considering the sun sets in Denali after midnight, and rises before 3 A.M., it felt like no time passed. We headed into the park for our bus ride.
Denali is incredibly unique in that the singular road, Denali Park Road, spans 92 miles from the entrance to the end of the accessible part of the park. However, the Pretty Rocks landslide a few years ago (at mile 45) cut off access to the latter portion of the road. Nevertheless, Denali is still worth the visit. After debating between paying for a narrated bus or the transit bus, I opted for the latter— the East Fork transit bus. Both buses depart around the same time and travel the same distance. The Denali Tundra Wilderness bus costs $144.50 per person and the East Fork transit costs $33.50 per person. Our driver stopped for wildlife, restroom breaks, and my occasional urge to photograph the landscape I couldn’t get enough of.

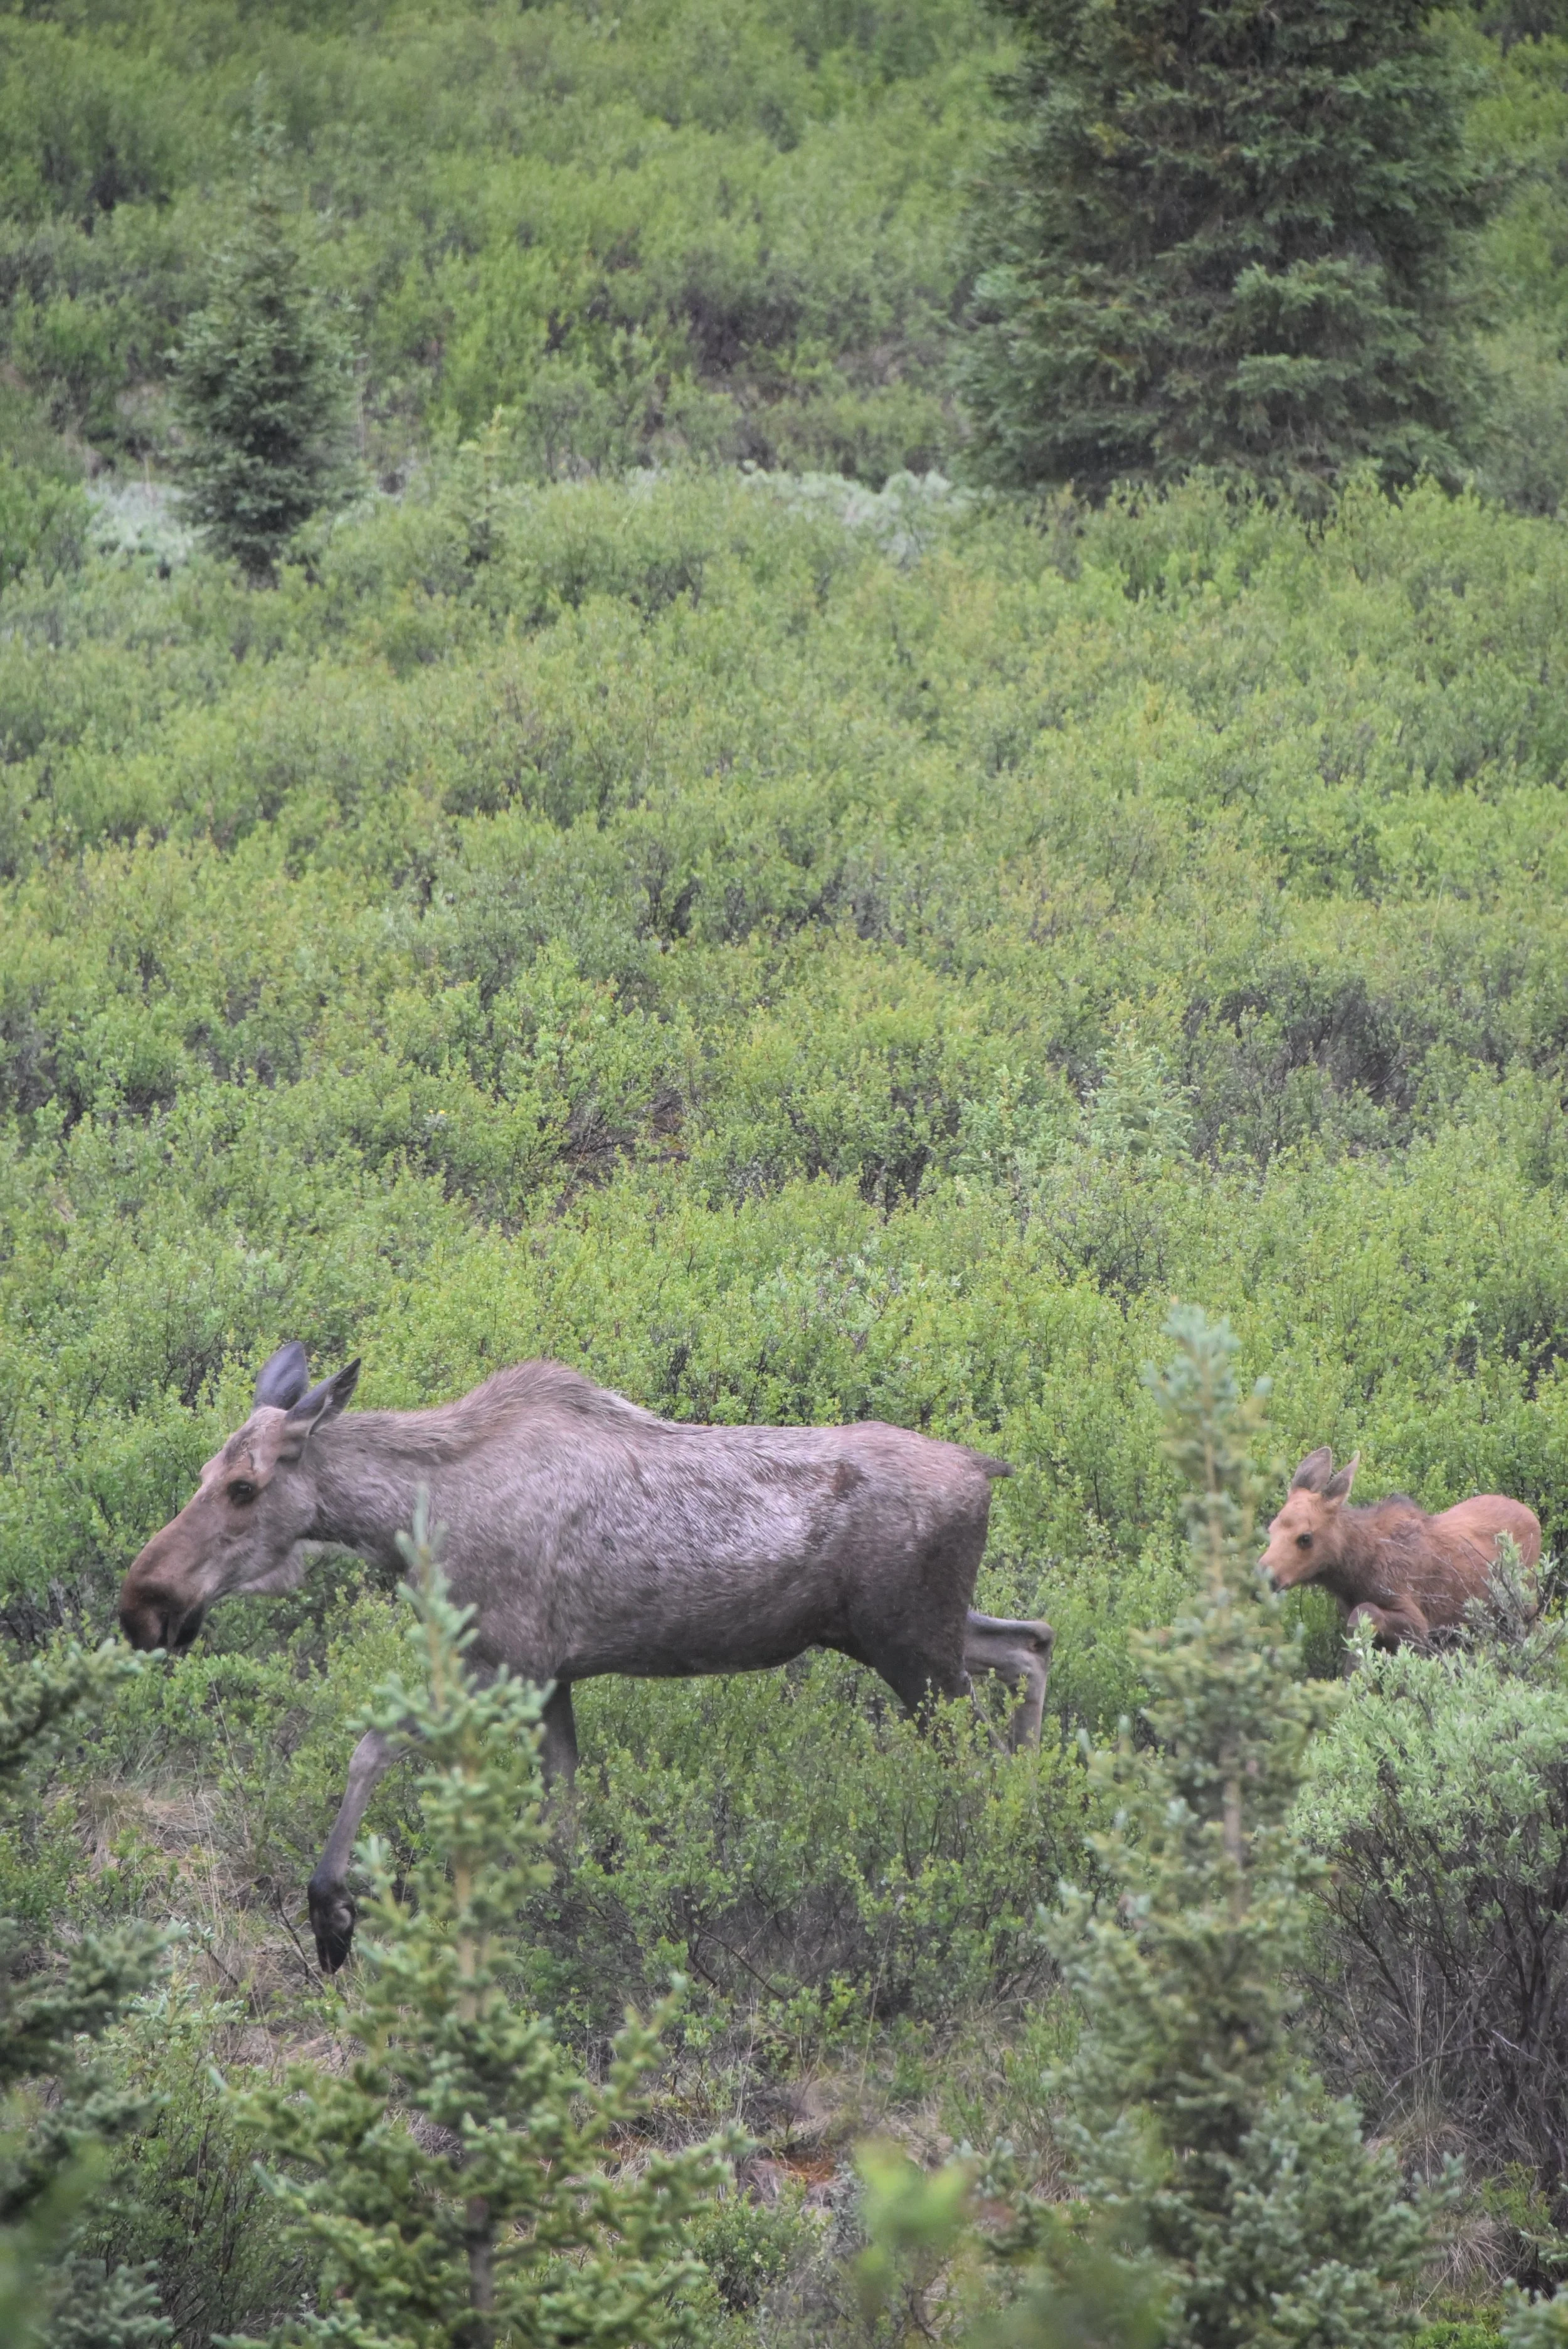
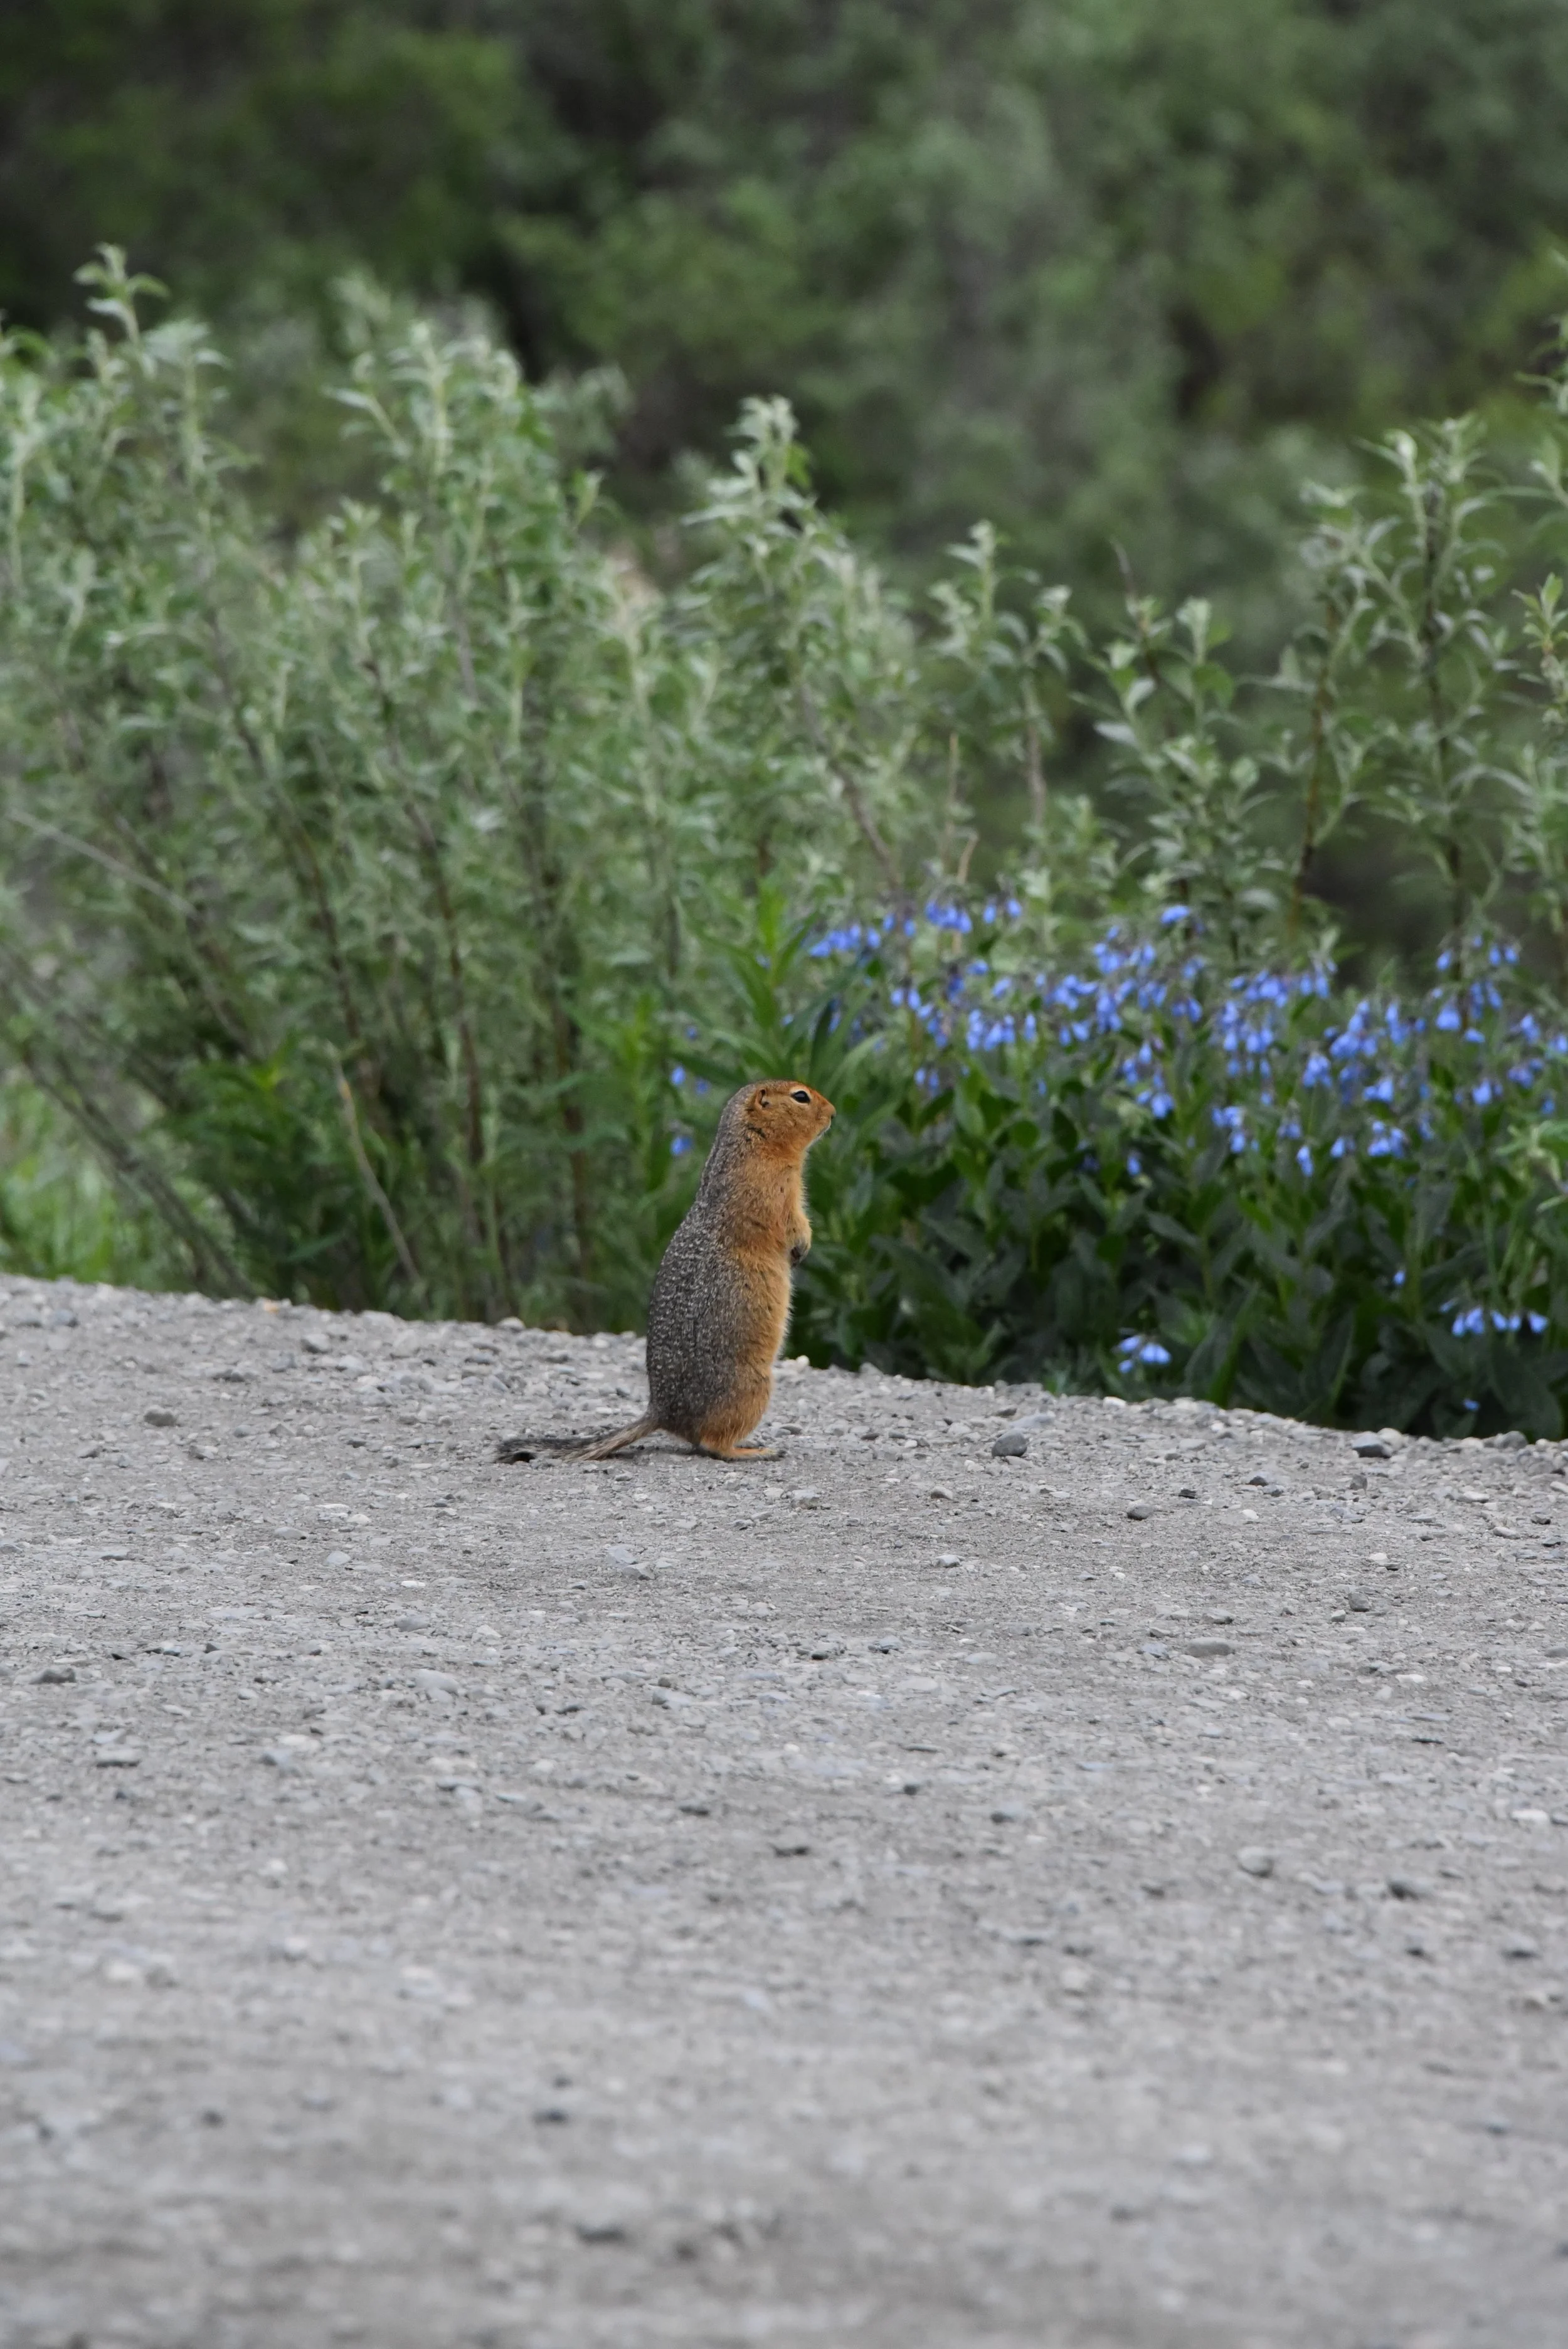


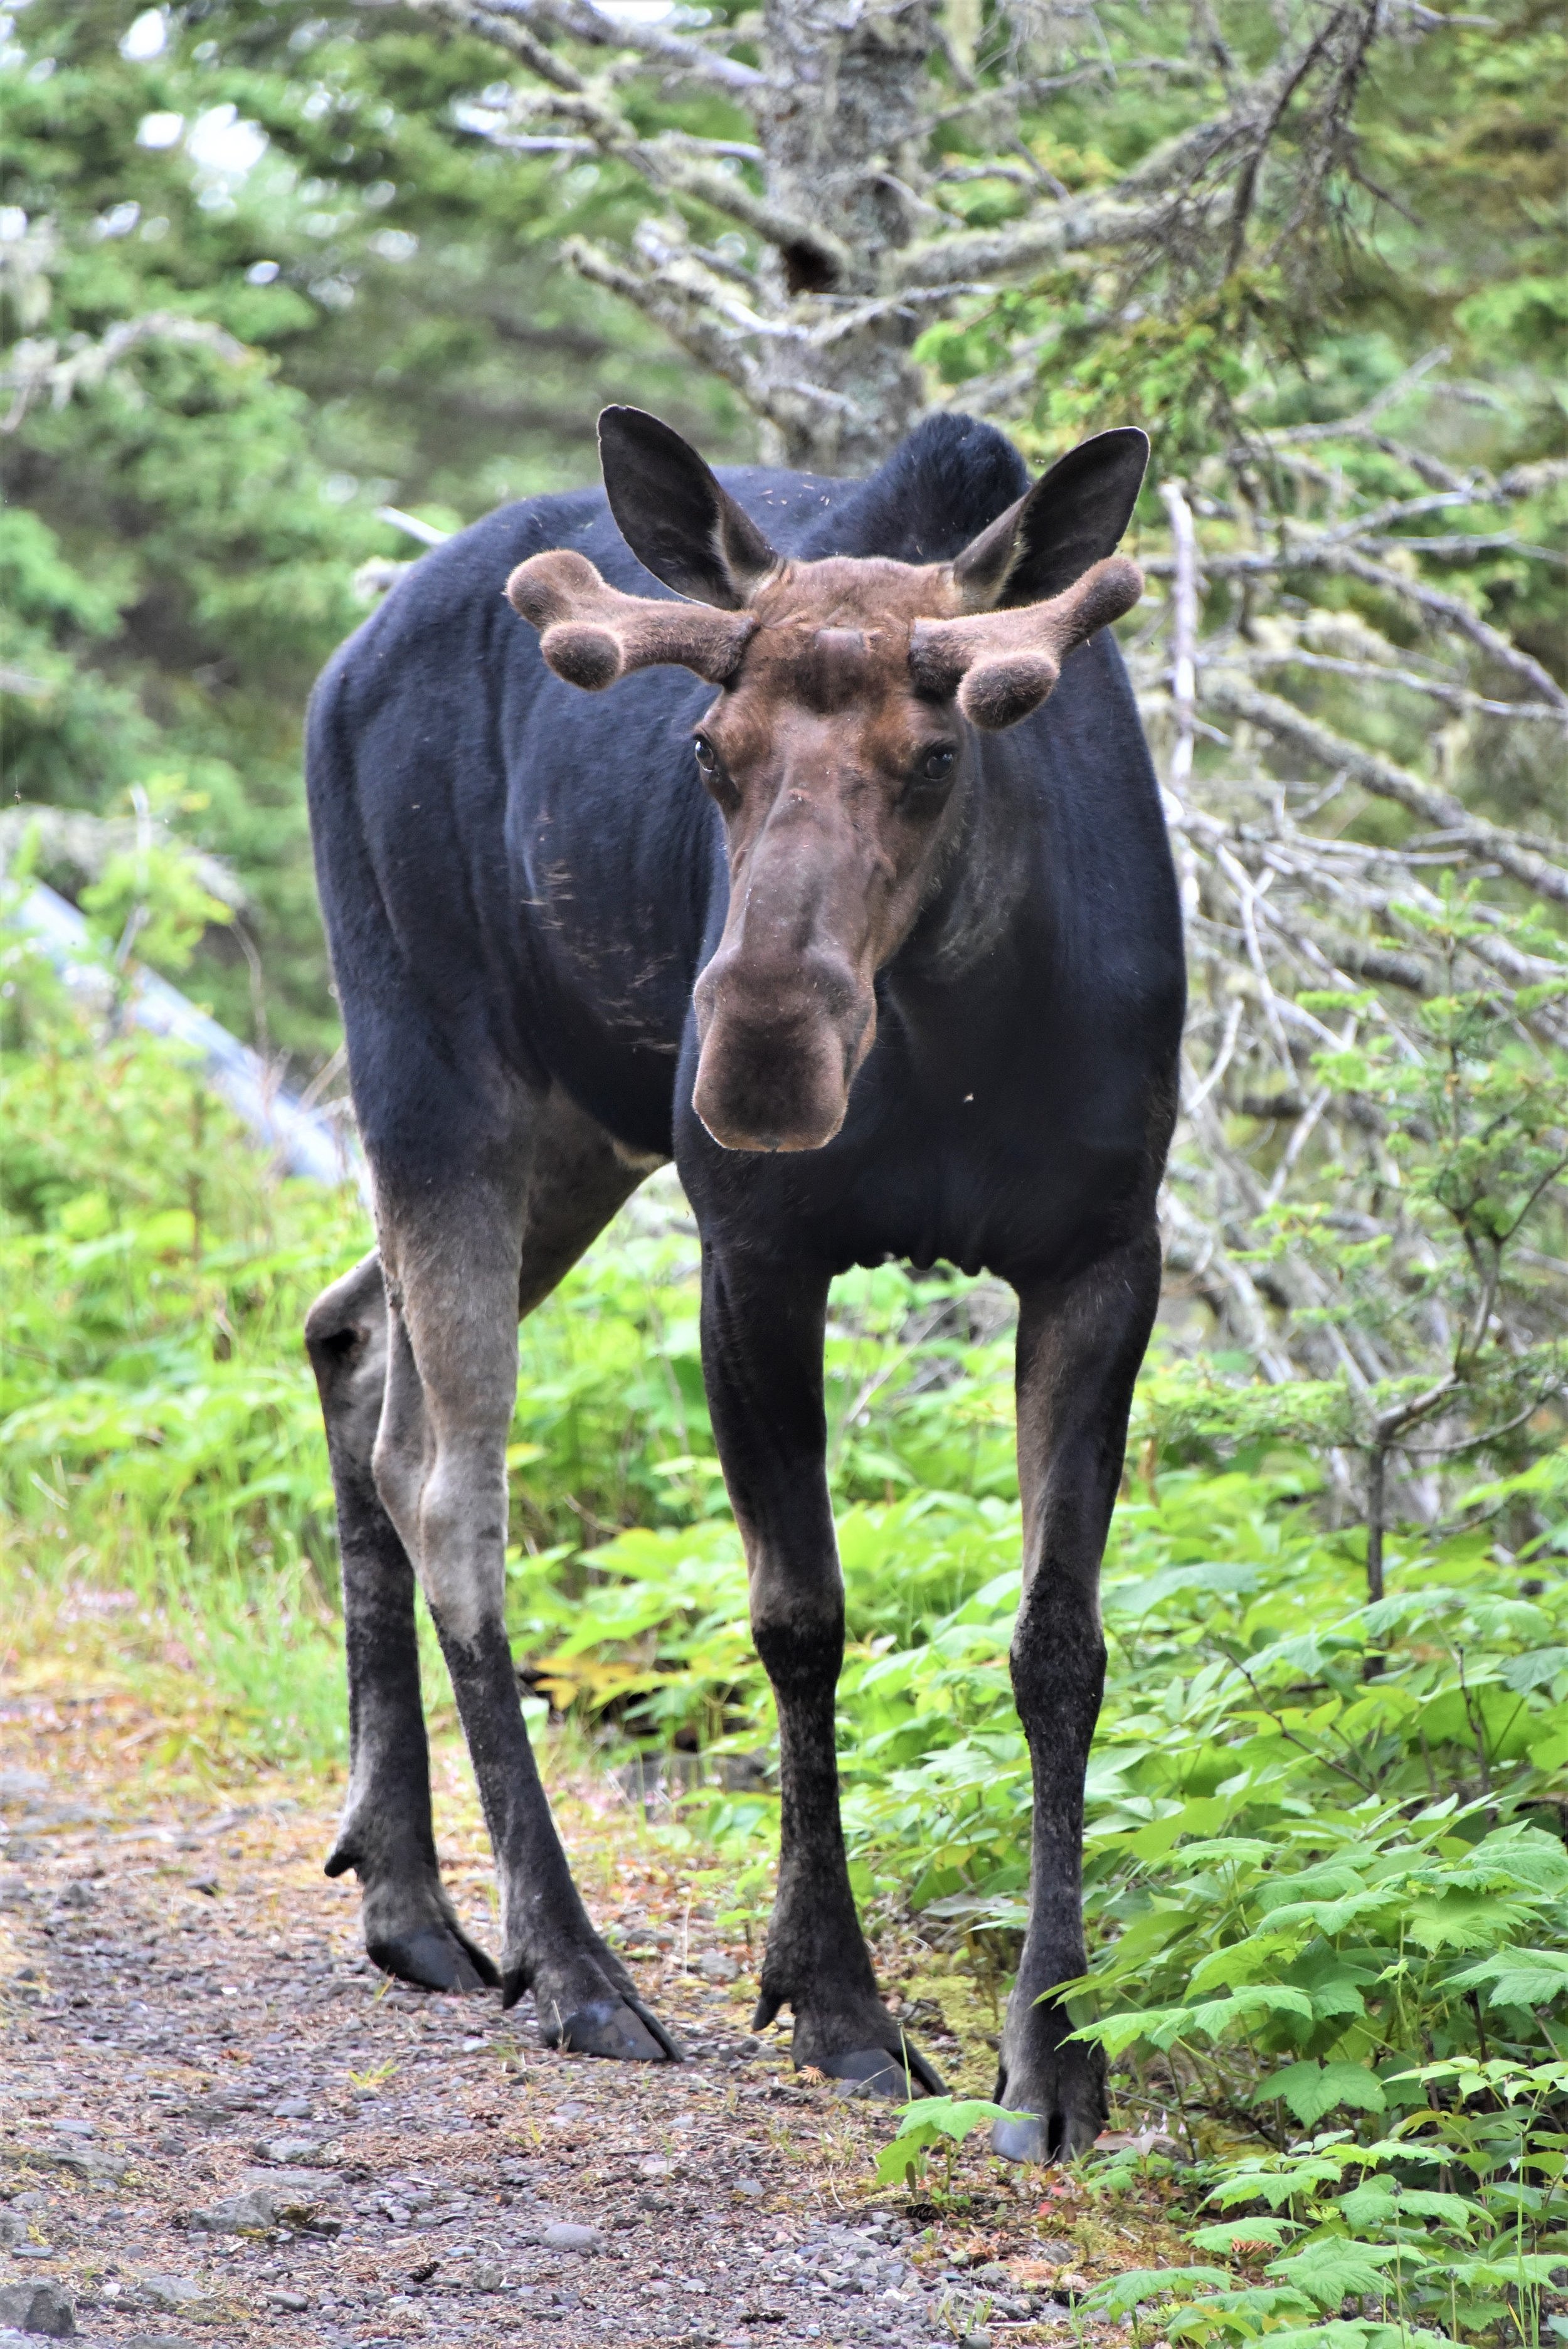
I didn’t have high hopes for Denali given the road closure and the hype it gets in the lower 48, but the wildlife was abundant. We saw Dall sheep (from a distance), caribou, alpine ground squirrels, and moose, of course. The highlight was a meandering moose and her calf. After our drive through the park, we felt we experienced Denali and were ready to embark on the next adventure. The long days of sunlight make for smooth long distance driving as we made it to Copper Center for the night.
Day 3 – Copper Center to McCarthy
This part of the trip was the trickiest to navigate. Thankfully, the guides at St. Elias also double as travel agents. At least that’s what it felt like it with how helpful their staff was in ensuring I could make this trip to Wrangell-St. Elias National Park happen in a very limited timeframe.
The tough part is the travel. Rental car companies (aside from local Alaskan ones) ban both the “quick” way from Denali to McCarthy (via the Denali Highway) and the McCarthy Road. Both are unmaintained gravel roads. Though many drive on these roads and have no issues, all it takes is one flat tire with no phone service to make a trip memorable. And not in a good way.
I booked a shuttle service from Copper Center to McCarthy through Kennicott Shuttle for $169 per person (for the roundtrip on two different days). A slightly hefty cost for a substantial peace of mind. The three-hour drive stops twice for a restroom break and offers an opportunity to be behind the camera on a drive, instead of behind the wheel.


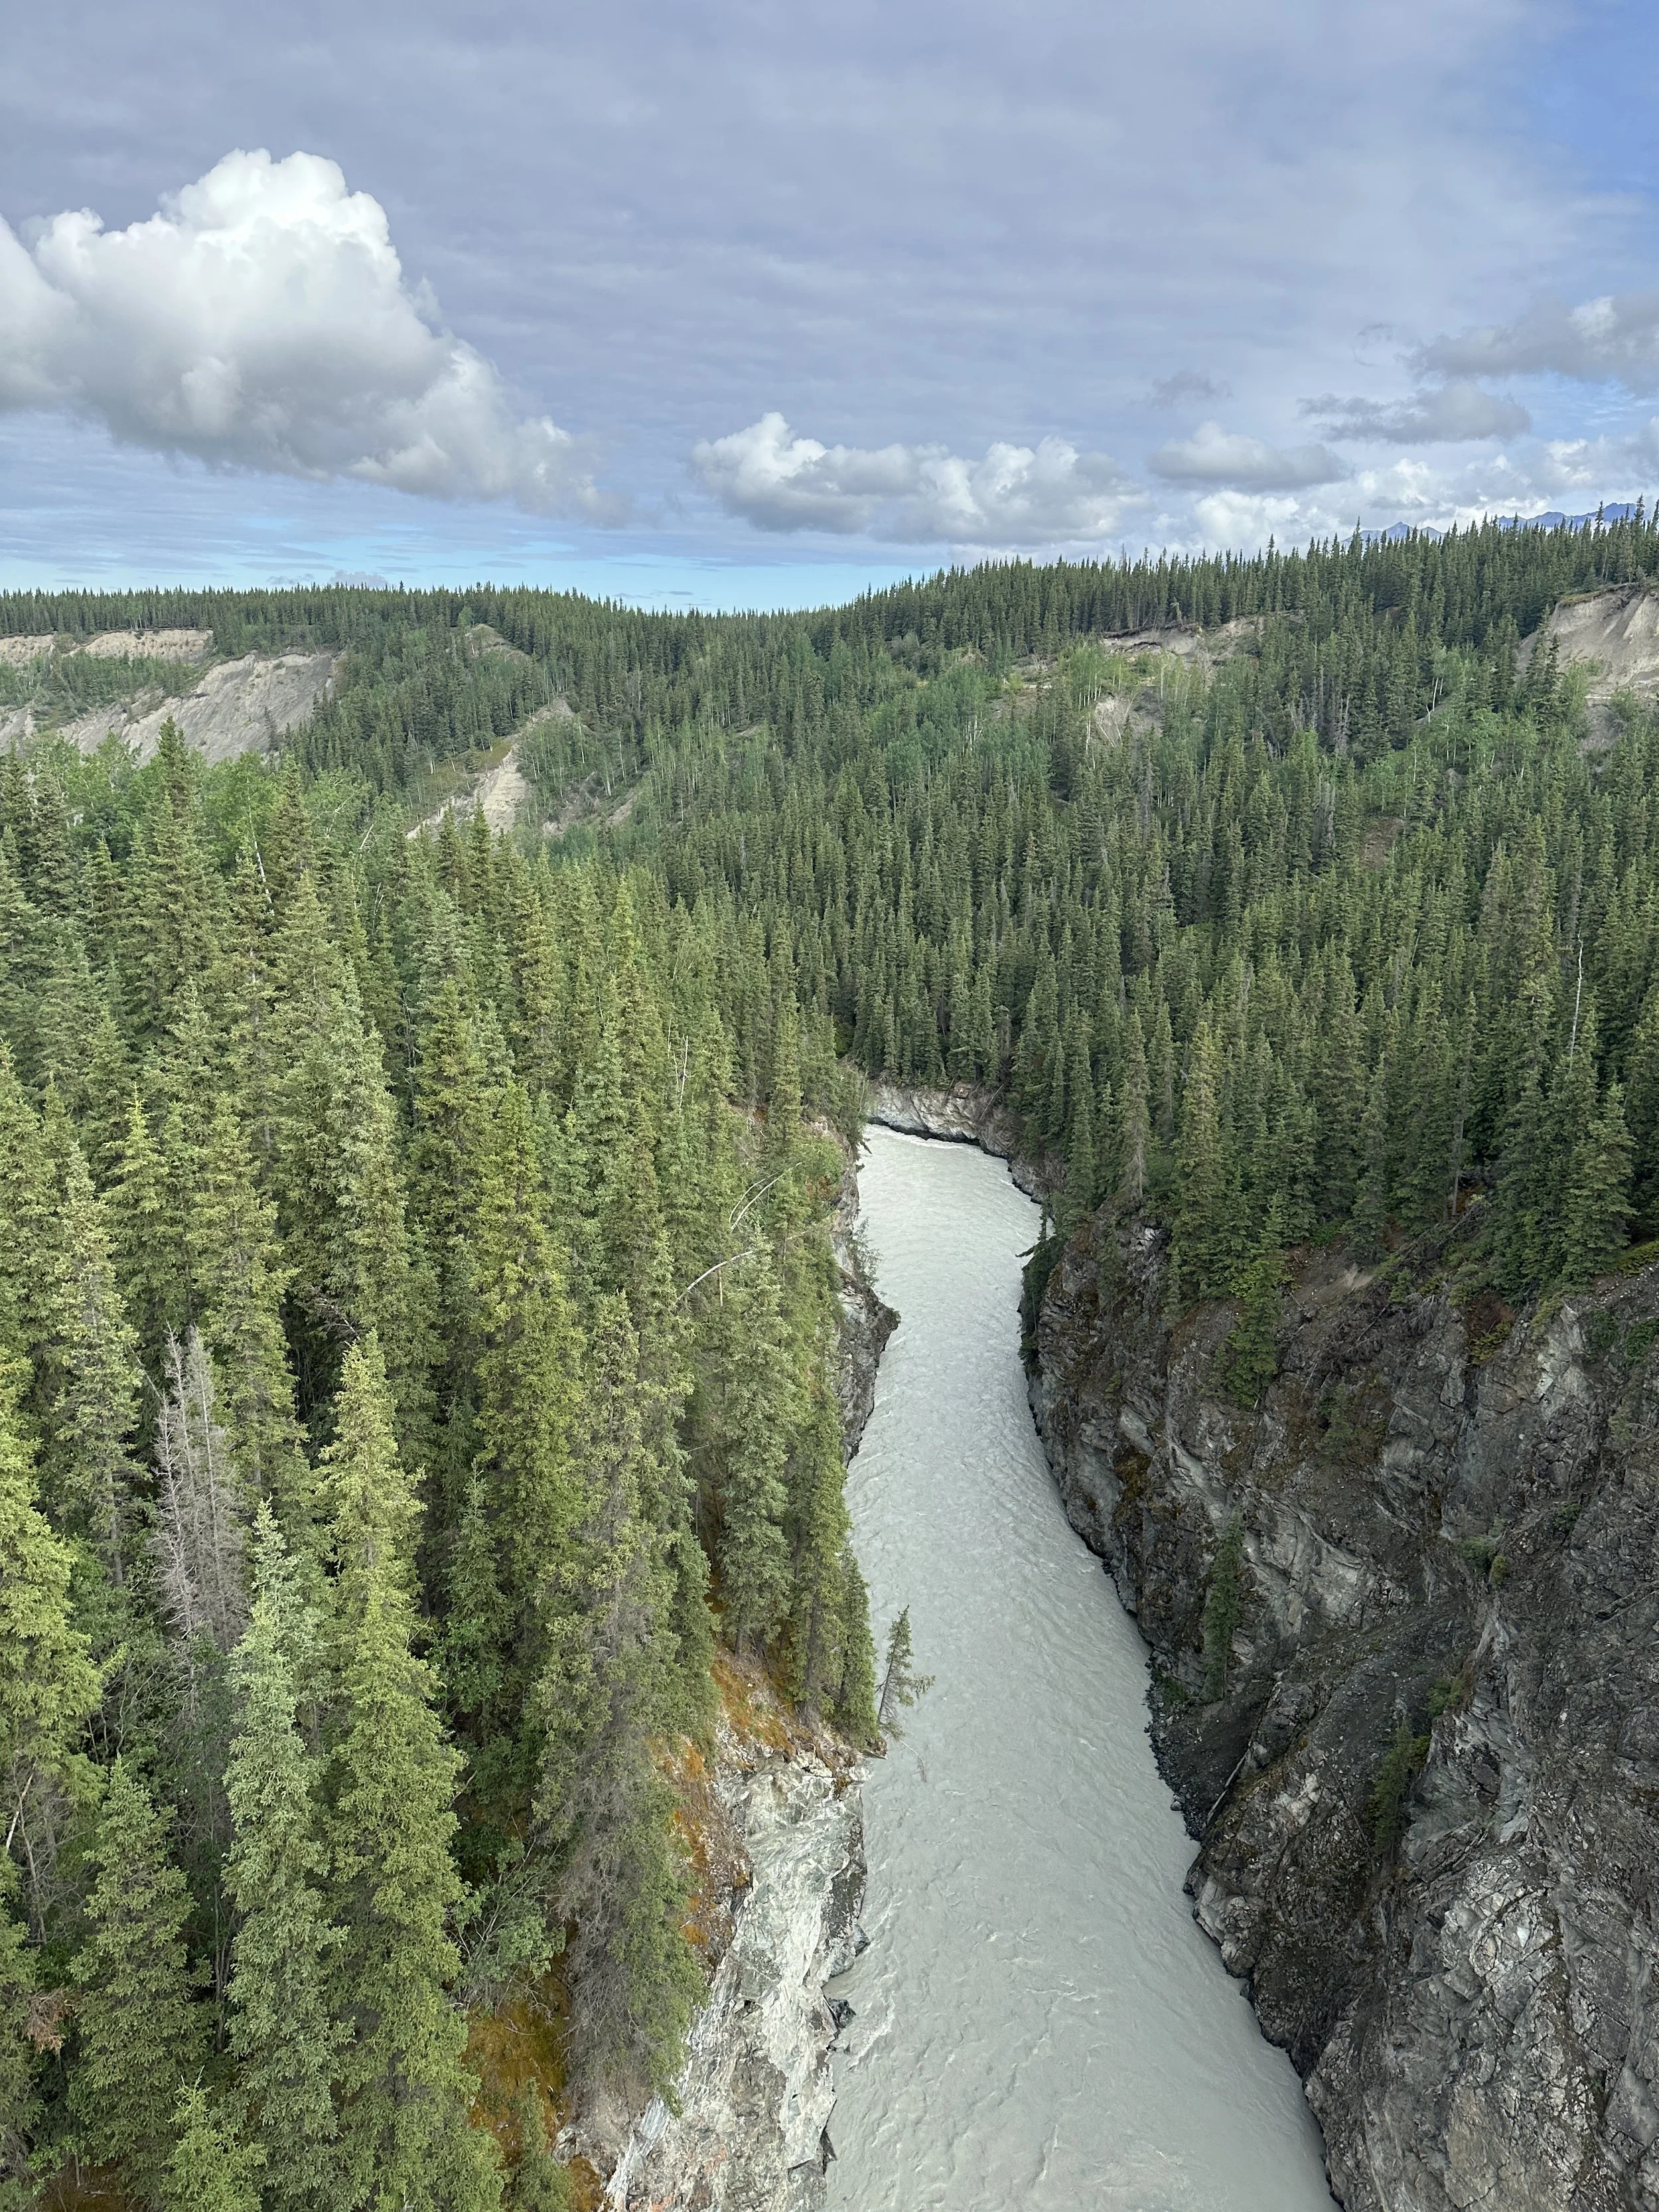
After the journey along the 60-mile gravel road, and a brief stop at the famous Kuskulana bridge, we made it to the footbridge to McCarthy. There's a free payphone to contact the owners of your stays, but the lovely owner of Blackburn Cabins was waiting for our arrival at the end of the bridge. A short drive later, we were at our remote cabin. Mere steps outside the cabin is a trail that leads to what is known as the Toe of the Glacier. We had this spot entirely to ourselves. It was our first experience with glacial calving, and not our last on this trip.


We sat in awe of the glacier that we’d been setting foot on the following day. Afterwards, we ate lunch at The Potato. One extremely satisfying chicken fajita pita devoured later, and I was ready for a hot outdoor shower and rest.
Day 4 – Wrangell-St. Elias National Park
St. Elias Guides bookings include a shuttle pick-up from Blackburn Cabins. We hopped in a van and were fitted for crampons shortly after at their home base in Kennicott. Kennicott is an old mining town and also the start of the trek to the Root Glacier trail. This is the easiest accessible glacier to hike and is completely worth the journey to get there.


After an easy hike to the base of Root Glacier, we put our crampons on before the big moment. Though I feel confident I could have done this without a guide, I would still go with a guide for the knowledge they have. Our guide knew where to find neat spots like blue pools and other gems I wouldn't have found alone. As America’s largest national park, my four-mile hike barely scratched the surface. I already want to go back to ice climb or hike into ice caves... both of which St. Elias Guides offer!

Root Glacier from the dirt trail.
We shuttled back to Copper Center that evening, and while we waited, we met a couple who drove the McCarthy Road and were returning from their Kennicott trip like us. I started to regret paying for the shuttle because it would have been so much nicer to hop in the car on our own schedule, but they returned from their car to tell us they had a flat tire. In one of the most remote corners of Alaska. Another spot where I had no cell signal (as it turns out, T-Mobile has no towers in the entire state of Alaska). Though they had what they needed to replace their tire, it made me grateful for the shuttle route.
Day 5 – Copper Center to Seward
We were back on the road after returning to Copper Center for the night. The best part about a road trip is the random stops along the way to the destination. We left an isolated part of Alaska for a more populated one. A coastal rainforest. I did not realize that type of terrain existed in Alaska. It’s one of the rainier regions of Alaska. It felt like the Pacific Northwest. Like I was back in Seattle wondering when the sun would come out. Or if it ever does.
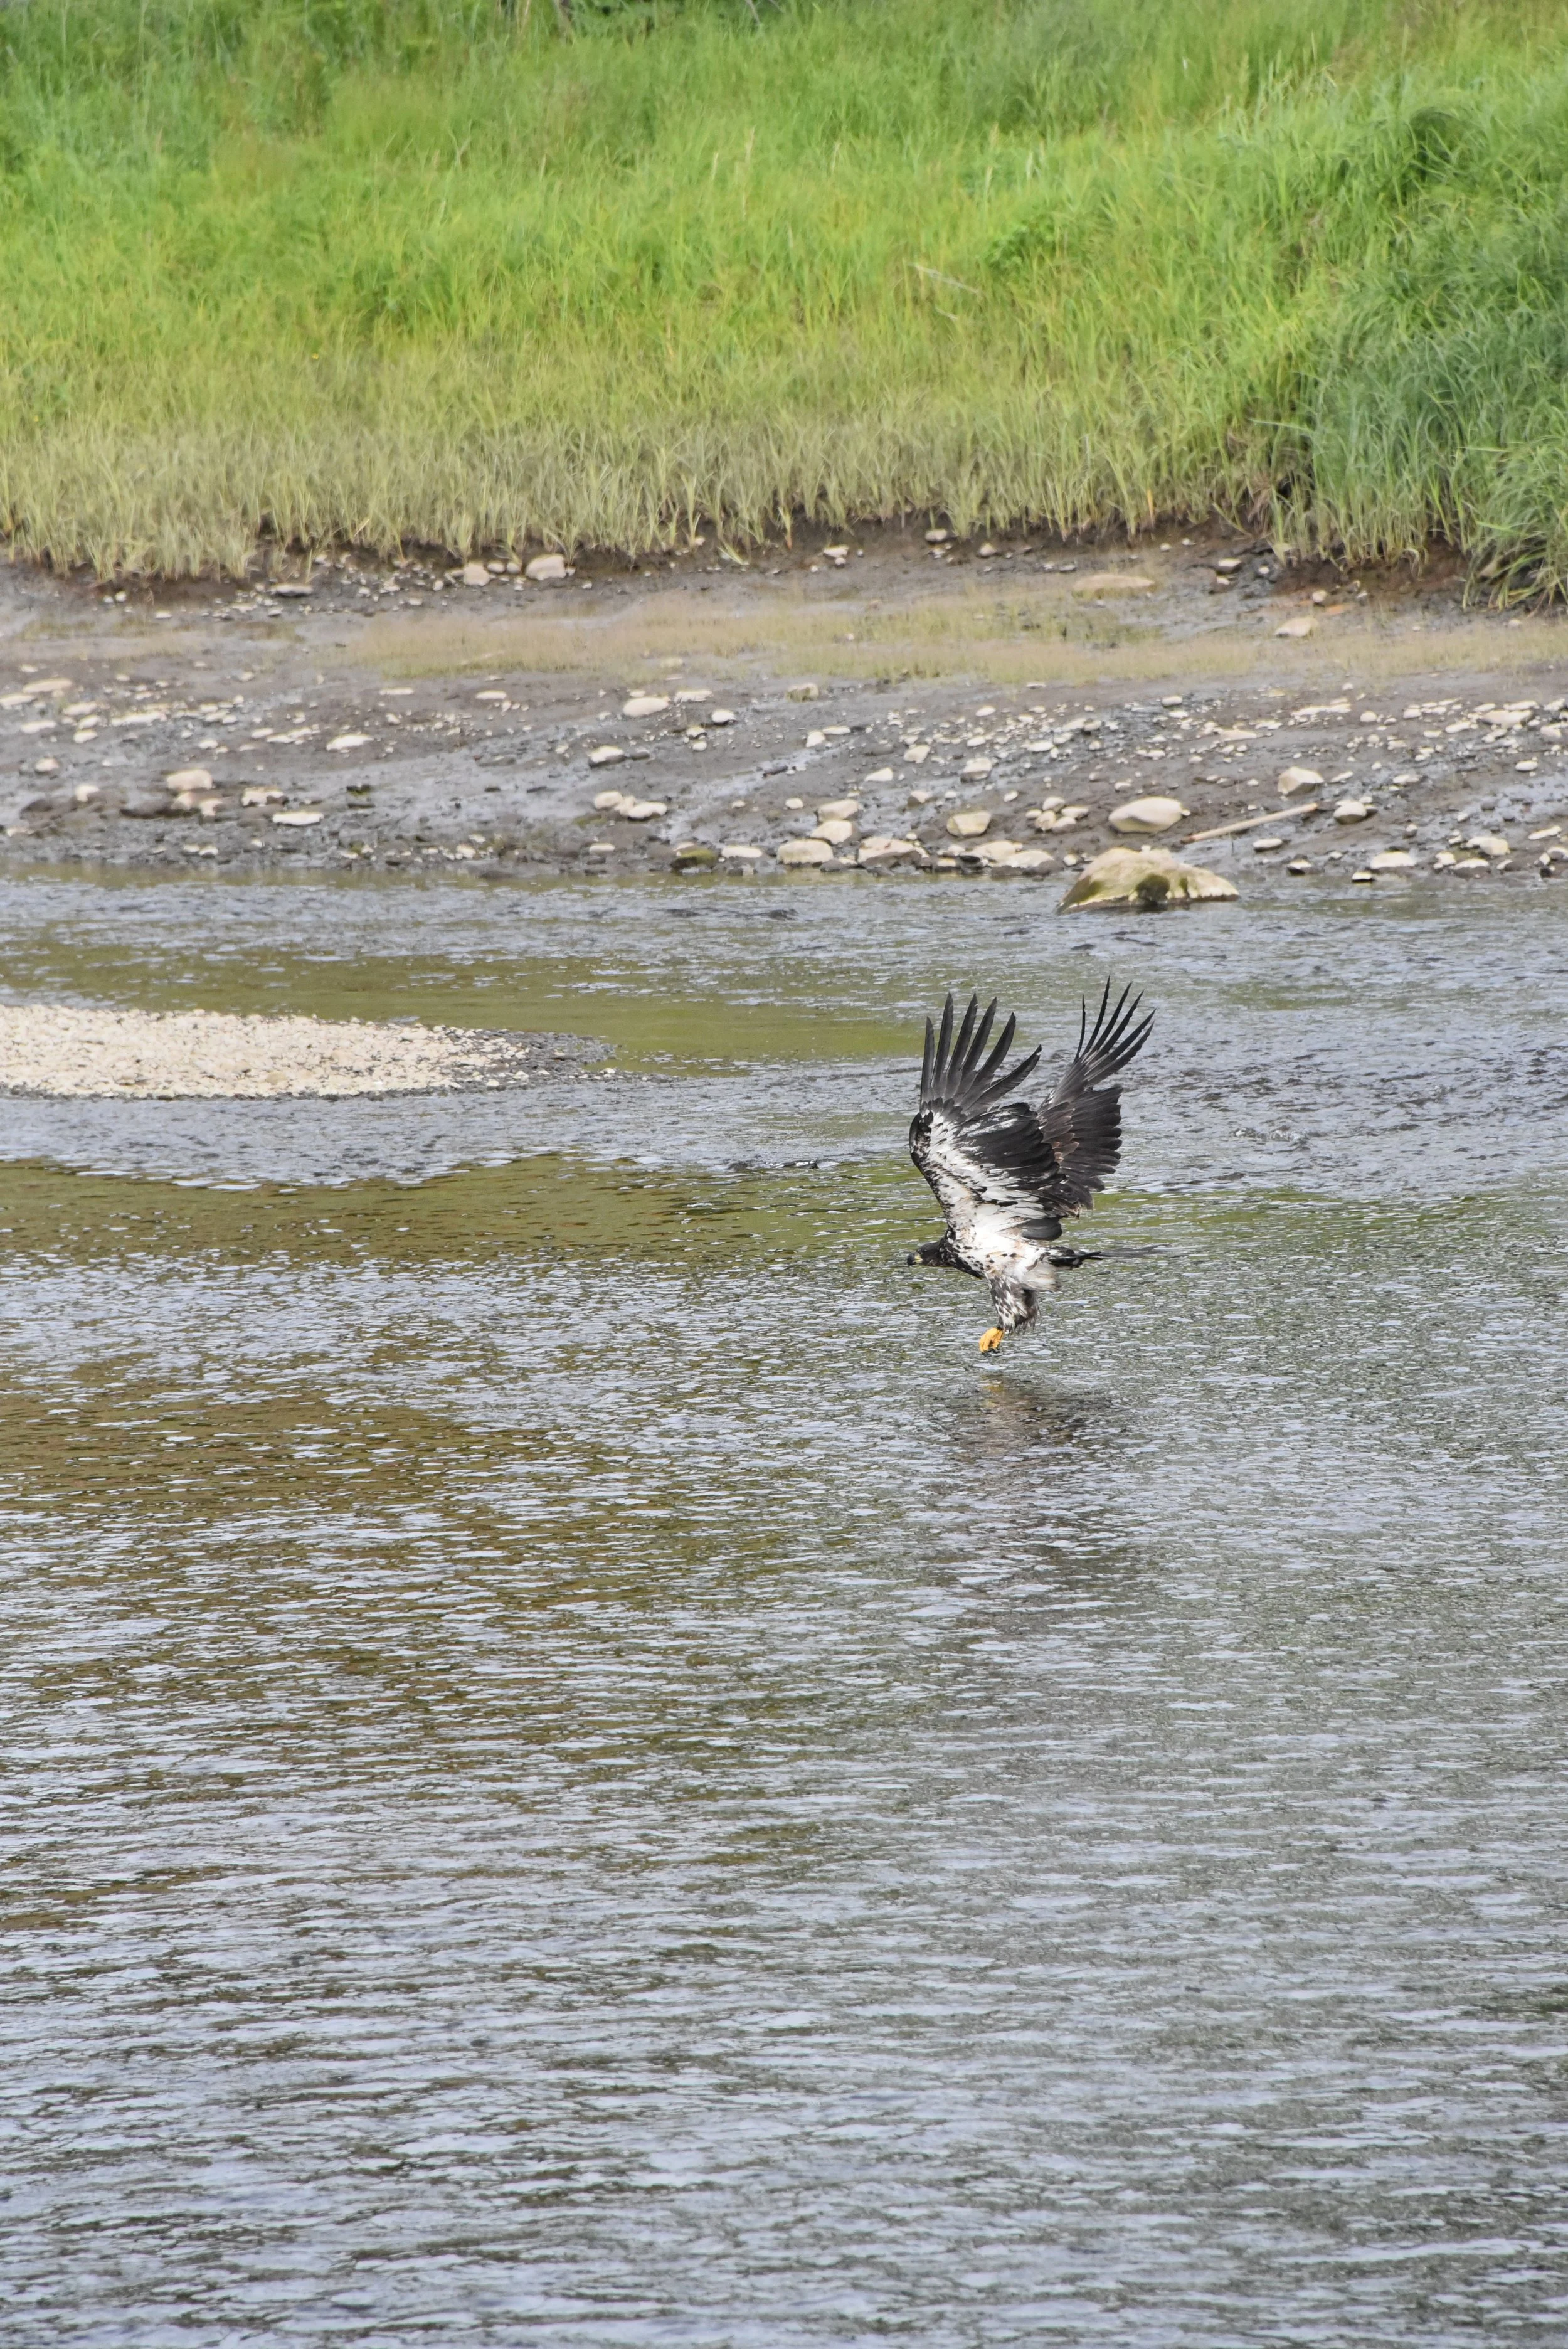
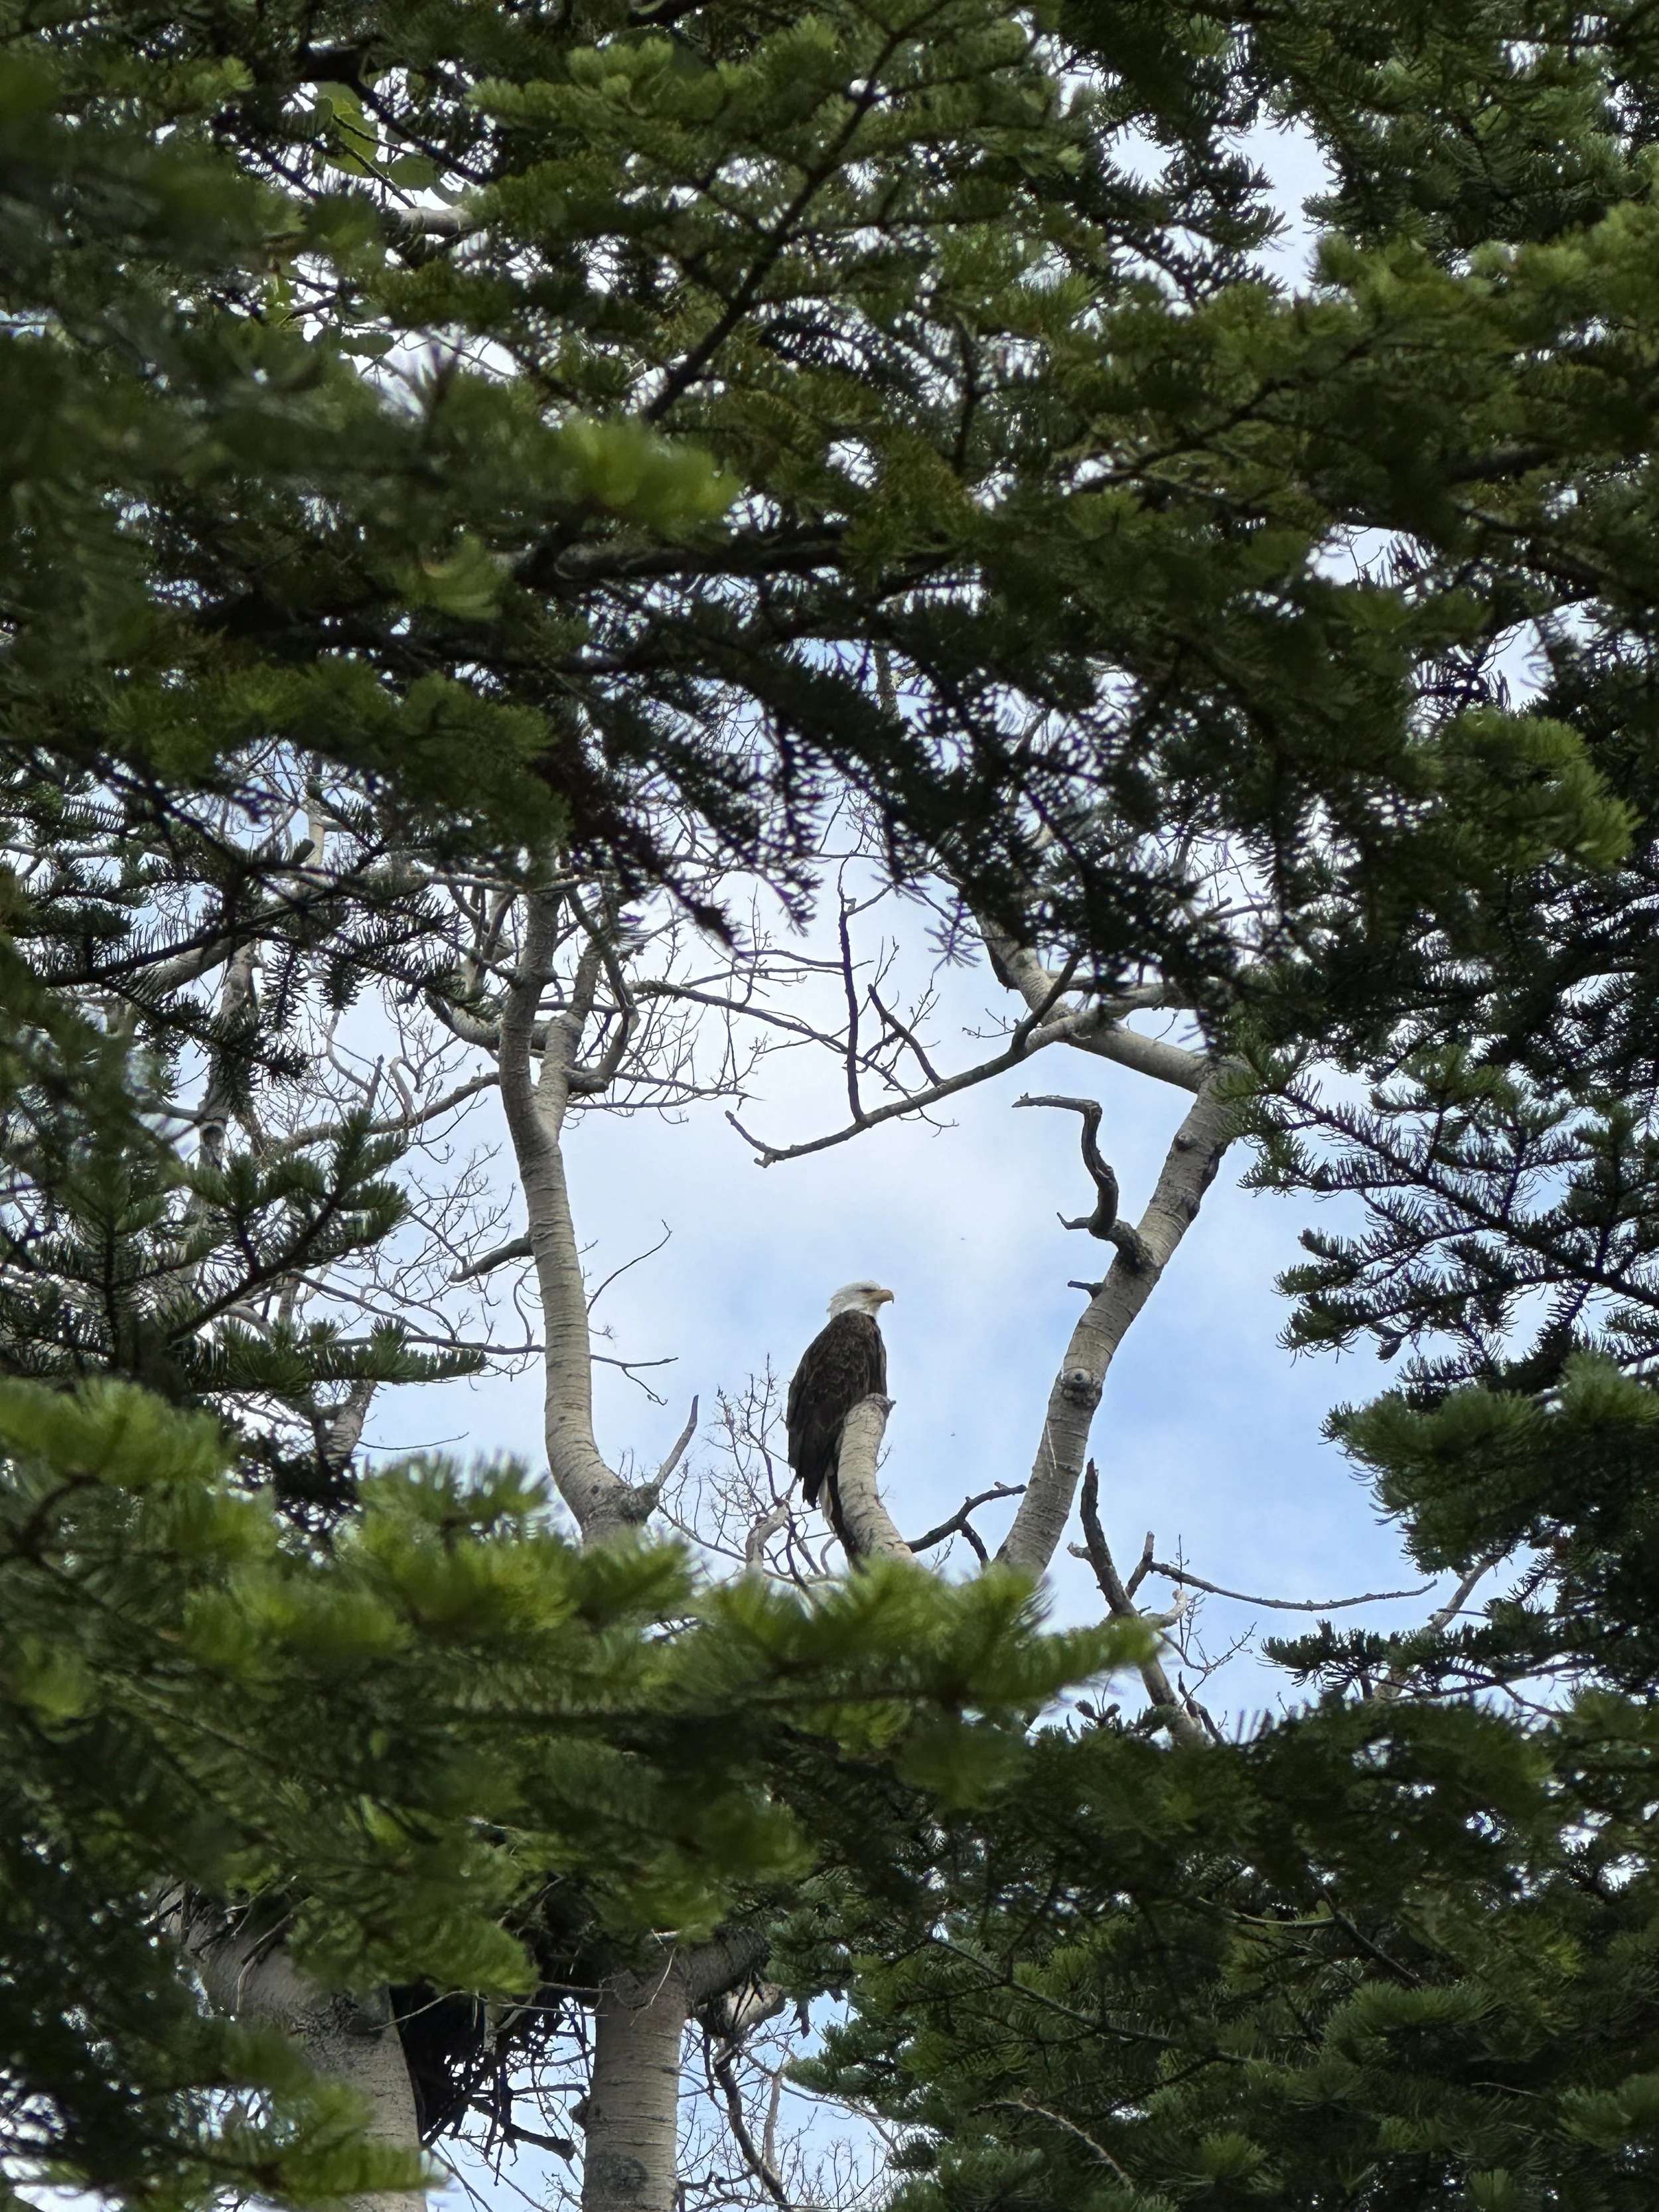
We weren’t even settled into our campground before we were immediately informed by a fellow camper that a bald eagle landed atop a tree branch directly above our cabin. The eagle’s home was actually diagonal to our cabin, with two eaglets inside. No doubt a good start to this leg of the trip.
Day 6 – Seward
A day to ease into coastal rainforest life. We ate, shopped, explored, and tried to embrace the dreary climate. We also saw more eagles. So many eagles.
Day 7 – Kenai Fjords National Park
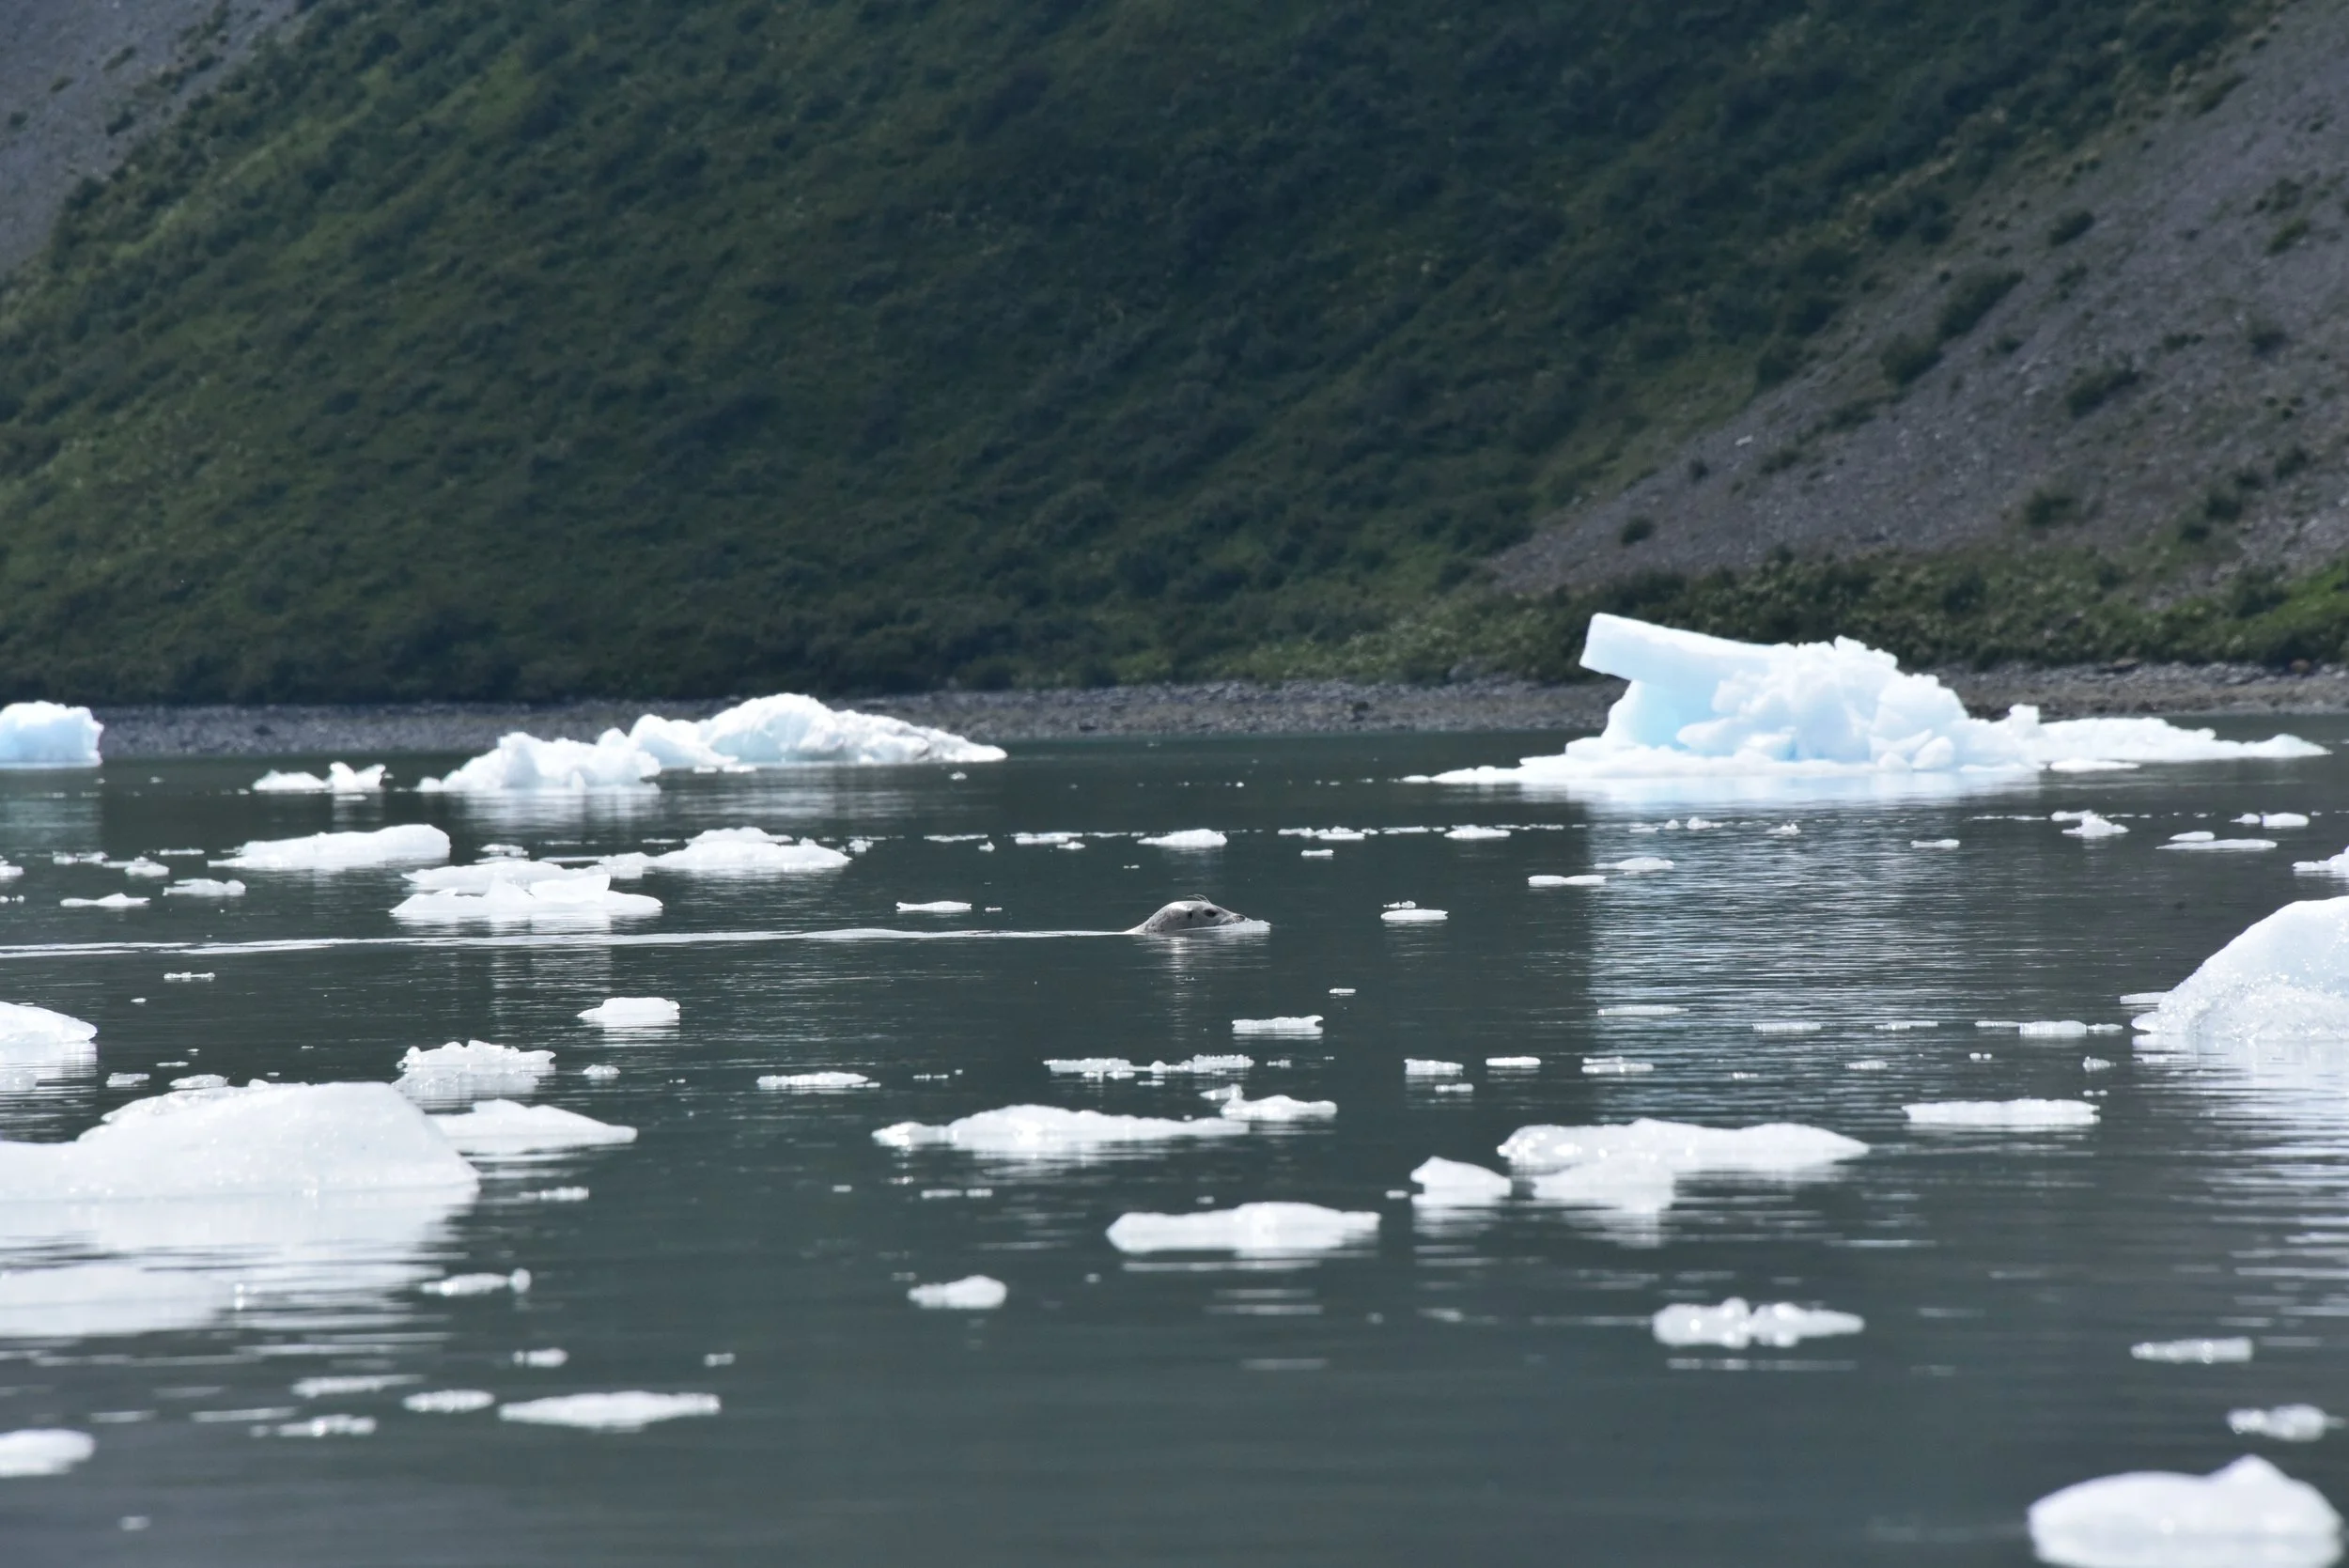
We met our tour guide at 7 A.M. and were fitted for rainproof jackets and pants. A blessing. Shortly after we were on our boat ride, highly anticipating a moment I had dreamed about all these years. Not Denali, not the sweet surprise of Wrangell-St. Elias. The latter part of this tour of kayaking alongside Aialik Glacier. I hoped it would live up to the dream I envisioned in my mind. Turns out, it delivered that and more.
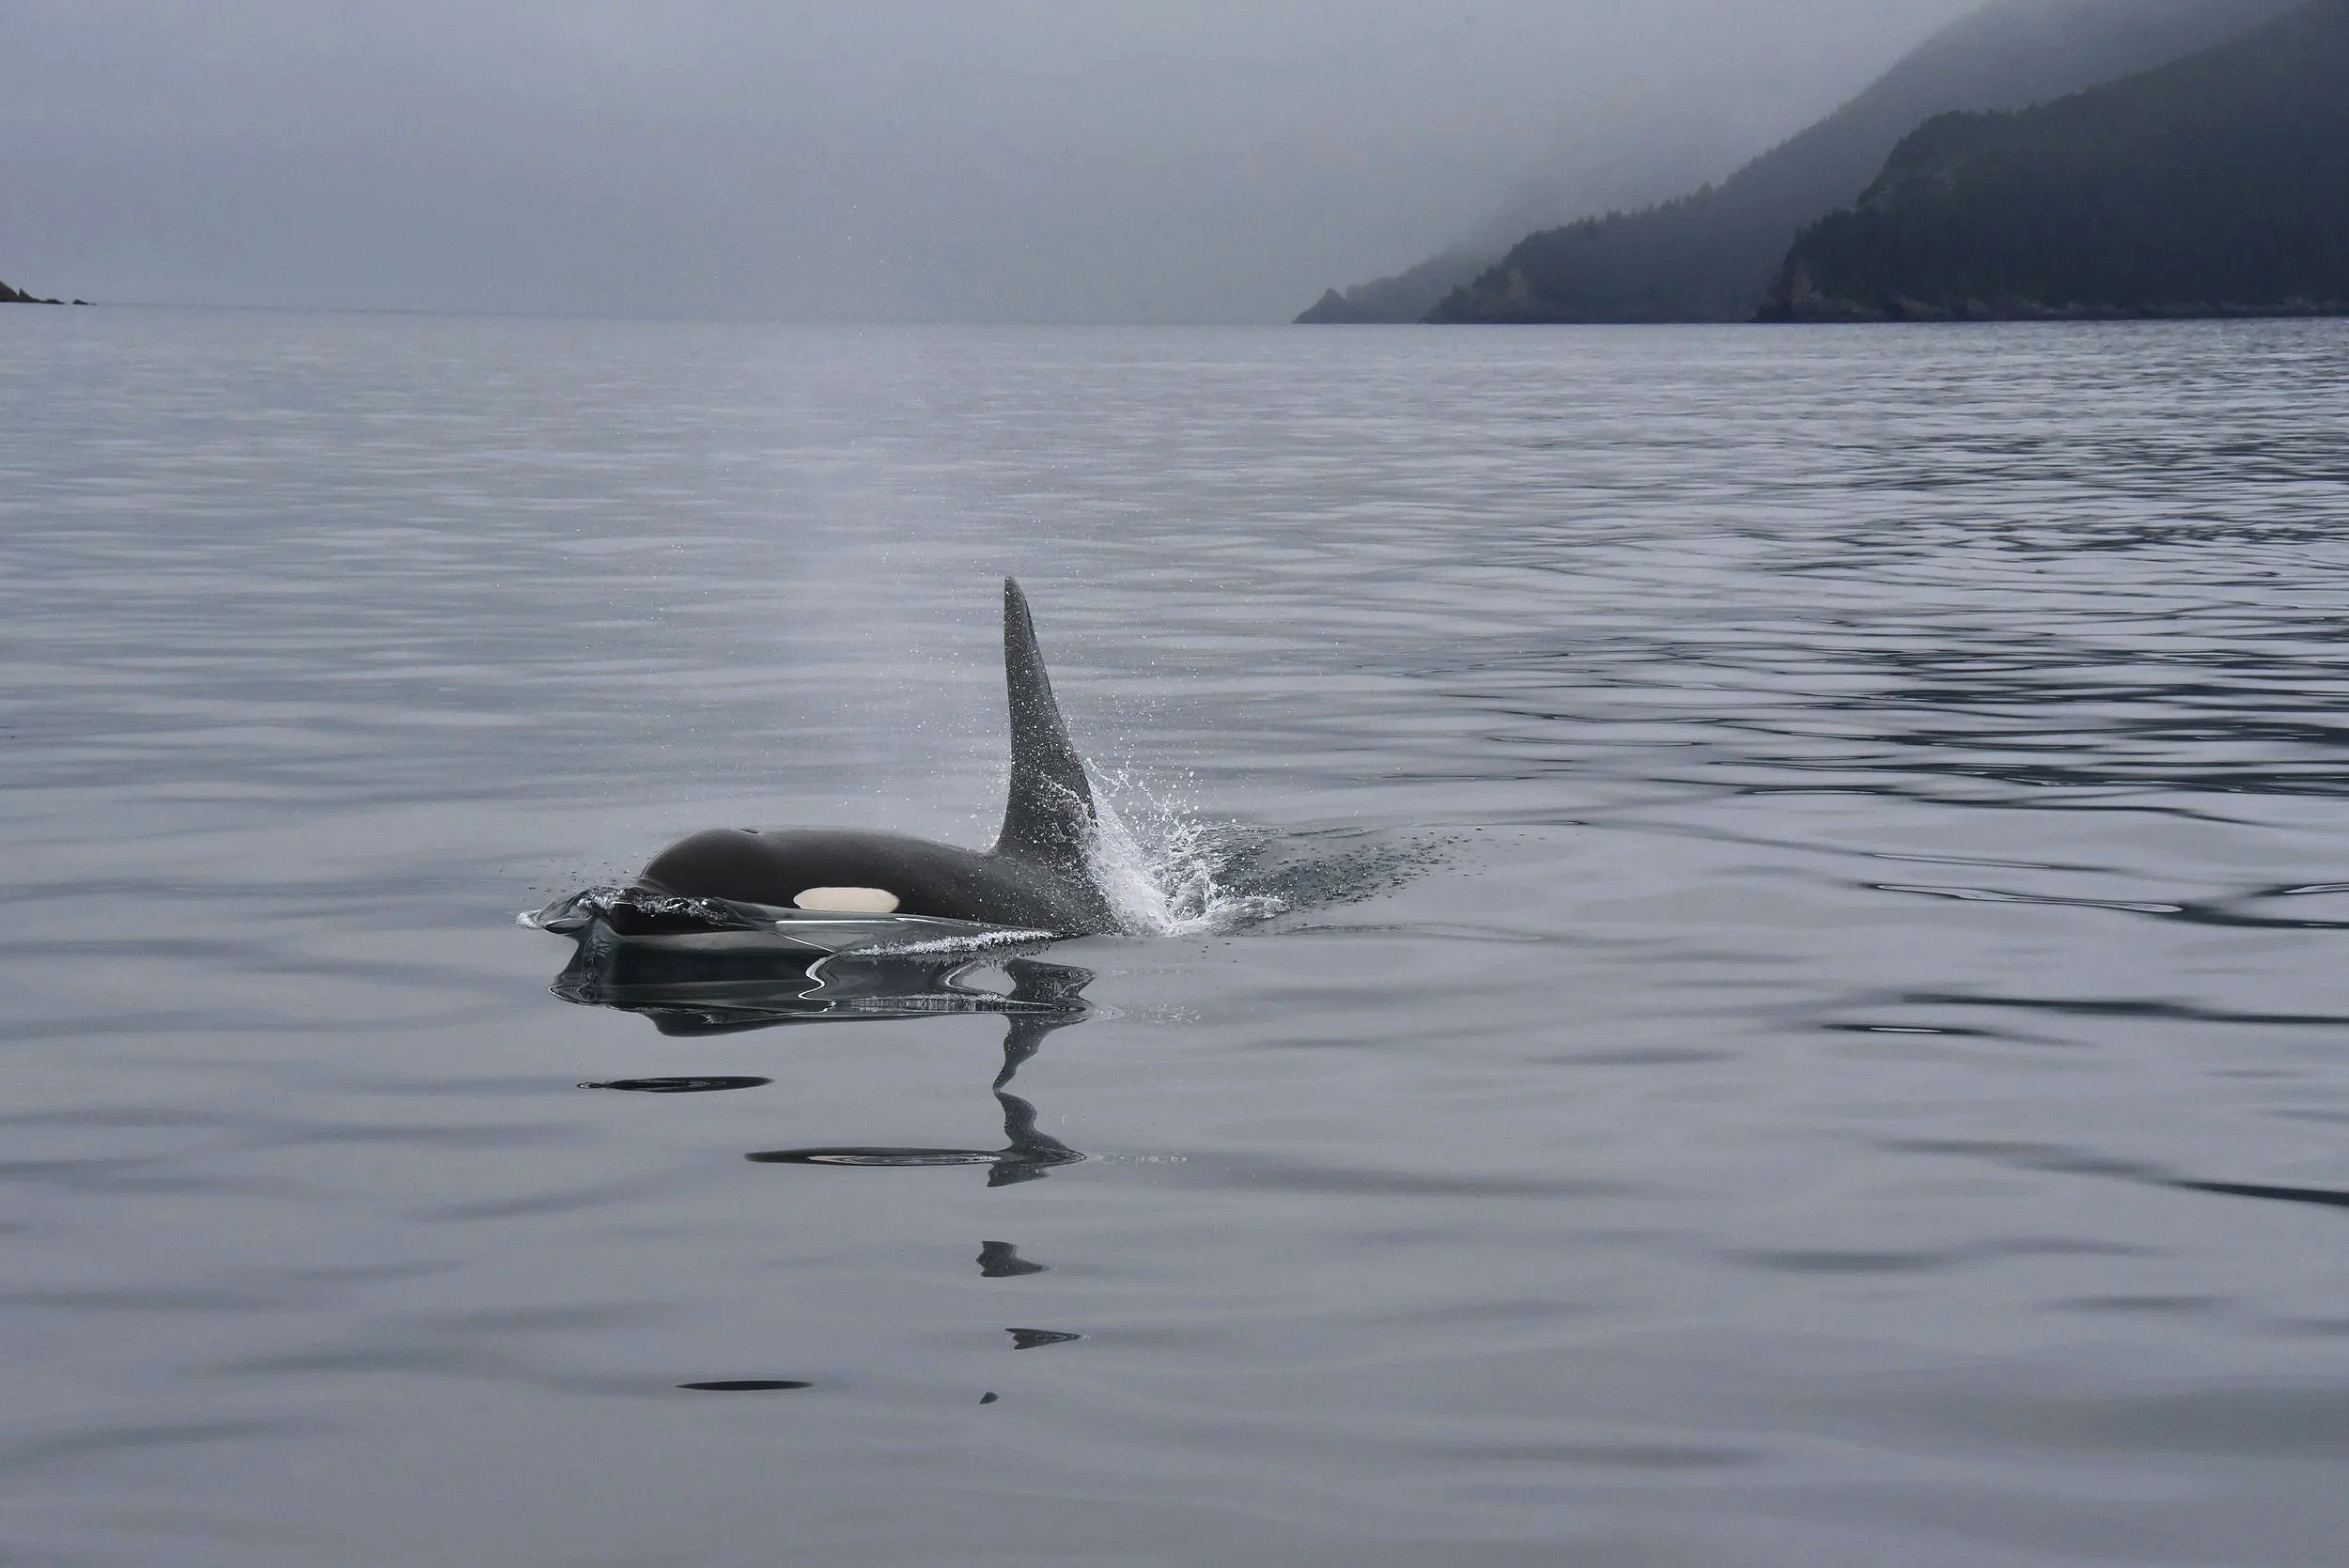

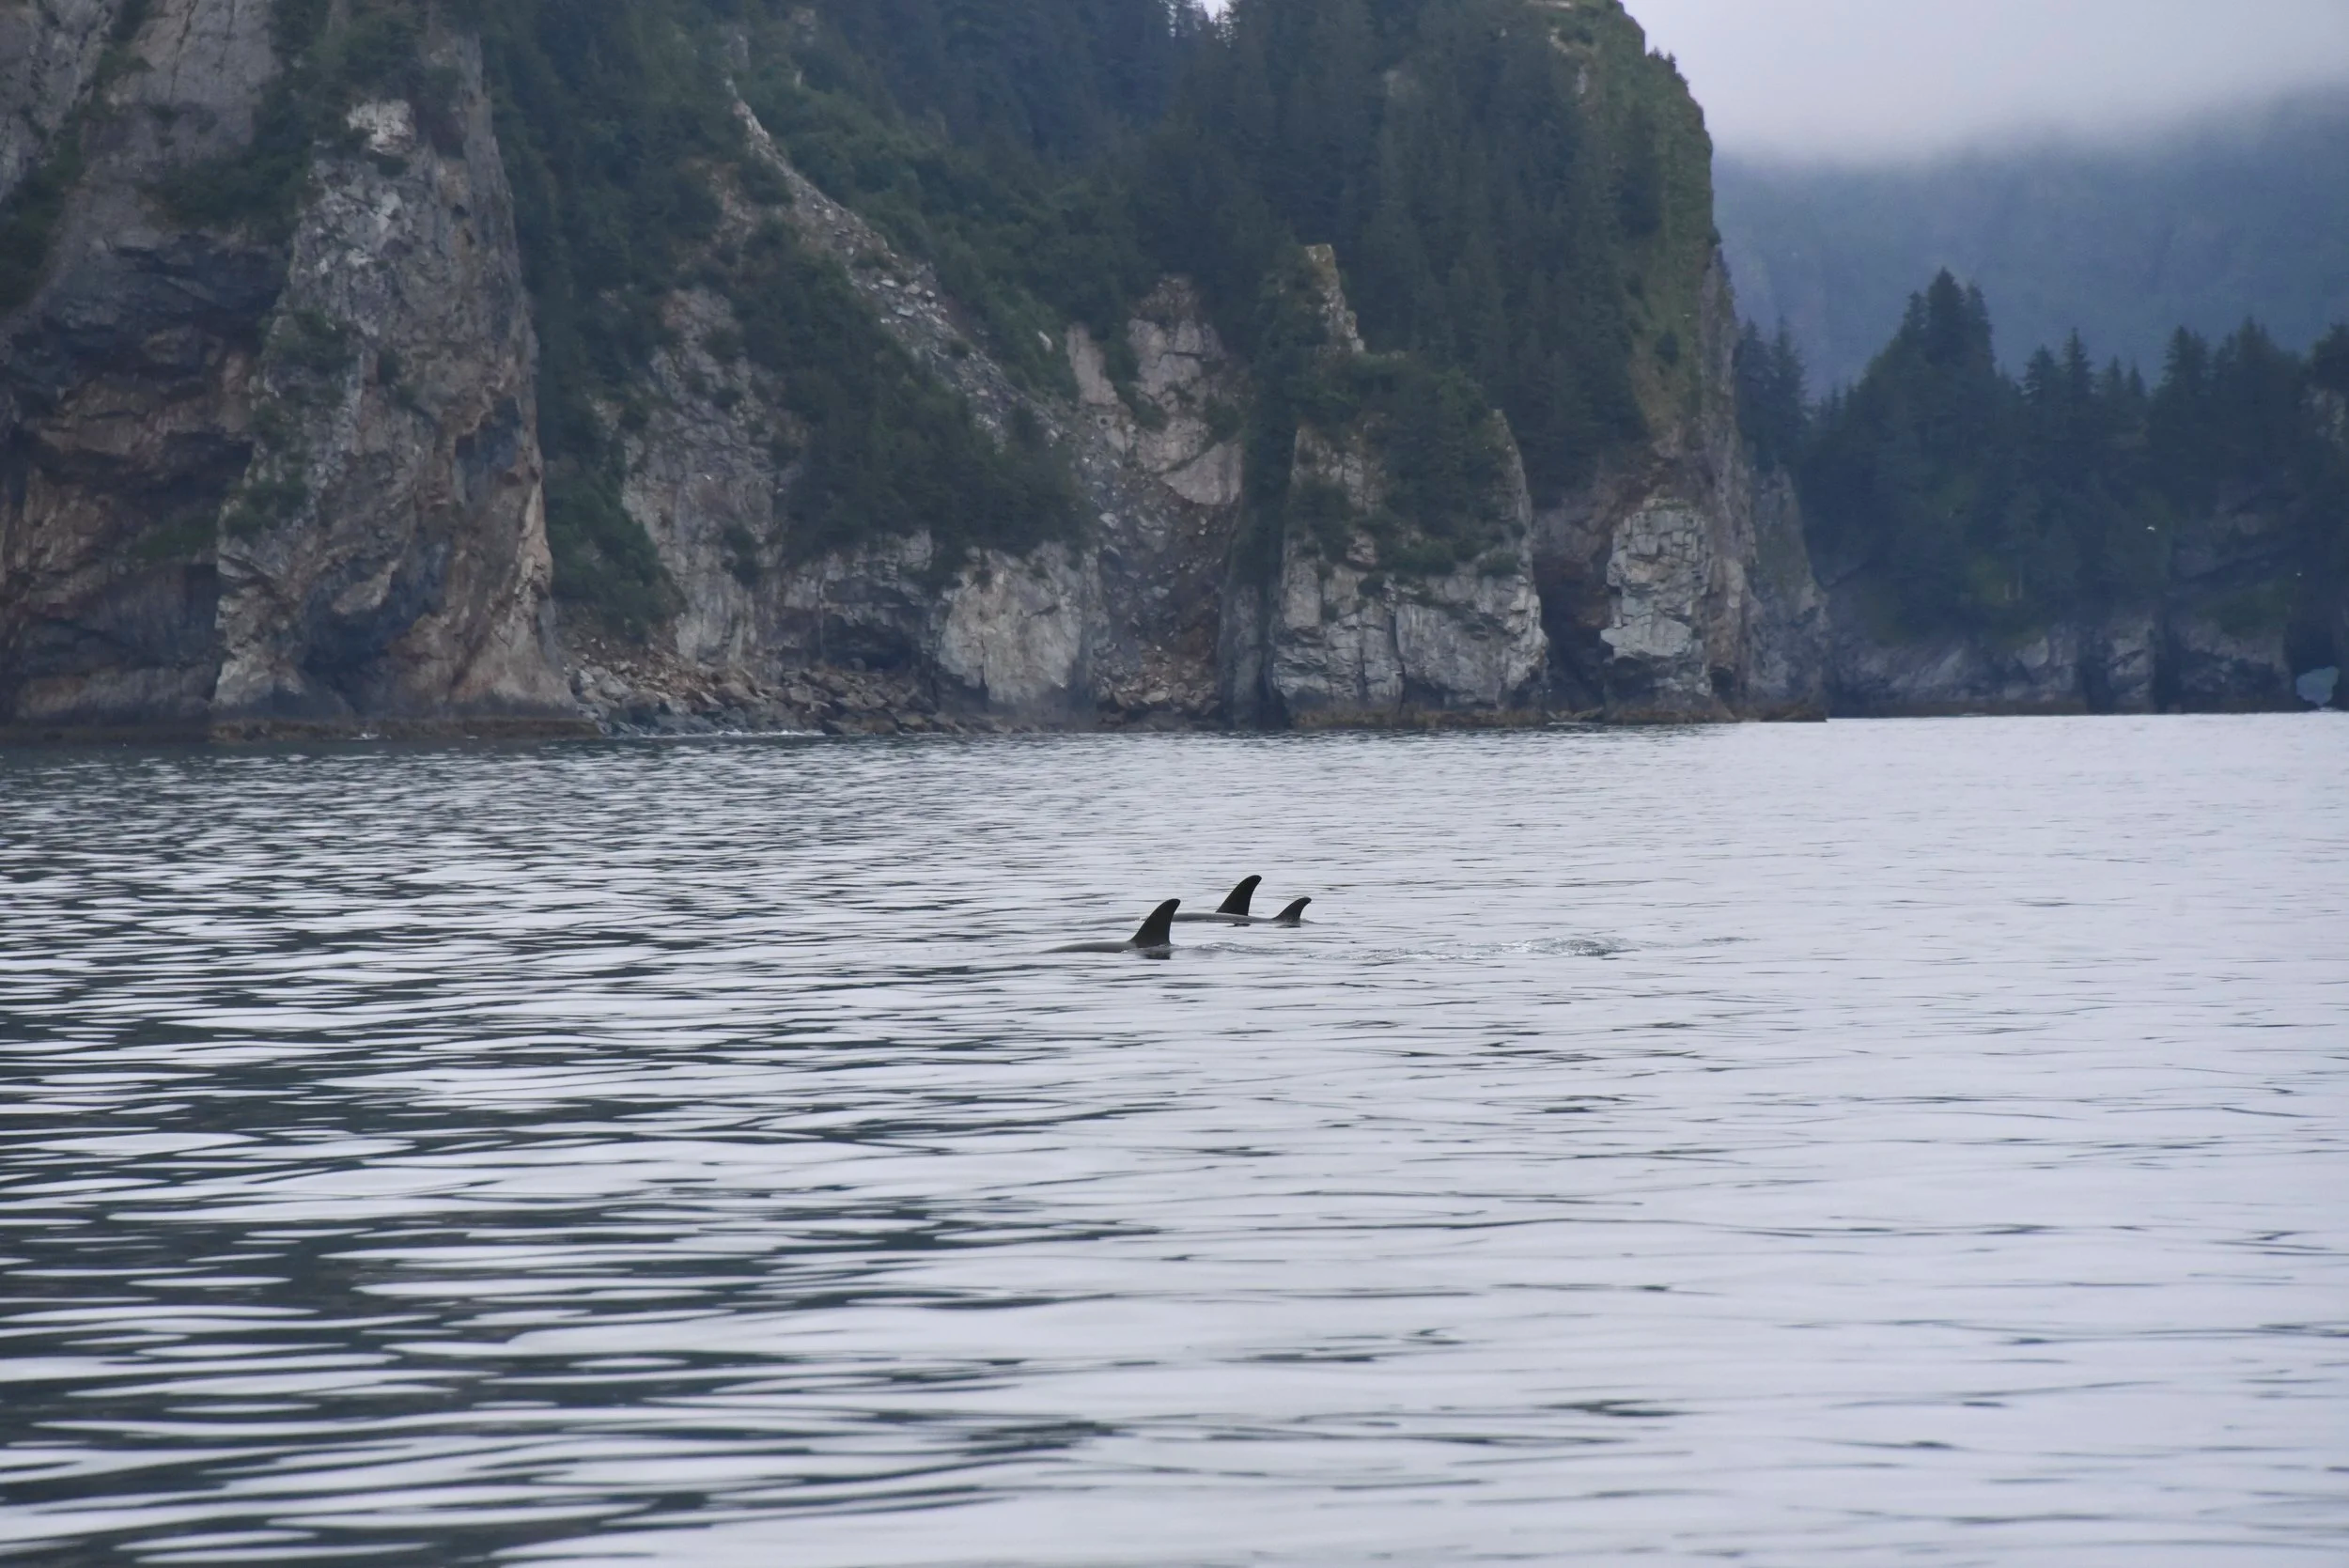
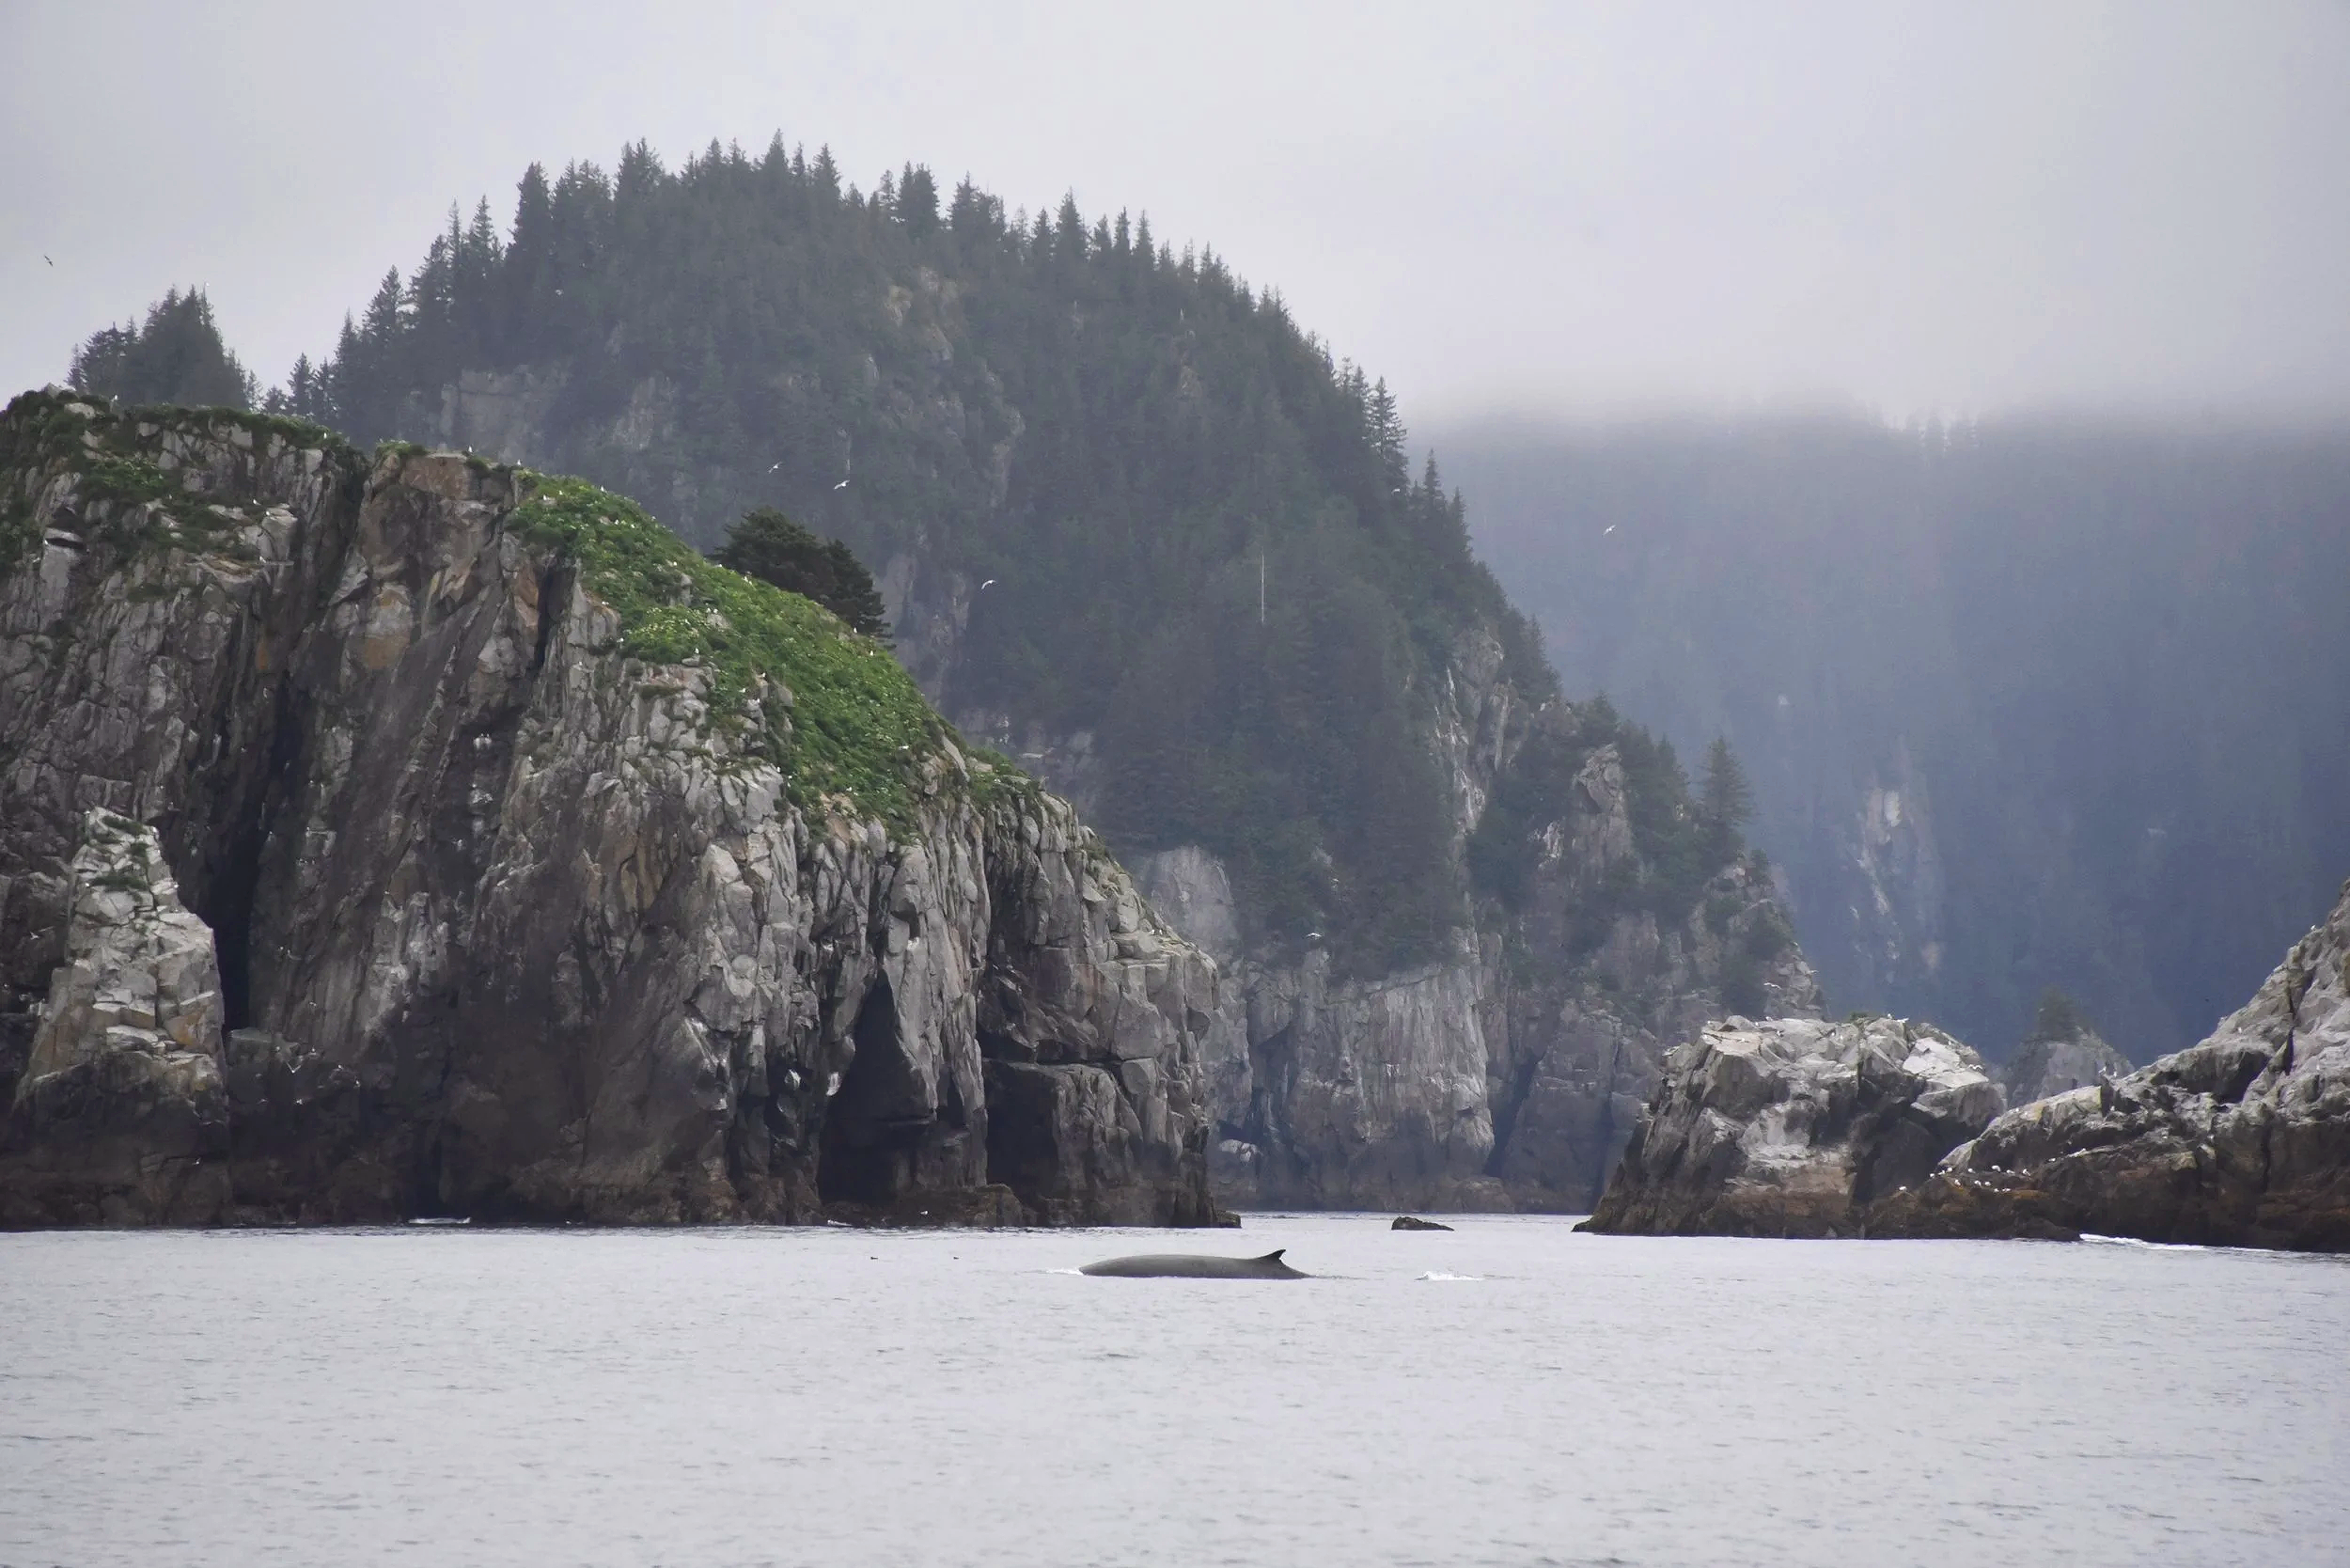
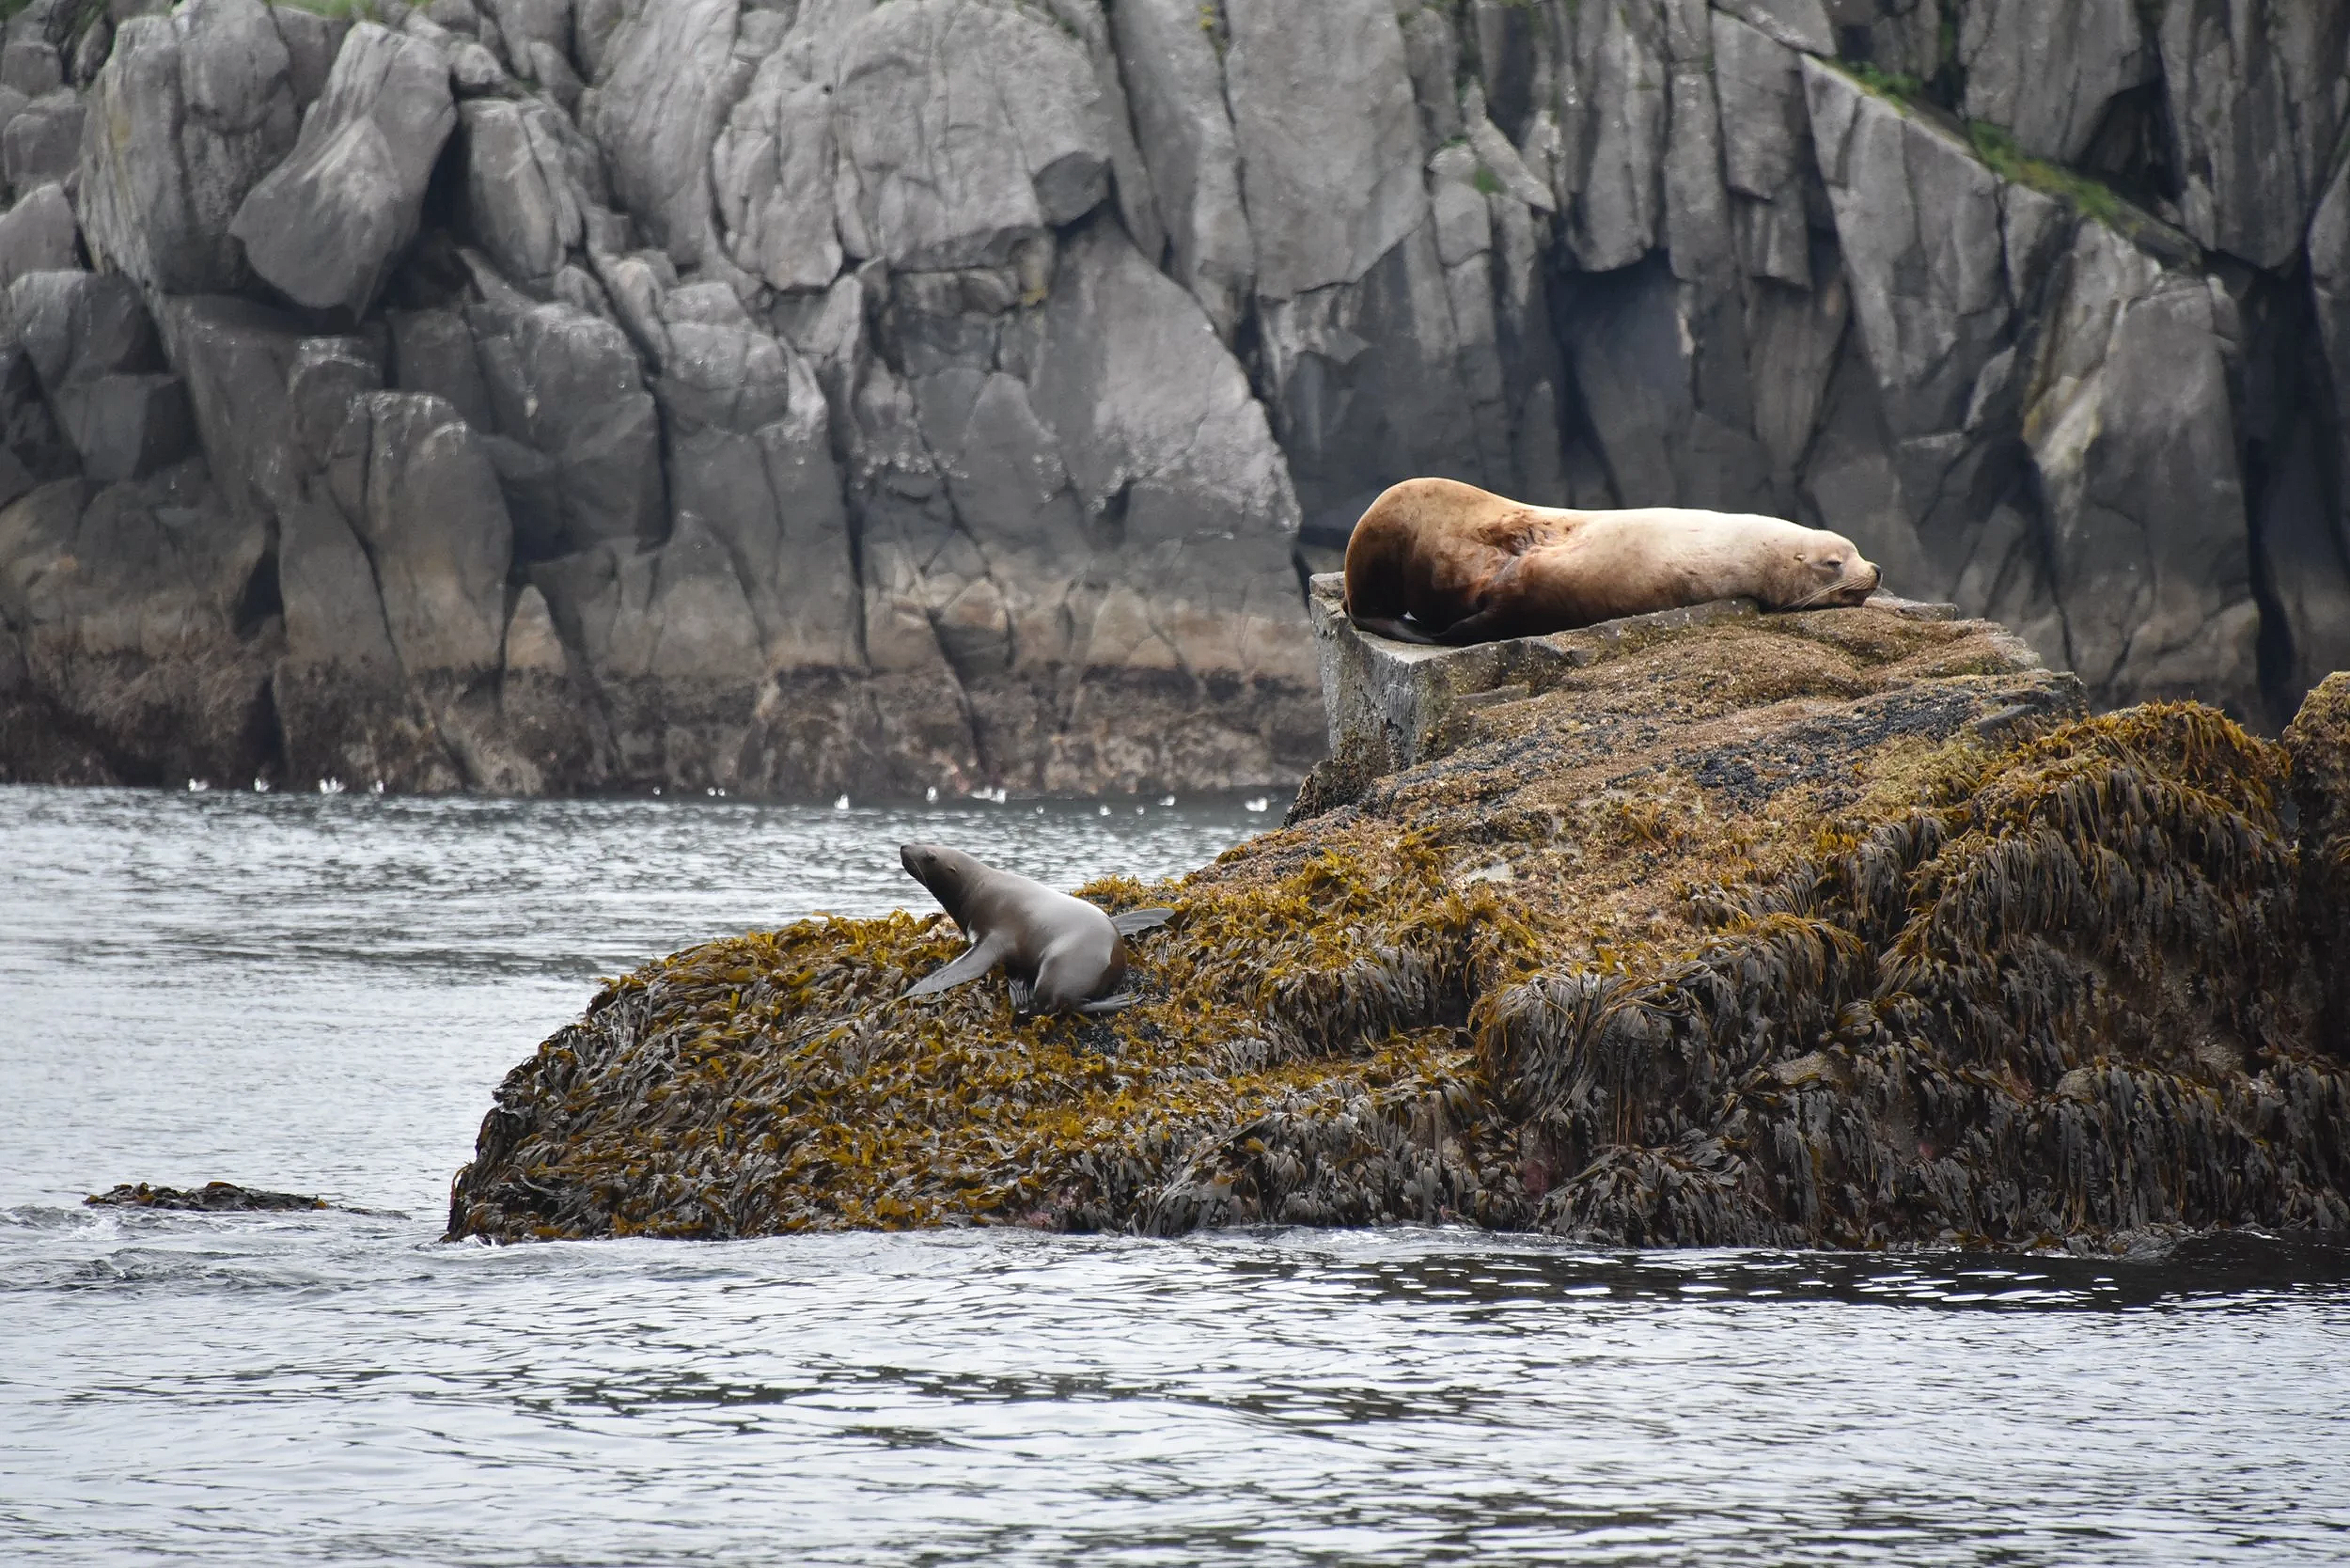
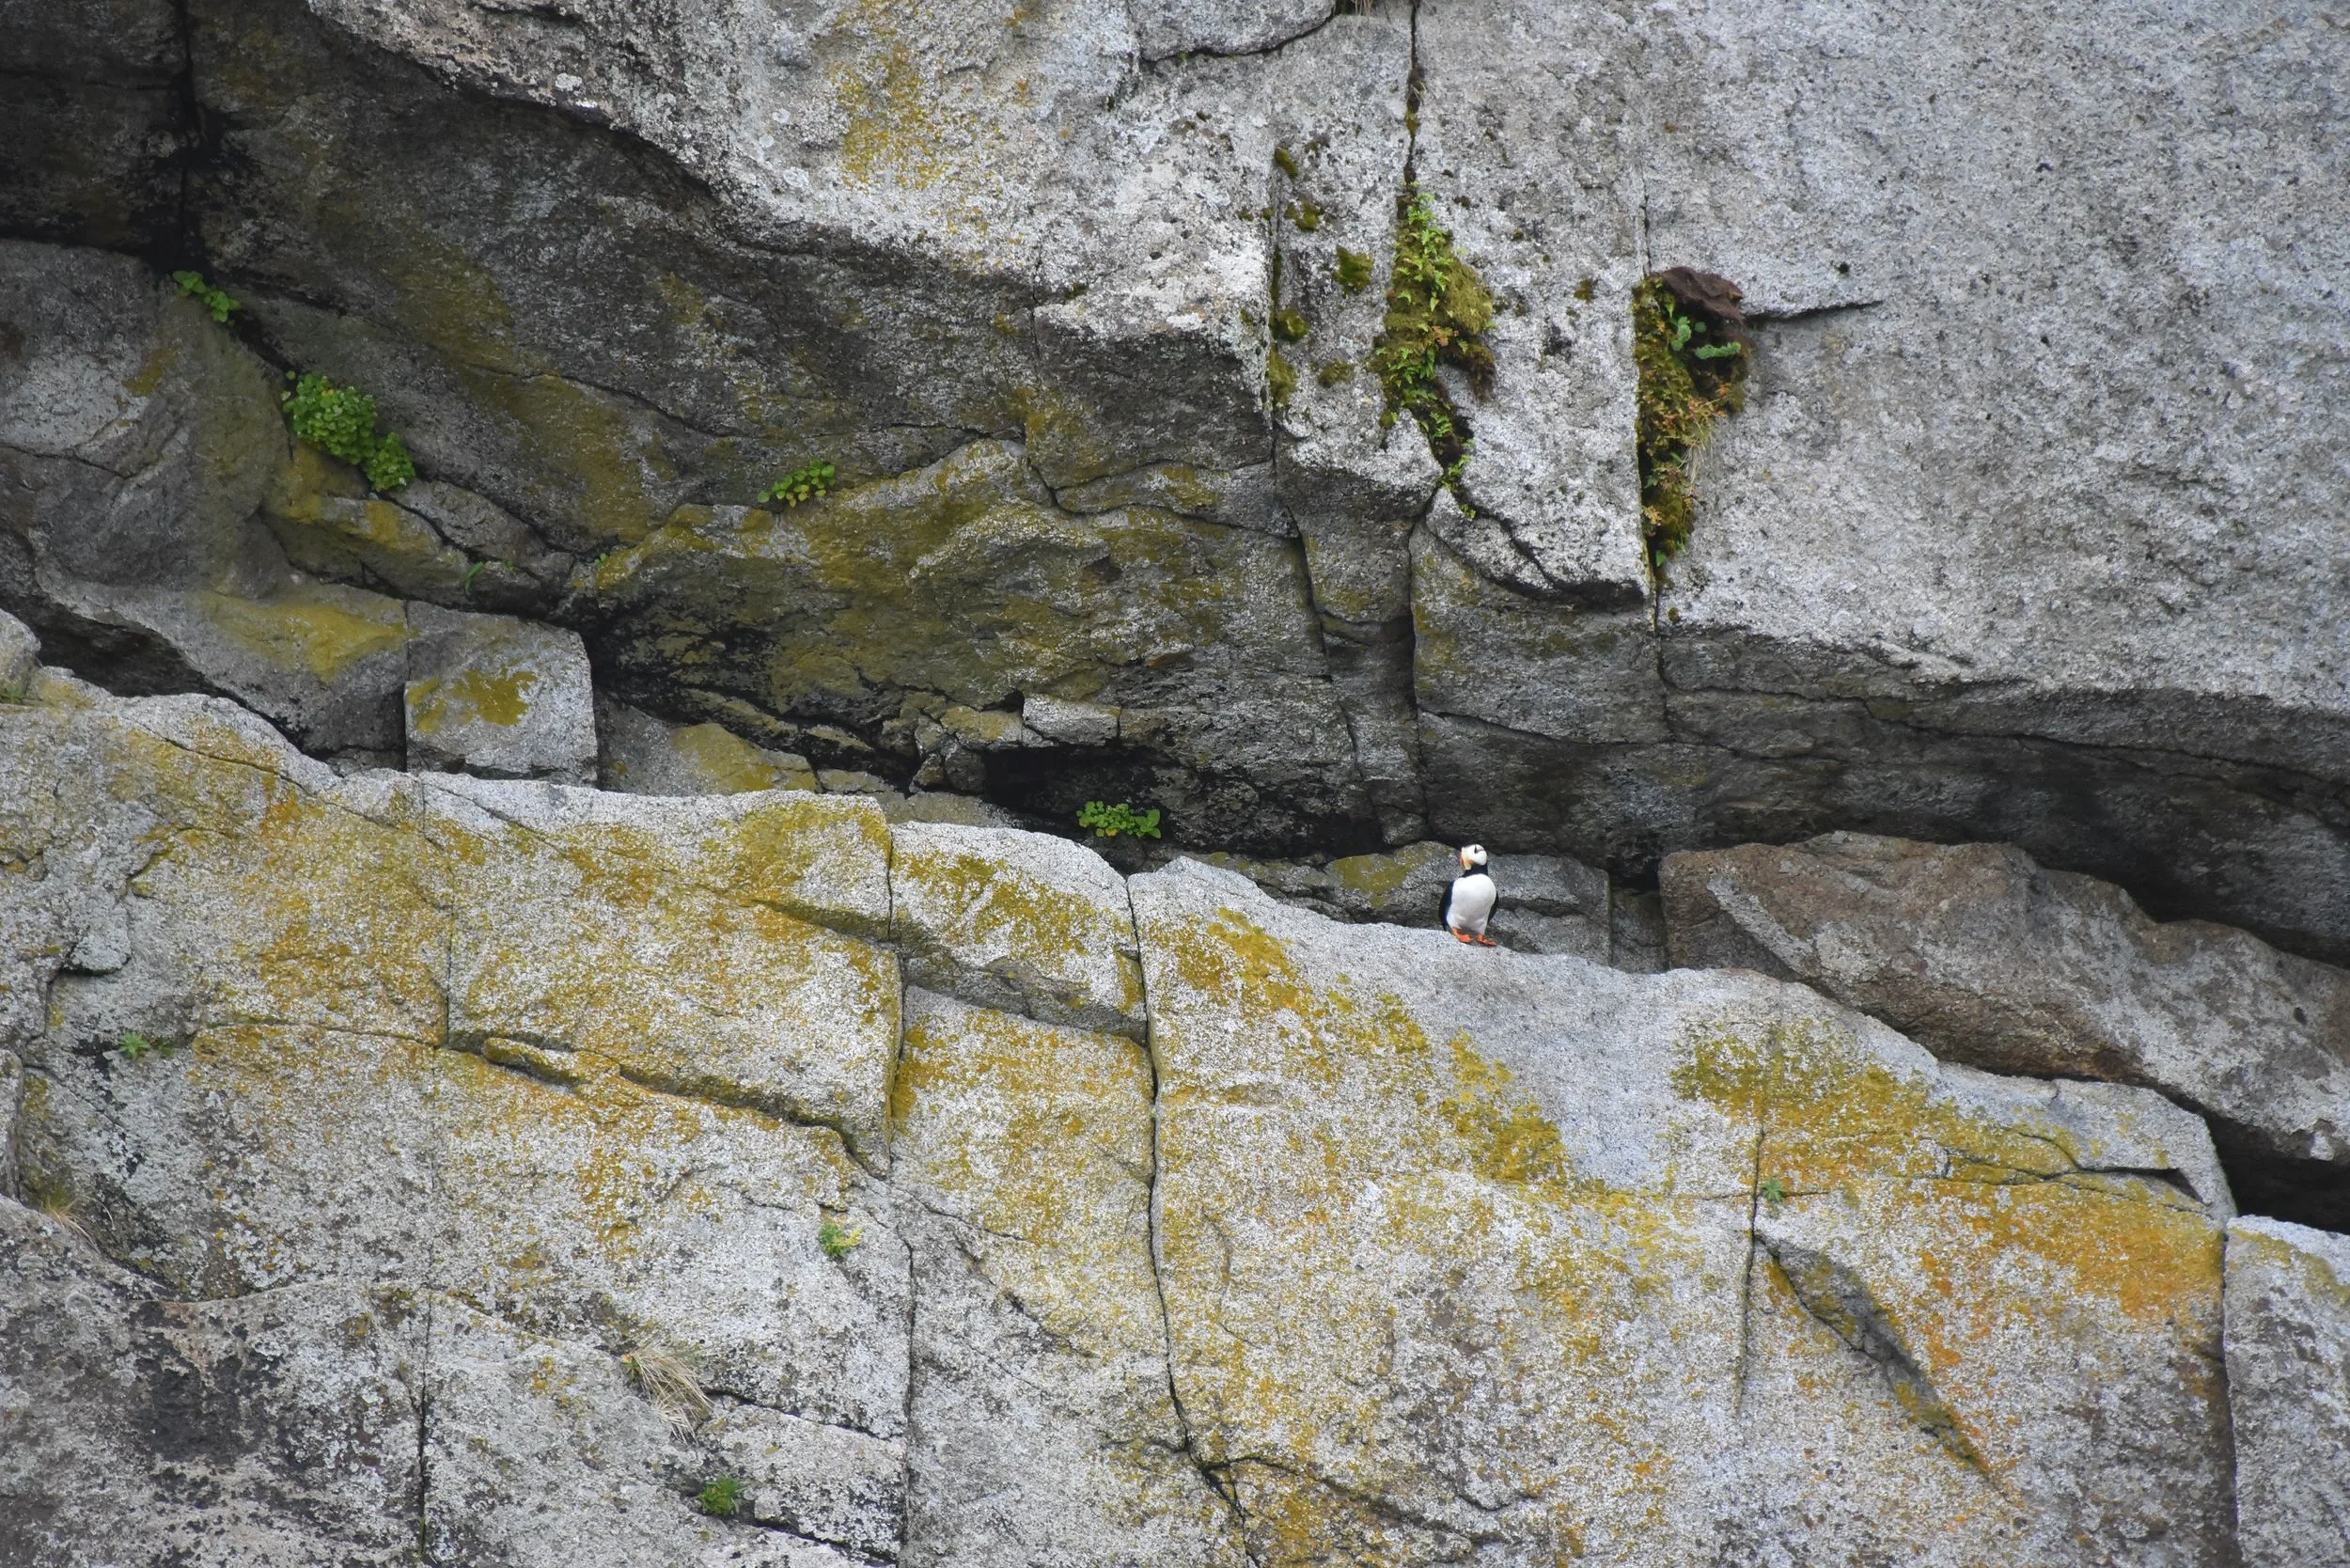
On our boat ride, our captain’s (and passengers’) keen eyes caught sight of humpback whales, orcas, sea lions, sea otters, harbor seals, starfish, porpoises, and puffins! I am not a wildlife gal, but this ride alone made feel like I was living out my middle school dream of being a National Geographic wildlife photographer. It felt incredible to capture so many wild moments.
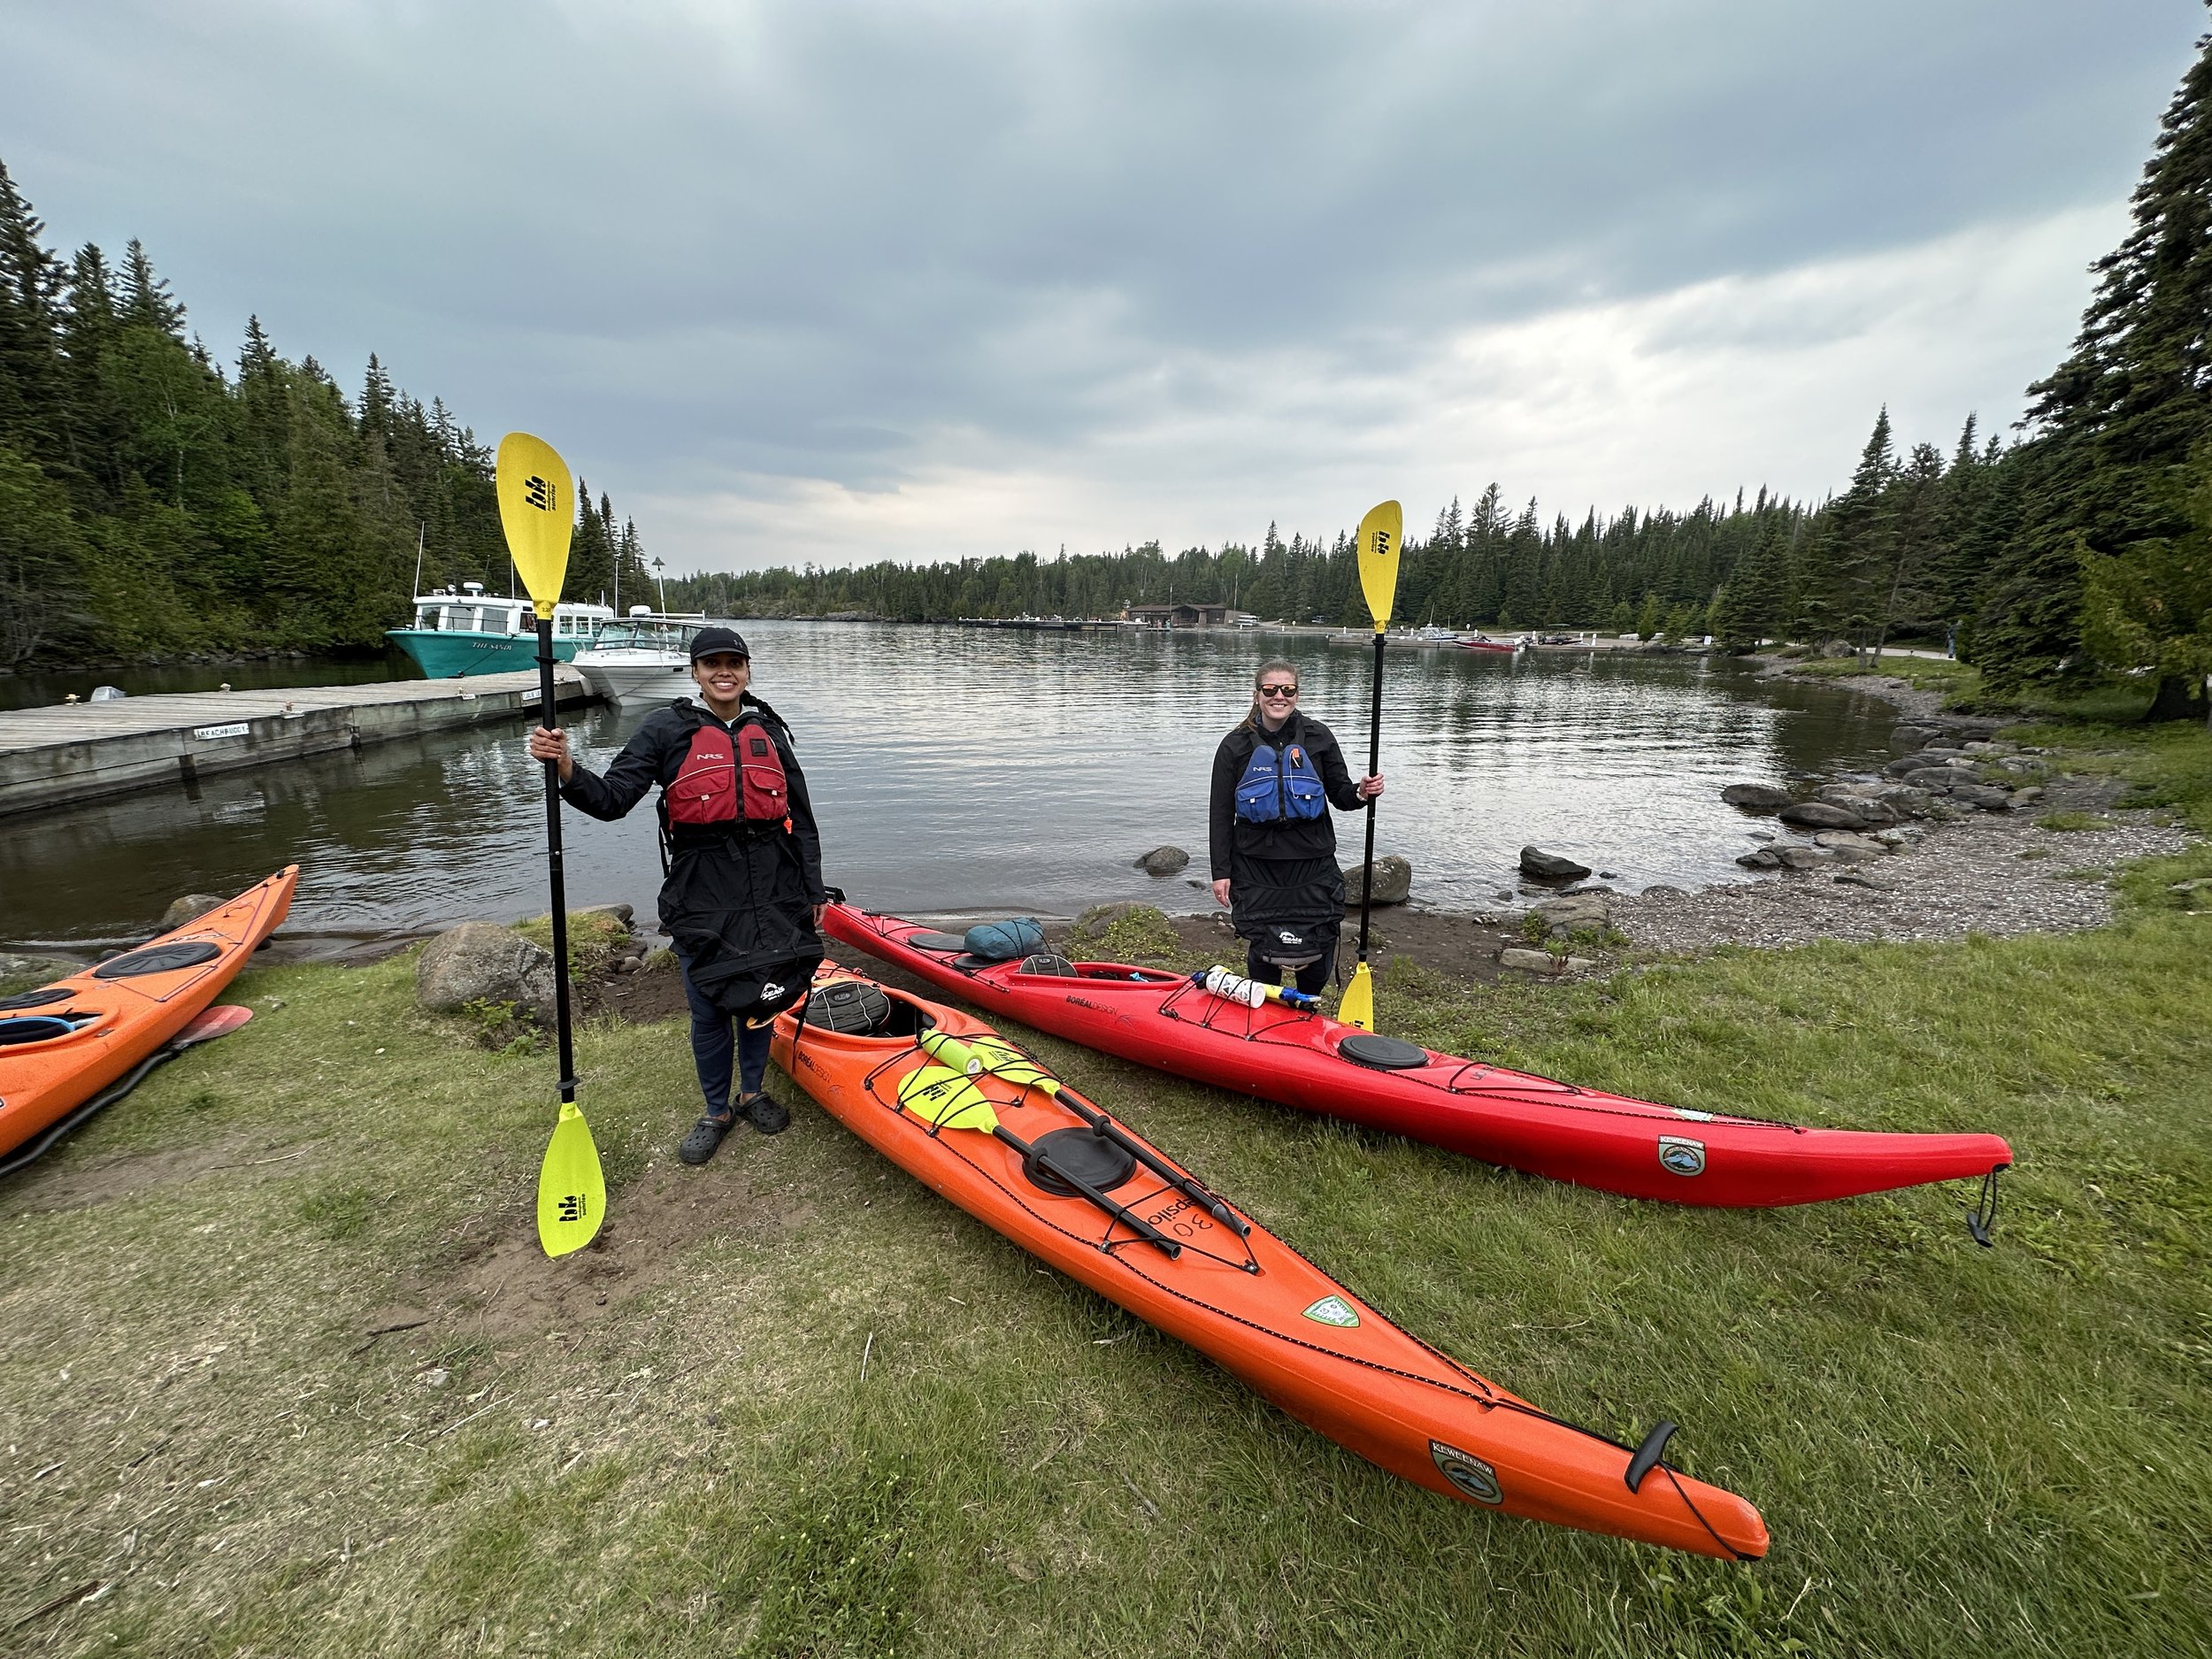
When we docked, we donned spray skirts (I felt like a pro after it being part of my weeklong wardrobe in Isle Royale), and were on the water in no time. Our guide got us up close to Aialik Glacier for lunch. We ate sandwiches in the company of sunbathing harbor seals and thunderous cracking sounds of the inner icy layers of the glacier. Every part of this trip was worth it.


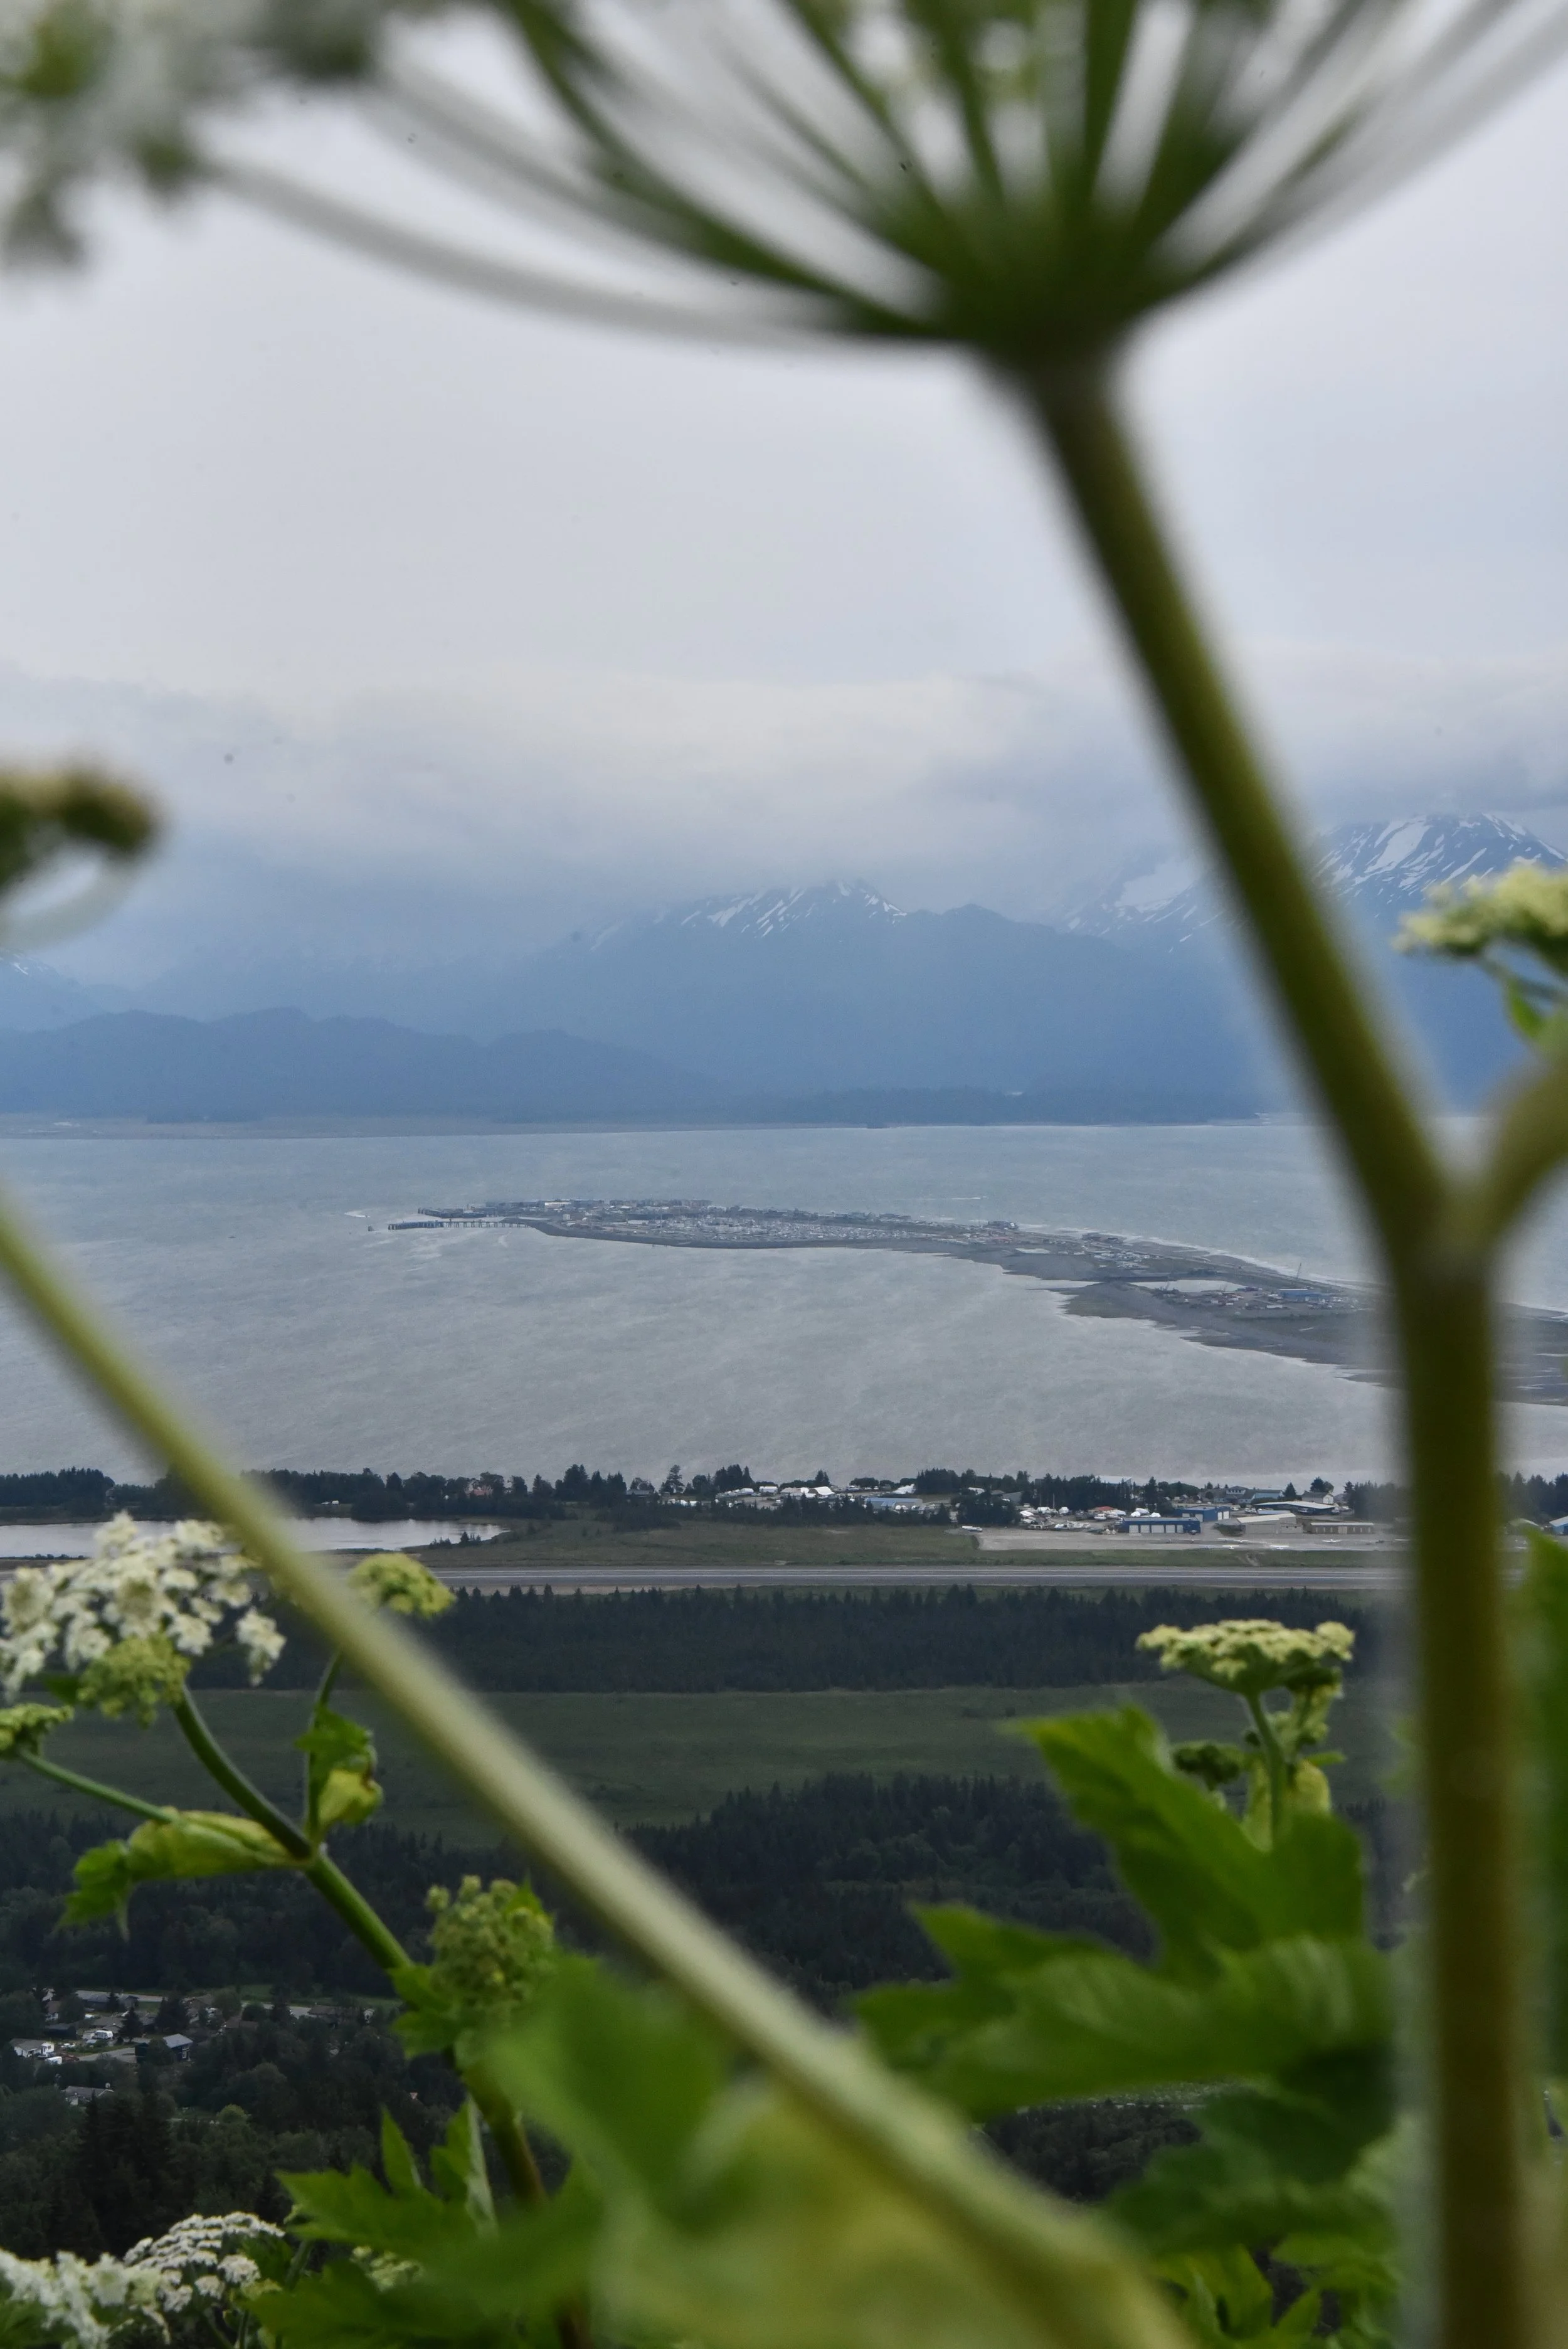
Day 8 – Homer
After such an incredible tour, and a rest day the day prior, we did not really want to linger in Seward longer. We heard from several travelers that Homer was the place to go, and at this point, a four-hour drive one way felt like a short commute. My years of day trip drives to the Adirondacks and White Mountains were great training moments for this. We headed to Homer and the drive alone proved worthwhile. Moose meander alongside the road like deer back in New England. I will never tire of seeing moose in the wild.
Homer is a quaint, seaside town reminiscent of any Rhode Island town in the summer. We ate incredible halibut (in the halibut capital of the world), walked along the beach, and saw eagles on a nature preserve trail. Homer was a very active town, which I loved. There is a great pedestrian path that takes you to town, and in June, the wildflowers were plentiful and bordered the path for its entirety. So stunning!


As our trip slowly wrapped up, my dad said his only regret was not seeing a bear. I found a twenty-mile, less-traveled road on the way back from Homer that gave me a good feeling. The forest that the road envelopes you in experienced a terrible wildfire years ago and sadly was still recovering. We made it fifteen miles in and were still surrounded by dead trees. At mile 16, there was a lovely overlook of the lake we drove past on the way to Homer. The viewpoint was beautiful, and made this detour worth it — with or without wildlife sightings.
Of course once we resigned ourselves to not seeing wildlife, at mile 17, I caught sight of something in the distance – a large, black boulder, and three smaller stones. Turns out, a mama bear and her three cubs were eating their roadside dinner and we stumbled upon it! Two cubs even climbed some trees for some post-dinner playtime. I couldn’t believe our luck!
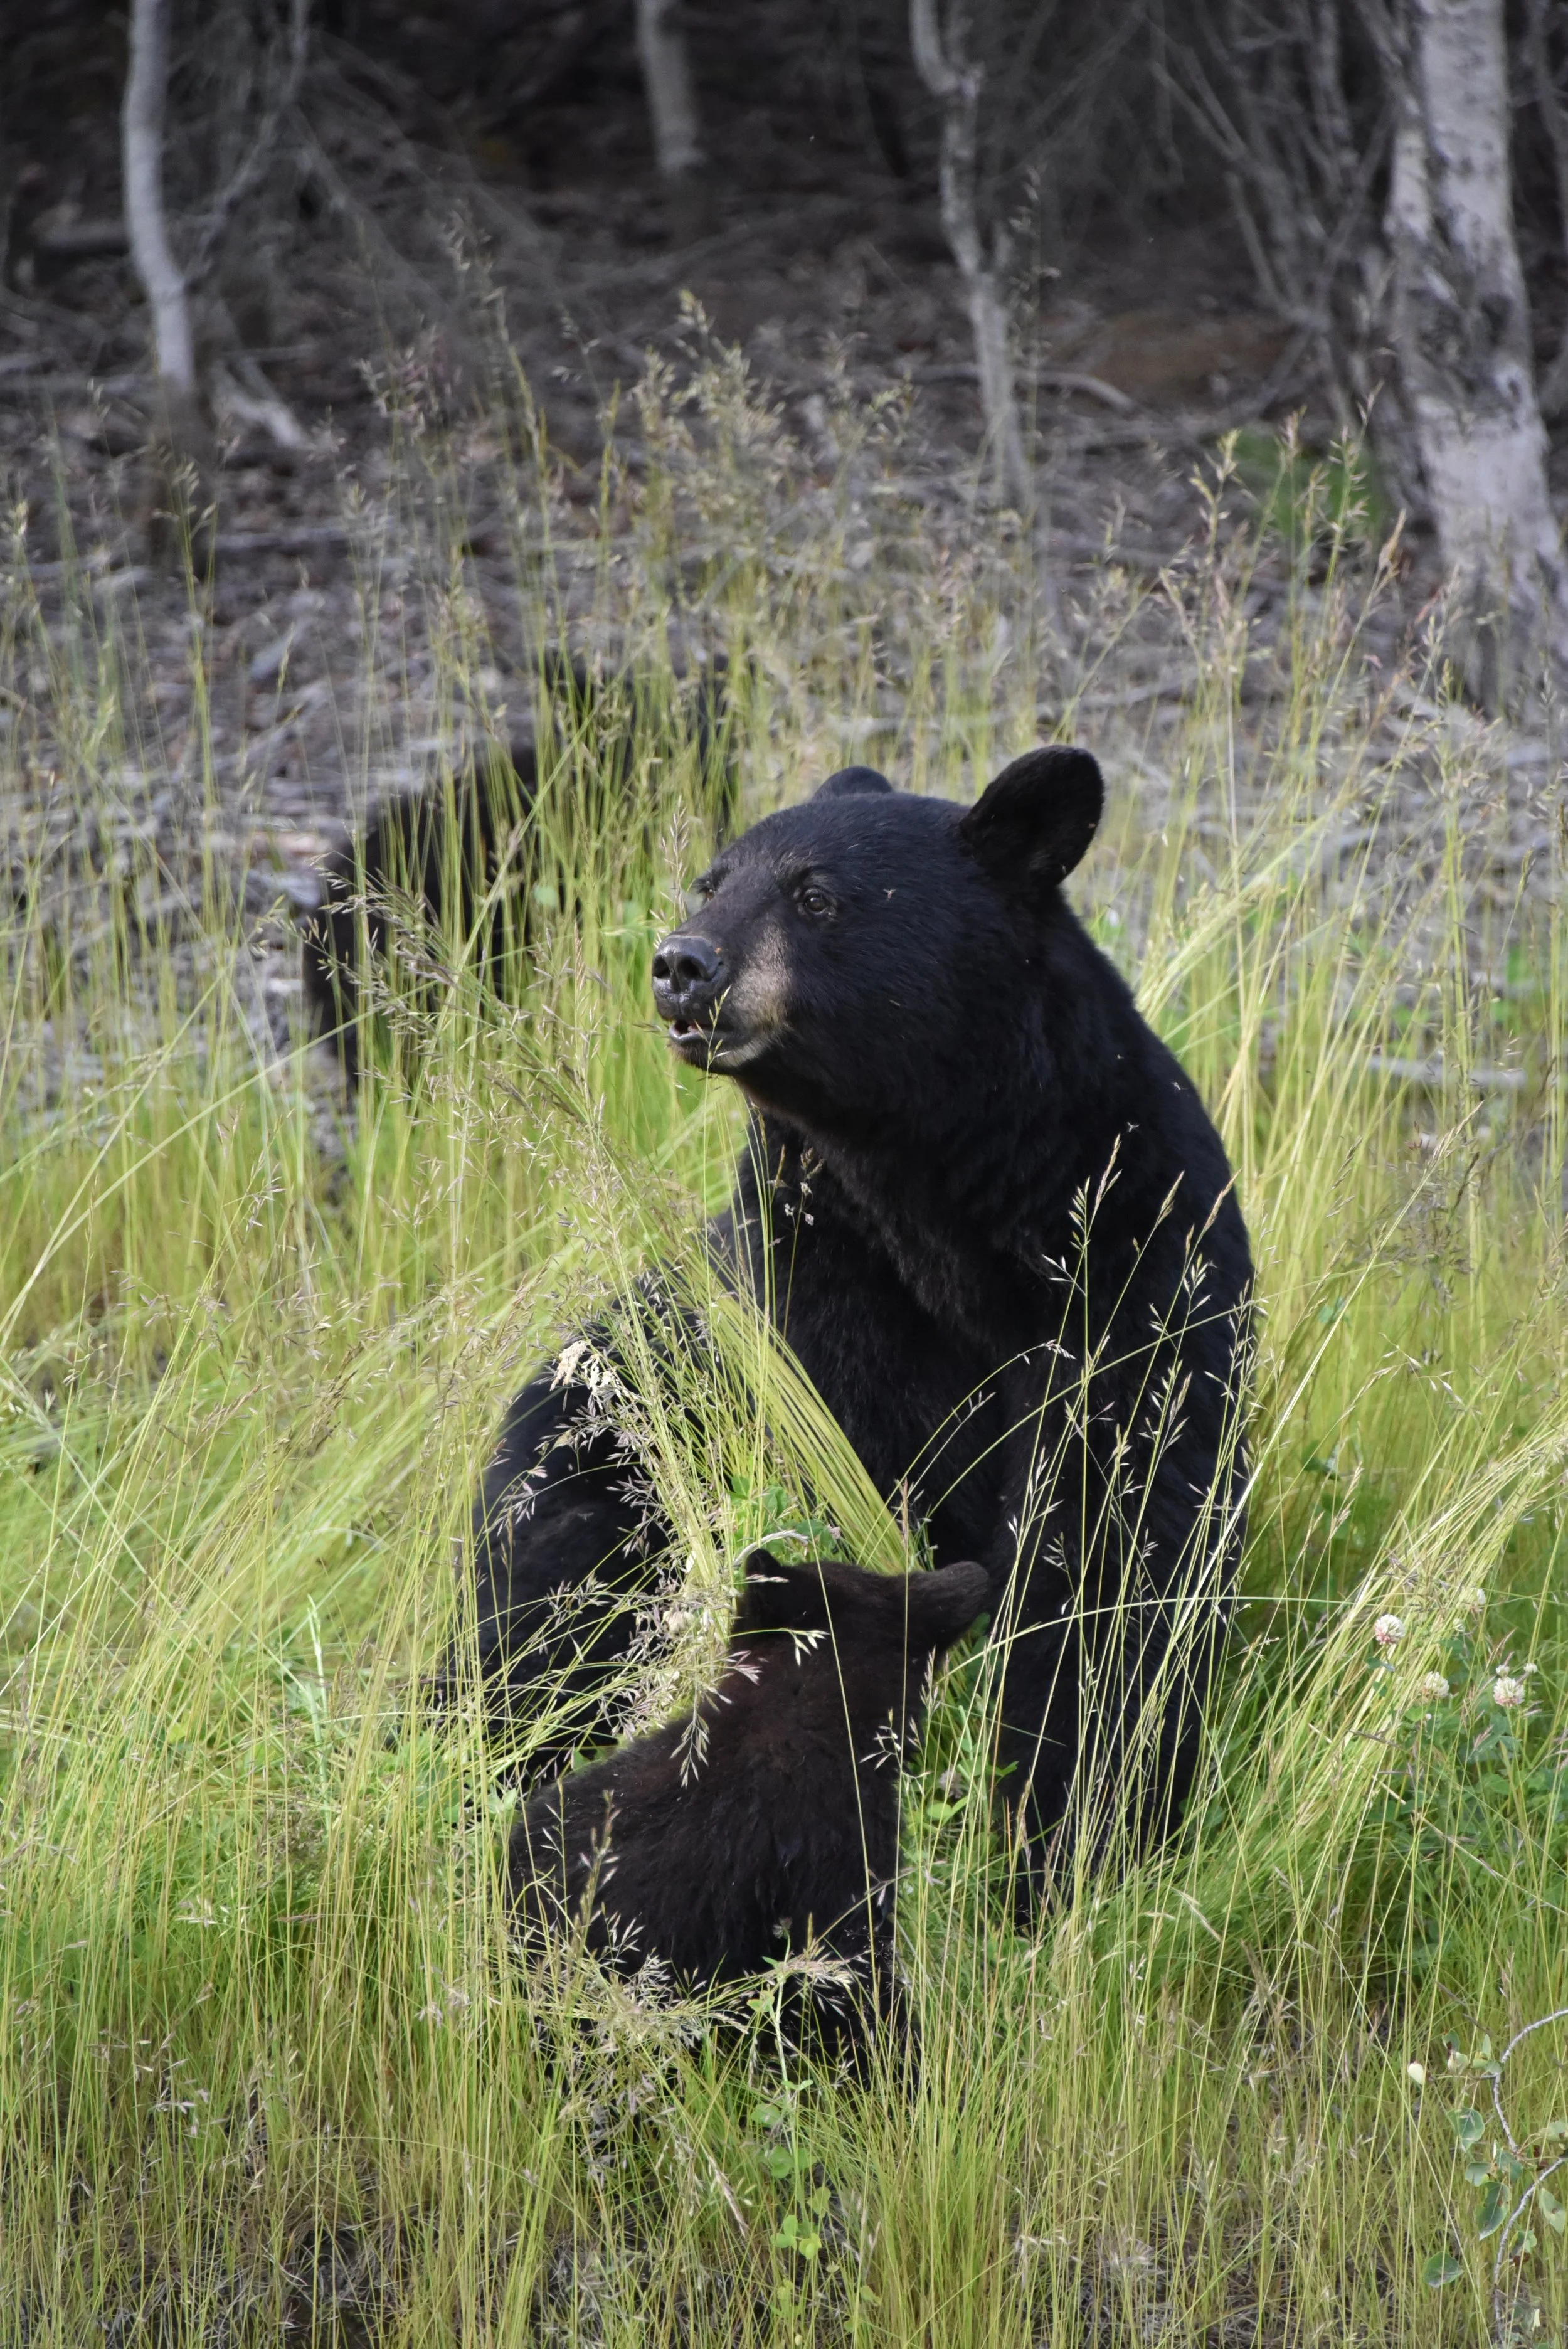

We returned to Seward, all smiles.

Day 9 – Seward to Anchorage
Our final drive returned us to Anchorage along Seward Highway, where there are ample moments to pull over for seaside, mountainscape views. Our flight out was an early one, so once we returned to Anchorage, the trip essentially concluded.
Day 10 – Travel Day (Headed home)
Have you visited Alaska? Are there any national parks there you’re adding to your bucket list?
If you enjoyed this itinerary, check out these other hidden national park gems:
Kayak Isle Royale National Park — Michigan’s Hidden Gem
13,000 Footer, Alpine Lakes, and More in Nevada’s Only National Park
Kentucky’s Best Kept Secret: Mammoth Caves National Park
Florida Offers More Than Disney Rides — Go on a Sailboat and Airboat Tour

Kayak Camping is the Superior Way to Explore Michigan’s Isle Royale National Park
No roads. No cars. Little to no service. My kind of vacation.
Isle Royale is one of the few parks that require travelers to arrive by ferry or seaplane. Here’s how we spent five days in Isle Royale National Park with the Keweenaw Adventure Company:
Every summer I gear up to accomplish one of my yearly goals: visiting two new national parks. With my visit to Virgin Islands National Park in the spring, I set my sights on another remote island park in a state I had yet to visit: Michigan’s Isle Royale National Park.

Being on a remote island in the U.S. felt like a once-in-a-lifetime experience. Since my thru-hike in the most isolated corner of the Adirondacks, I have found myself gravitating to quieter, off-the-beaten path (quite literally in the case of Isle Royale) places.
No roads. No cars. Little to no service.
My kind of vacation.
Not only is Isle Royale Michigan’s only national park, but it is also one of the few parks that require travelers to arrive by ferry or seaplane. It’s also only open seasonally (closed from November to mid-April), and typically it is the least visited park in the lower 48.
As I get closer to visiting all 63 U.S. national parks, I try to find special ways to explore them. While it is technically possible to see Isle Royale National Park in a day, most visitors say they regret not spending days there. With possible ferry delays due to weather, though these are rare, you could end up only spending a couple hours in this incredible park by limiting your visit to a day trip. There’s something about how wild and vast Isle Royale is that draws you in for longer.
I stumbled on a new-to-me way to explore an island park: kayak camping with the Keweenaw Adventure Company. This company took care of everything—from ensuring my safety while navigating the waters of Lake Superior to providing gourmet meals in the backcountry.
Kayak camping is the superior way to visit Isle Royale National Park because the guides at Keweenaw Adventure Company tailor your trip to your interests. When asked what we wanted to do, our only requirements were seeing the Rock Harbor Lighthouse, getting a hike in, and spending as much time on the water as possible.
Our guide through the Keweenaw Adventure Company took us on an adventure in June 2023 that did just that. Here’s how we spent five days in Isle Royale National Park:

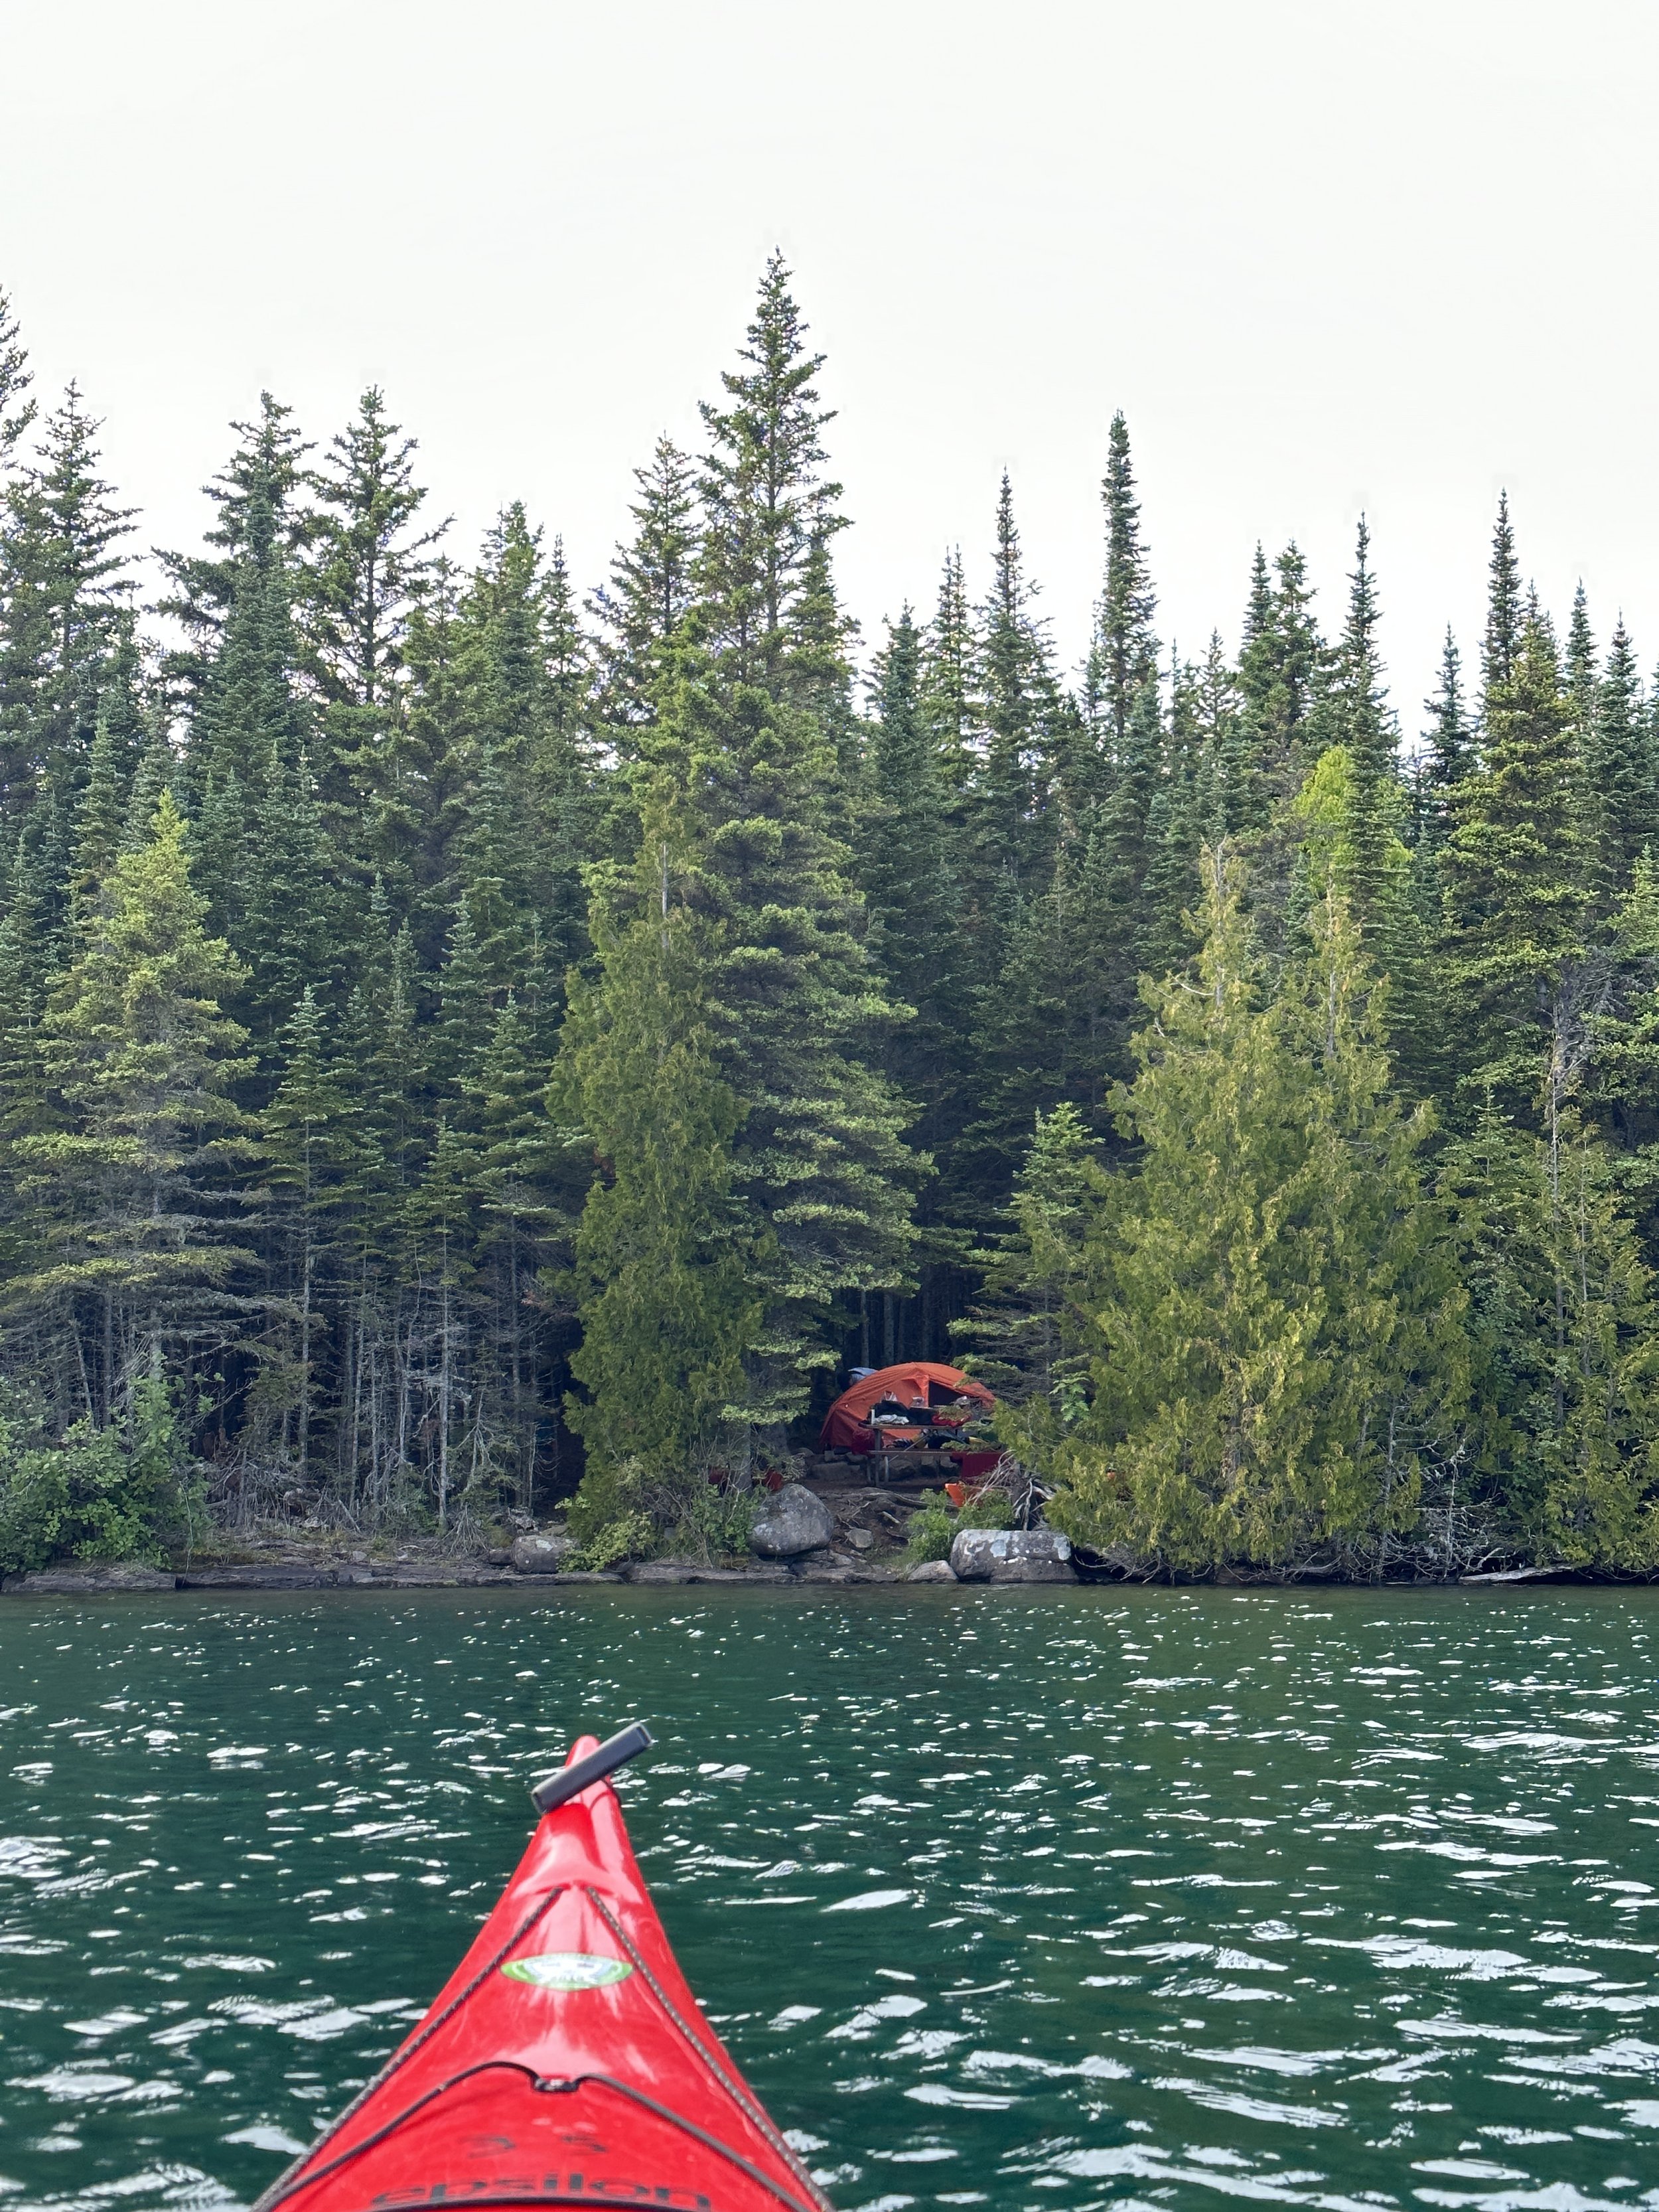
Kayaking along Lake Superior to one of our campsites for the night.
Day 0: Orientation
After exploring Houghton, MI, we made the short, tree-lined trek to quaint Copper Harbor. Prior to the trip, we were required to participate in an orientation. Upon our arrival, we were introduced to Bonesy, our guide for the trip. He asked us to place our belongings for the trip on a wooden table. Then, he handed us three dry bags. Our first task: fit all our desired belongings into the bags. After what felt like an hour, and most likely was given how many things we thought we wanted to take, we were ready to go.
Bonesy instructed us to suit up in our wetsuits, and zip ourselves into our spray skirts. We learned skills like the J-lean and hip snap, along with paddling strokes that would help us navigate the waters of Lake Superior. He demonstrated a self-rescue flawlessly and I was in awe. More awe struck me when he told us we were up next to practice.
I absolutely love the cold and all things winter, but nothing prepares you for such frigid waters. Except this Water Safety Course. The chill tingled down to my toes as I leaned to my right to submerge myself to complete the lesson. He made sure we didn’t forget any crucial steps and despite this being the part I was most nervous about, I am beyond grateful that this was part of the trip. A sense of reassurance poured over us after successfully completing a self-rescue; knowing now that if it did happen in any event, we had skills to tap into to ensure we would be okay.

Day 1: Copper Harbor to Rock Harbor
We arrived to the ferry, a 3-hour ride, from Copper Harbor to Rock Harbor. Our park and ferry fees were included in our tour cost and taken care of so we simply had to walk aboard when it was time. As much as I enjoy being on the water, ferry rides are the only ones I have gotten sick on, so I made use of the motion sickness pills I packed.
The 56-mile ride on the Isle Royale Queen IV flies by as you gaze out the window. Being on the world’s largest freshwater lake felt surreal. When we docked, Park Rangers split up visitors into smaller groups and gave a ten-minute safety talk, including fun call-and-responses to ensure we would remember the tips she was providing visitors with. The most important one? Emergency services are extremely difficult to come by due to the remoteness, so to be careful even with what is considered easy, like hiking.
Entering Isle Royale National Park
After the talk, we were off to snag a campsite nearby. Once we secured our spot, we explored while Bonesy prepared dinner. I don’t usually do guided trips, but this part alone was worth it. To be able to go with the flow and not worry about logistics, or the need to prepare a meal, truly felt like a vacation. My friend and I watched the sun set at 9:30pm. As we returned to our campsite, the smell of stir fry filled the air and soon after both our stomachs and our hearts were full.


Day 2: Rock Harbor to West Caribou Island (Base Camp)
Bonesy took us on a short hike while we were still in Rock Harbor. I was eager to start kayaking to truly start the trip, but he said an early morning hike to Scoville Point made the most sense before starting our adventure on water. And he couldn’t have been more right.
Not even ten minutes into our walk to the trailhead, we turned a corner and were thirty yards away from a moose.
If this was any indication of how the rest of the trip would go, I was in for possibly the best trip of my life. It took years hiking in New Hampshire’s White Mountains to encounter a moose once. Apparently, all I had to do was go for a hike on a remote island off the coast of mainland Michigan to make this dream come true.

We embarked on the Stoll Trail for 4.6 miles (roundtrip) to Scoville Point. A very moderate hike with stunning views of Lake Superior for most of our trek. Bonesy pointed out an eagle’s nest along the trail that I would have missed otherwise. In less than a mile, I had two incredible wildlife views, and we hadn’t started kayaking yet!
Afterwards, we loaded up our kayaks alongside Rock Harbor’s dock. Soon enough we were off to base camp. Two hours and about six miles of paddling took us to West Caribou Island.
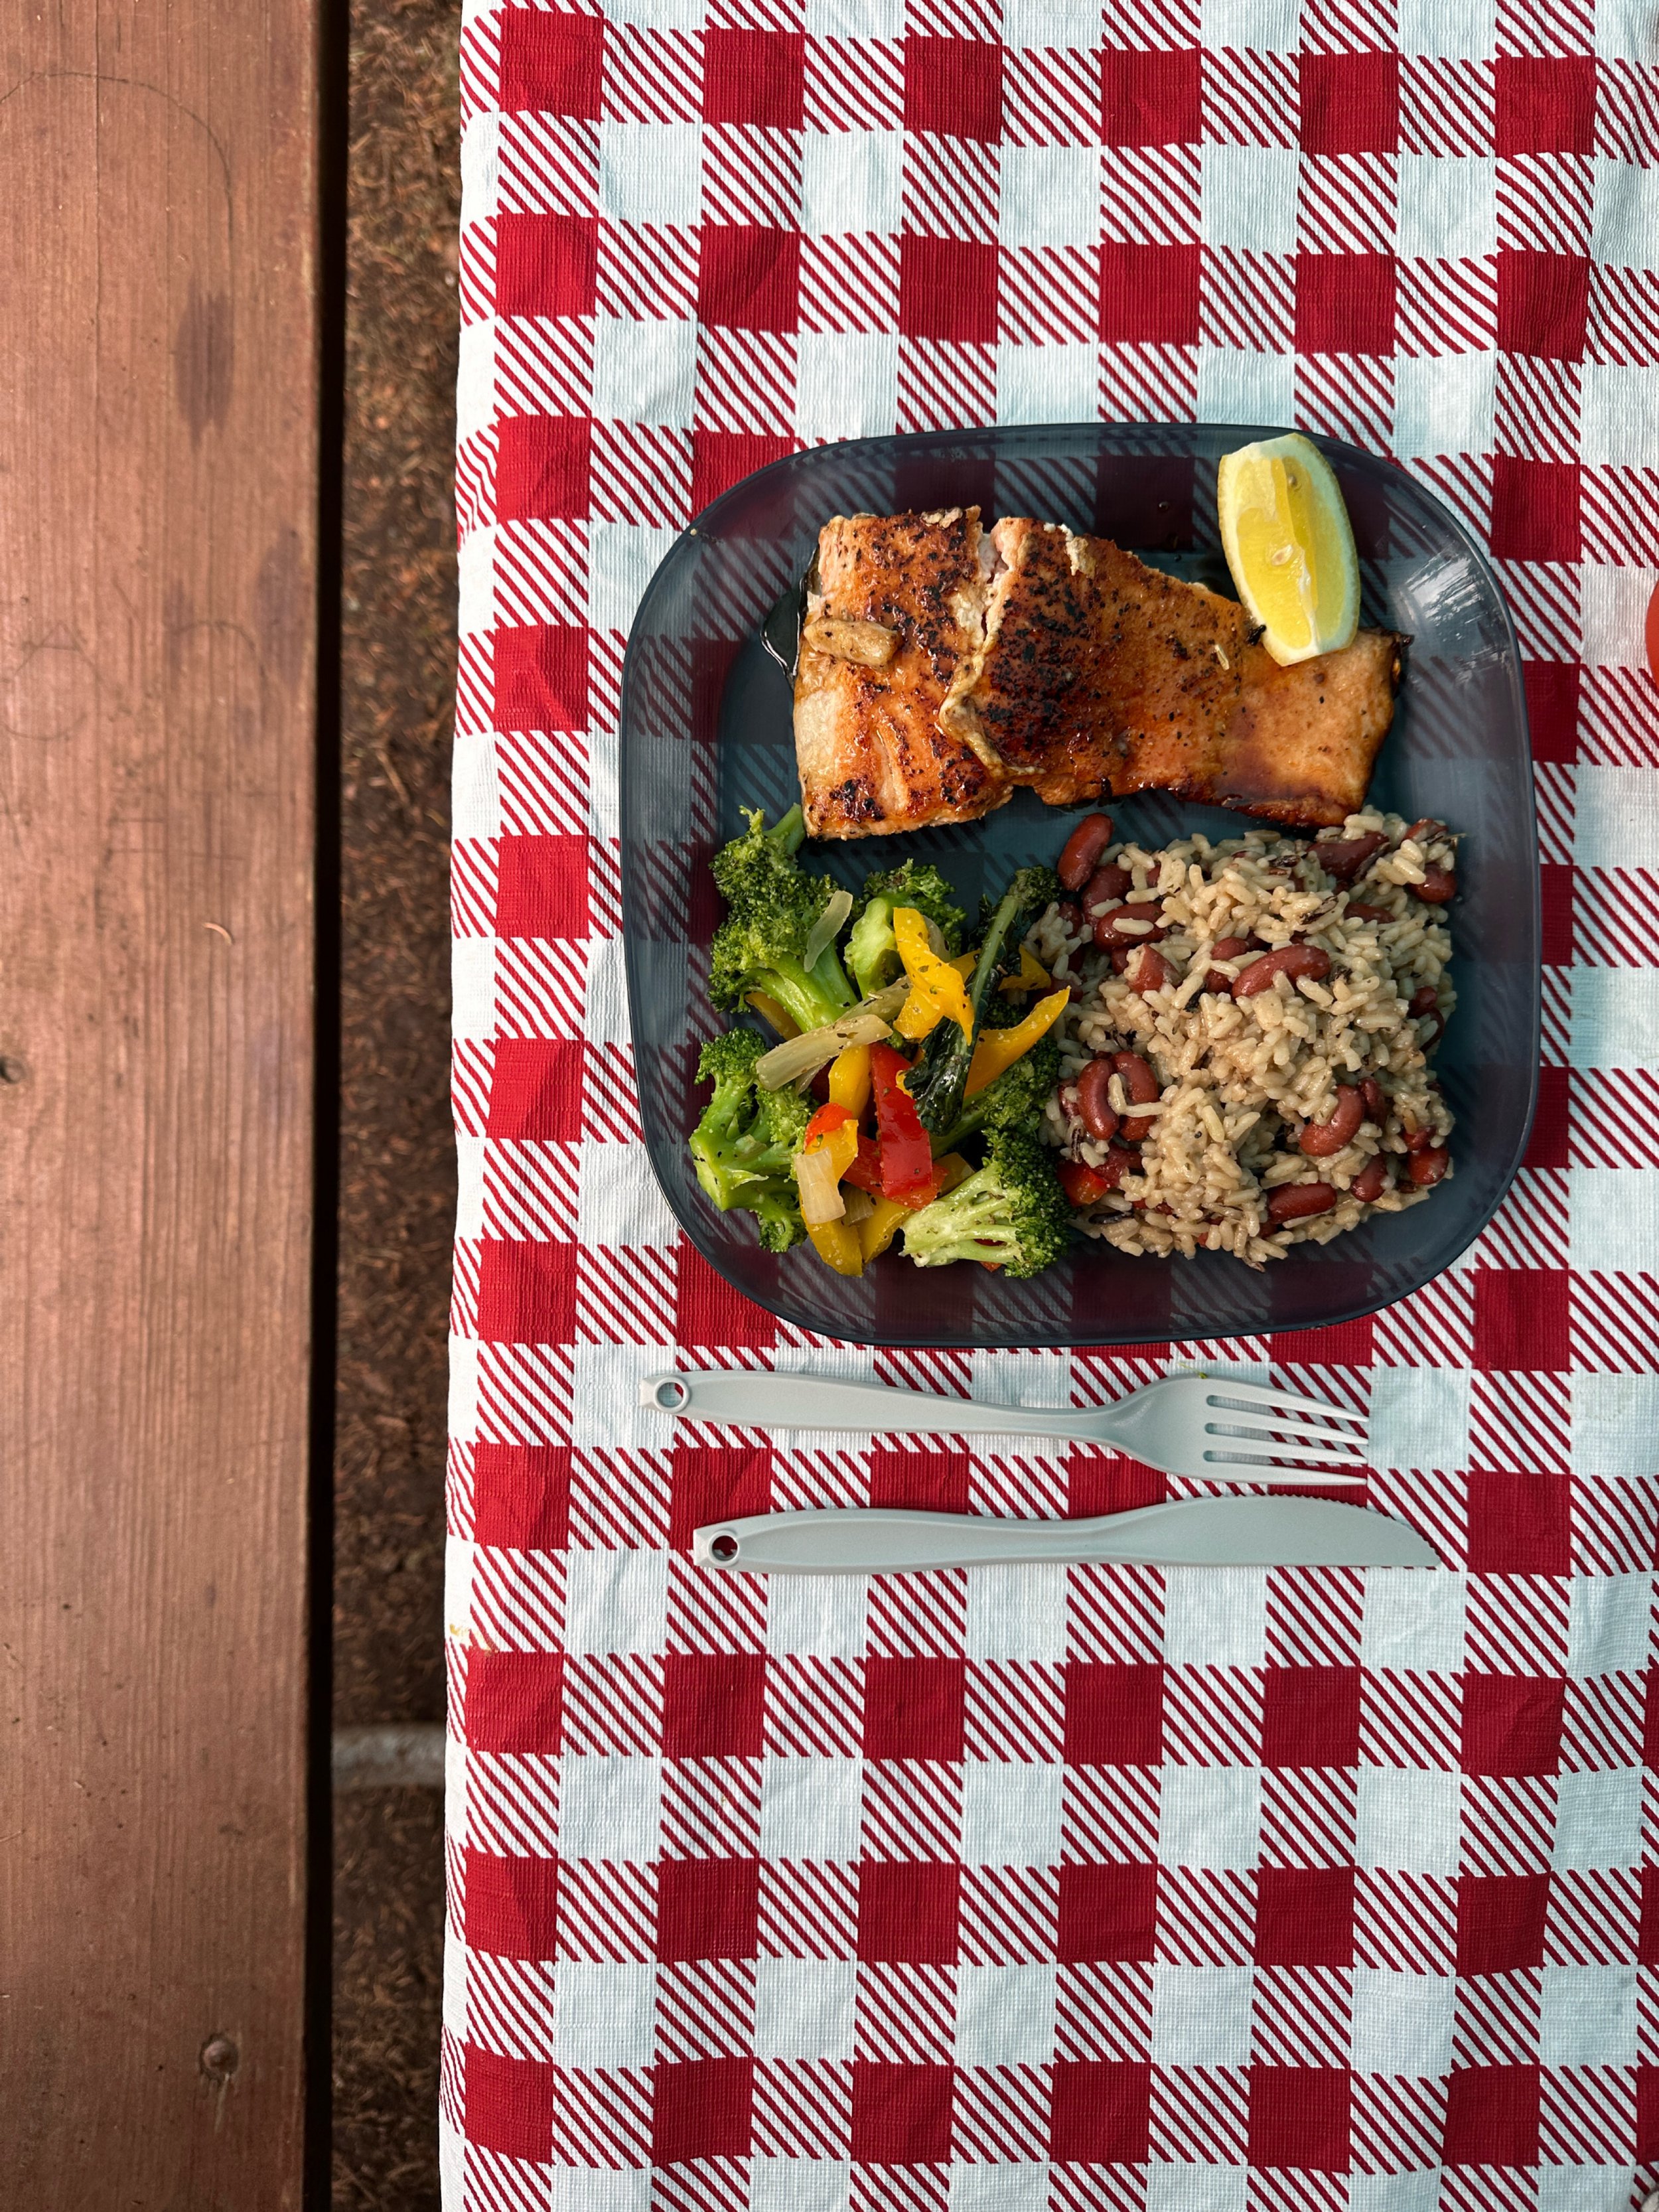
While we explored our new home for the next two nights, our dinner was quite the feast when we returned. Despite being in the backcountry, my food tasted gourmet. A major upgrade from last year’s thru-hike meals I prepared myself.
Unreal Meals in the Backcountry
A major perk of this guided trip is that not only are meals delicious and prepared for us, but our tent, camp equipment, water purification, and even bug spray were included in the trip. My friend and I could truly just enjoy ourselves and the wonder of Isle Royale, without having to run through a to-do task list in our minds multiple times day, like other camping trips we’d gone on.
Day 3: Rock Harbor Lighthouse to Daisy Farm
West Caribou Island was a great jumping off point for day adventures. The island has very limited spots for camping as it is only accessible by watercraft. We had a lean-to to ourselves and could offload some gear to go exploring for the day.

Our first stop: Rock Harbor Lighthouse.
I have always had a fascination with lighthouses and couldn’t pass up the chance to paddle up to one, dock there, and head inside.


Afterwards, we ventured off to Daisy Farm – Isle Royale’s largest campground that doubles as the trailhead for Mt. Ojibway, the highest point on the island. The sunshine finally greeted us on this hike after a couple chilly days. Isle Royale’s weather is as everchanging as New England’s – rain jackets and pants one day, a t-shirt and shorts the next.


This hike reminded me of hiking in Acadia – where the land meets the ocean. In Isle Royale’s instance, the land meets the lake. The hike, part of the Greenstone Ridge, is a little over 5 miles and about 1,000 ft of elevation gain. I love a lookout tower view and Mt. Ojibway delivered! Mt. Ojibway’s summit, at 1,150 feet, was the only spot I had phone signal for the entirety of the trip. We ended our evening enjoying a nice campfire back on West Caribou Island and slowly the stars outshined the fire’s flames as the night went on.


Day 4: West Caribou Island (Base Camp) to Merritt Lane

Bonesy knew we were an adventurous pair and at this point had earned our paddling arms (the equivalent of sea legs on a ship to me), so he set his sights on Merritt Lane for our last night. We loaded up the kayaks to backpedal to Rock Harbor, but first made a lunch stop at Three Mile. This would be our longest day in the kayaks, so Bonesy did a great job of breaking it up for us to also see more in the meantime. After Three Mile, we kayaked a little over 2.5 miles to Rock Harbor, giving us the chance to move our legs and buy a couple refreshments from the park store before departing for the last stretch.
Rock Harbor to Merritt Lane
This portion of the trip was roughly four miles, and as we approached Merritt Lane, I couldn’t believe how lucky we were. There was a small opening among the trees just for this site. It felt like we stumbled upon the perfect one. The mosquitoes swiftly brought me back to reality as they were hungrier than I was for dinner. They made sure they ate well. We layered up and ate our final feast, overlooking the water that just days ago felt so foreign and cold, and now felt familial and warm. I truly didn’t want to leave.


Day 5: Merritt Lane to Rock Harbor
Our final paddle was our slowest four and a half miles because I kept resting my paddle on my legs to soak in the moments. In a couple hours, I’d be back on the ferry heading home, and I wasn’t ready to leave. Each paddle stroke was one step closer to leaving a place that I felt so at home in, in only a matter of days.

We splurged on a timed shower token (mostly to not take away from others’ experience on the ferry ride back since we hadn’t showered in days), bought a few postcards, and disposed of the trash we accumulated over our time in the park at the Rock Harbor Camp Store. We settled onto our ferry seats, and after docking in Copper Harbor, I was ready to do it all over again.
Check out our route (including our two hikes) below. The first image is zoomed out to show just how much more there is to explore on Isle Royale, and the second image is zoomed in to show the route we took on our five day kayak camping trip.


Tips:
Bring layers!
I didn’t think we’d face such chilly weather, followed by mosquito-biting summer sunshine, but I’m glad I packed for it.
Pack your camera. You won’t want to miss the wonderful wildlife.
Book your adventure with Keweenaw Adventure Company. It truly made this trip special and stress-free. Give the owner, Raymond, a call at 906-289-4303 or send him an email at info@keweenawadventure.com.
Add these other national parks to your bucket list:

The Best of the Berkshires: Hike Mt. Greylock, Massachusetts’ Highest Point
Greylock was my first “serious” solo hike years ago and I wasn’t impressed. I decided to give it another try, but this time, I took a different route and loved it. The best way to hike Mt. Greylock is on this 12-mile, 3,300 elevation gain traverse across Mt. Greylock, Stony Ledge, Mt. Fitch, and Mt. Williams.

Sunrise view of Mt. Greylock from my favorite vantage point of Massachusetts’ highest peak: Stony Ledge.
Greylock was my first, “serious” solo hike back in September 2017. I say serious because it was the first time I drove a bit of distance to hike roughly seven miles alone. It was something I always wanted to do, and figured by picking the highest point in Massachusetts, in September, with stretches on the loved Appalachian Trail, there would be other hikers on trail or visitors driving up Greylock Road if I needed something.
Looking back now, seven years later, it’s incredible to think back to how much I’ve changed in the outdoors since then. I thru-hiked for nine days in the most remote corner of the Adirondacks, hiked all 115 4,000 foot mountains in the Northeast, and even have five incredibly memorable days in the woods completing a handful of the Northeast Ultras.
One thing I never thought I’d see myself doing is trail running. As much as I love hiking and being outside, I thought my running would forever be limited to the road because I already trip going uphill while trekking. As with most things, I like to try everything once. Two years ago I found myself wanting to quicken my pace to reach a sunset atop a local summit (my favorite one in fact—Tekoa Mountain in Westfield, Massachusetts). I started trail running to not miss the sunset, and realized I kind of liked it. Since then, I’ve taken up trail running as much as I can get out on the trails and now have a trail running buddy who may love it even more than I do.
Despite always being willing to try things once, there are several things I would not repeat. Like hiking to the summit of Greylock. I haven’t revisited Massachusetts’ high point in years because the view from Greylock’s summit is underwhelming to me. A few years ago I discovered a new angle of Greylock that I absolutely love and have frequently found myself returning to—the view from the Stony Ledge overlook.
I decided to give Greylock another try, but this time, I wanted to add in my favorite view, and a few extra stops for more elevation gain. I ascended Stony Ledge, then summitted Mt. Greylock, followed up with Mt. Fitch and Mt. Williams for a wonderful stick season traverse. This might be one of my new favorite hikes in Massachusetts. Here’s the route and why it made it to my list of favorites:
1. Great training for more serious hikes (like the high peaks in the Adirondacks or the 4,000 footers in New Hampshire).
Greylock is the highest point in Massachusetts, and it still doesn’t quite compare in terms of feet to the peaks of the Adirondacks or the White Mountains. This loop, however, has 3,300 feet of elevation gain over 12 miles. It feels like a day up north without the long drive from Western Massachusetts.
2. Ample parking.
Since I went just days prior to the road up the mountain closing and I arrived prior to sunrise, there wasn’t a car in sight. The parking lot at the end of Hopper Road in Williamstown, MA is large enough for several cars and still had parking available when I returned around noon.
3. Well-worn and well-maintained trails.
As much as I love the Adirondacks for their grittiness and ruggedness, there is something about being able to trail run without obstructions consistently amidst your feet (and being able to look up occasionally to take in the view too).
The best way to hike Mt. Greylock and enjoy the best that the Berkshires have to offer is along the Mt. Greylock, Stony Ledge, Mt. Fitch, and Mt. Williams Traverse. There are plenty of other routes up to Greylock, much faster ones too, but this one truly has it all and it’s a loop. Win-win.
Here’s the route I took (and would definitely do again):


Starting Point: Haley Farm Trailhead at 1033 Hopper Rd, Williamstown, MA 01267
Hopper Road > Haley Farm Trail
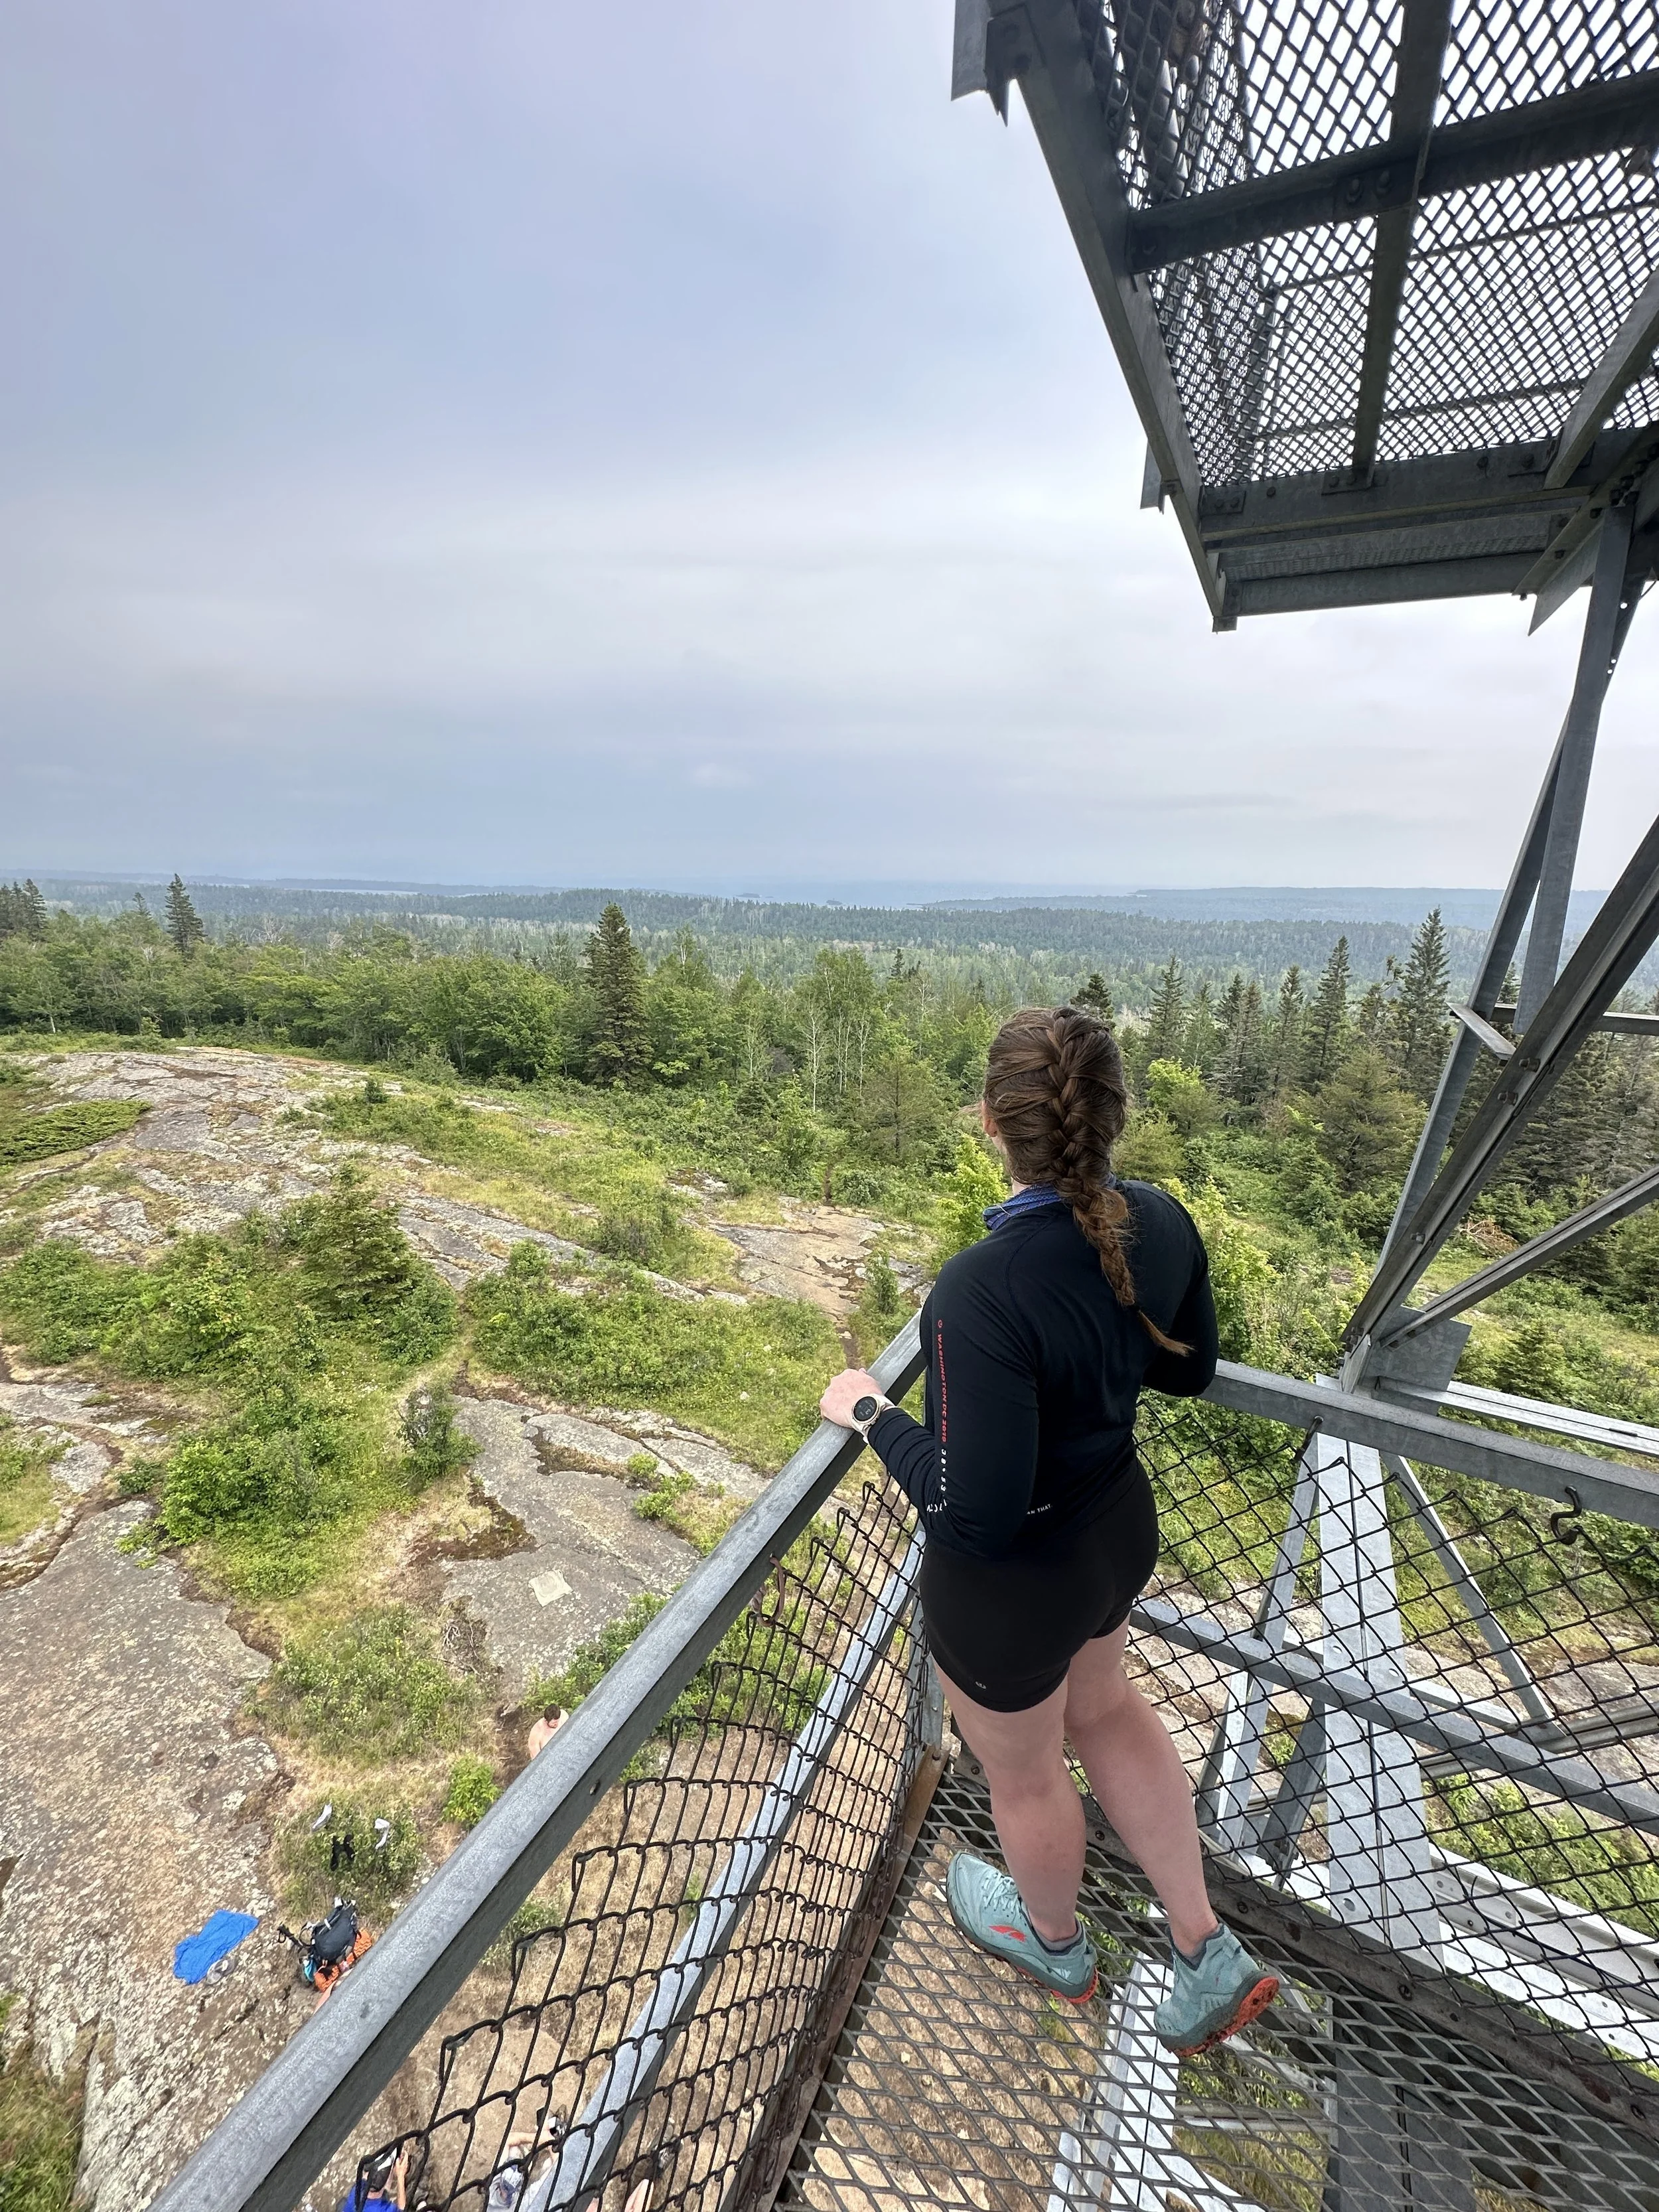
The trail starts off nice and flat from Hopper Road. The first right turn takes you very swiftly up a steep incline up Haley Farm Trail. It’s roughly 1,500 feet of elevation gain in a mile and a half. I chose this route because I hoped to see the sun rise behind Mt. Greylock from Stony Ledge. It was a bit overcast, but I’m glad I conquered much of the morning’s gain in the first stretch. Though the Haley Farm Trail feels relentless at times, the view from the summit is totally worth it. There are a few overlooks with benches to rest at too. Racing the sunrise didn’t leave me much room to relax. I pushed through to the summit and spent some time soaking it in. Stony Ledge has a picnic table at the top too, making it an ideal hike at any time of day.
After enjoying a cloudy sunrise, I continued on Sperry Road. This one’s another favorite! There are several campsites and bear-proof food storage lockers at each site that you pass along the way that I continuously remind myself I need to return to one day for an overnight. The Sperry Road Campground located within Mt. Greylock State Reservation is currently closed for renovations and off-season now at the end of 2024. It reopens mid-May to October and is hike-in only. Definitely on my list to camp at one of these days!


Sperry Road > Hopper Trail
Time for the real gem of this hike – the Hopper Trail. There are a few access points to it, but I continued on Sperry Road until where the Campground Trail interests with Sperry Road and the Hopper Trail. I took a left on the Hopper Trail then, and continued upward. This is where I saw the first hiker of the day. The Hopper Trail continues until you come to a split with the Overlook Trail.
Overlook Trail > Appalachian Trail > Summit
I veered right, though you could go left for a bit to see Mt. Greylock from a different vantage point. I knew I had a long day, so I headed straight to the summit. The Overlook Trail merges with the Appalachian Trail heading north. Soon there is a small pond on the left of the trail. The pond has a small cabin that in years past hikers could walk into. As of November 2024, the trail to the cabin is closed for restoration purposes. The pond is a great landmark for being near the summit.
Just after the pond’s serene views is the road intersection of Notch Road and Summit Road. Continue on north along the Appalachian Trail to the iconic, 92-foot granite tower atop the summit of Mt. Greylock.


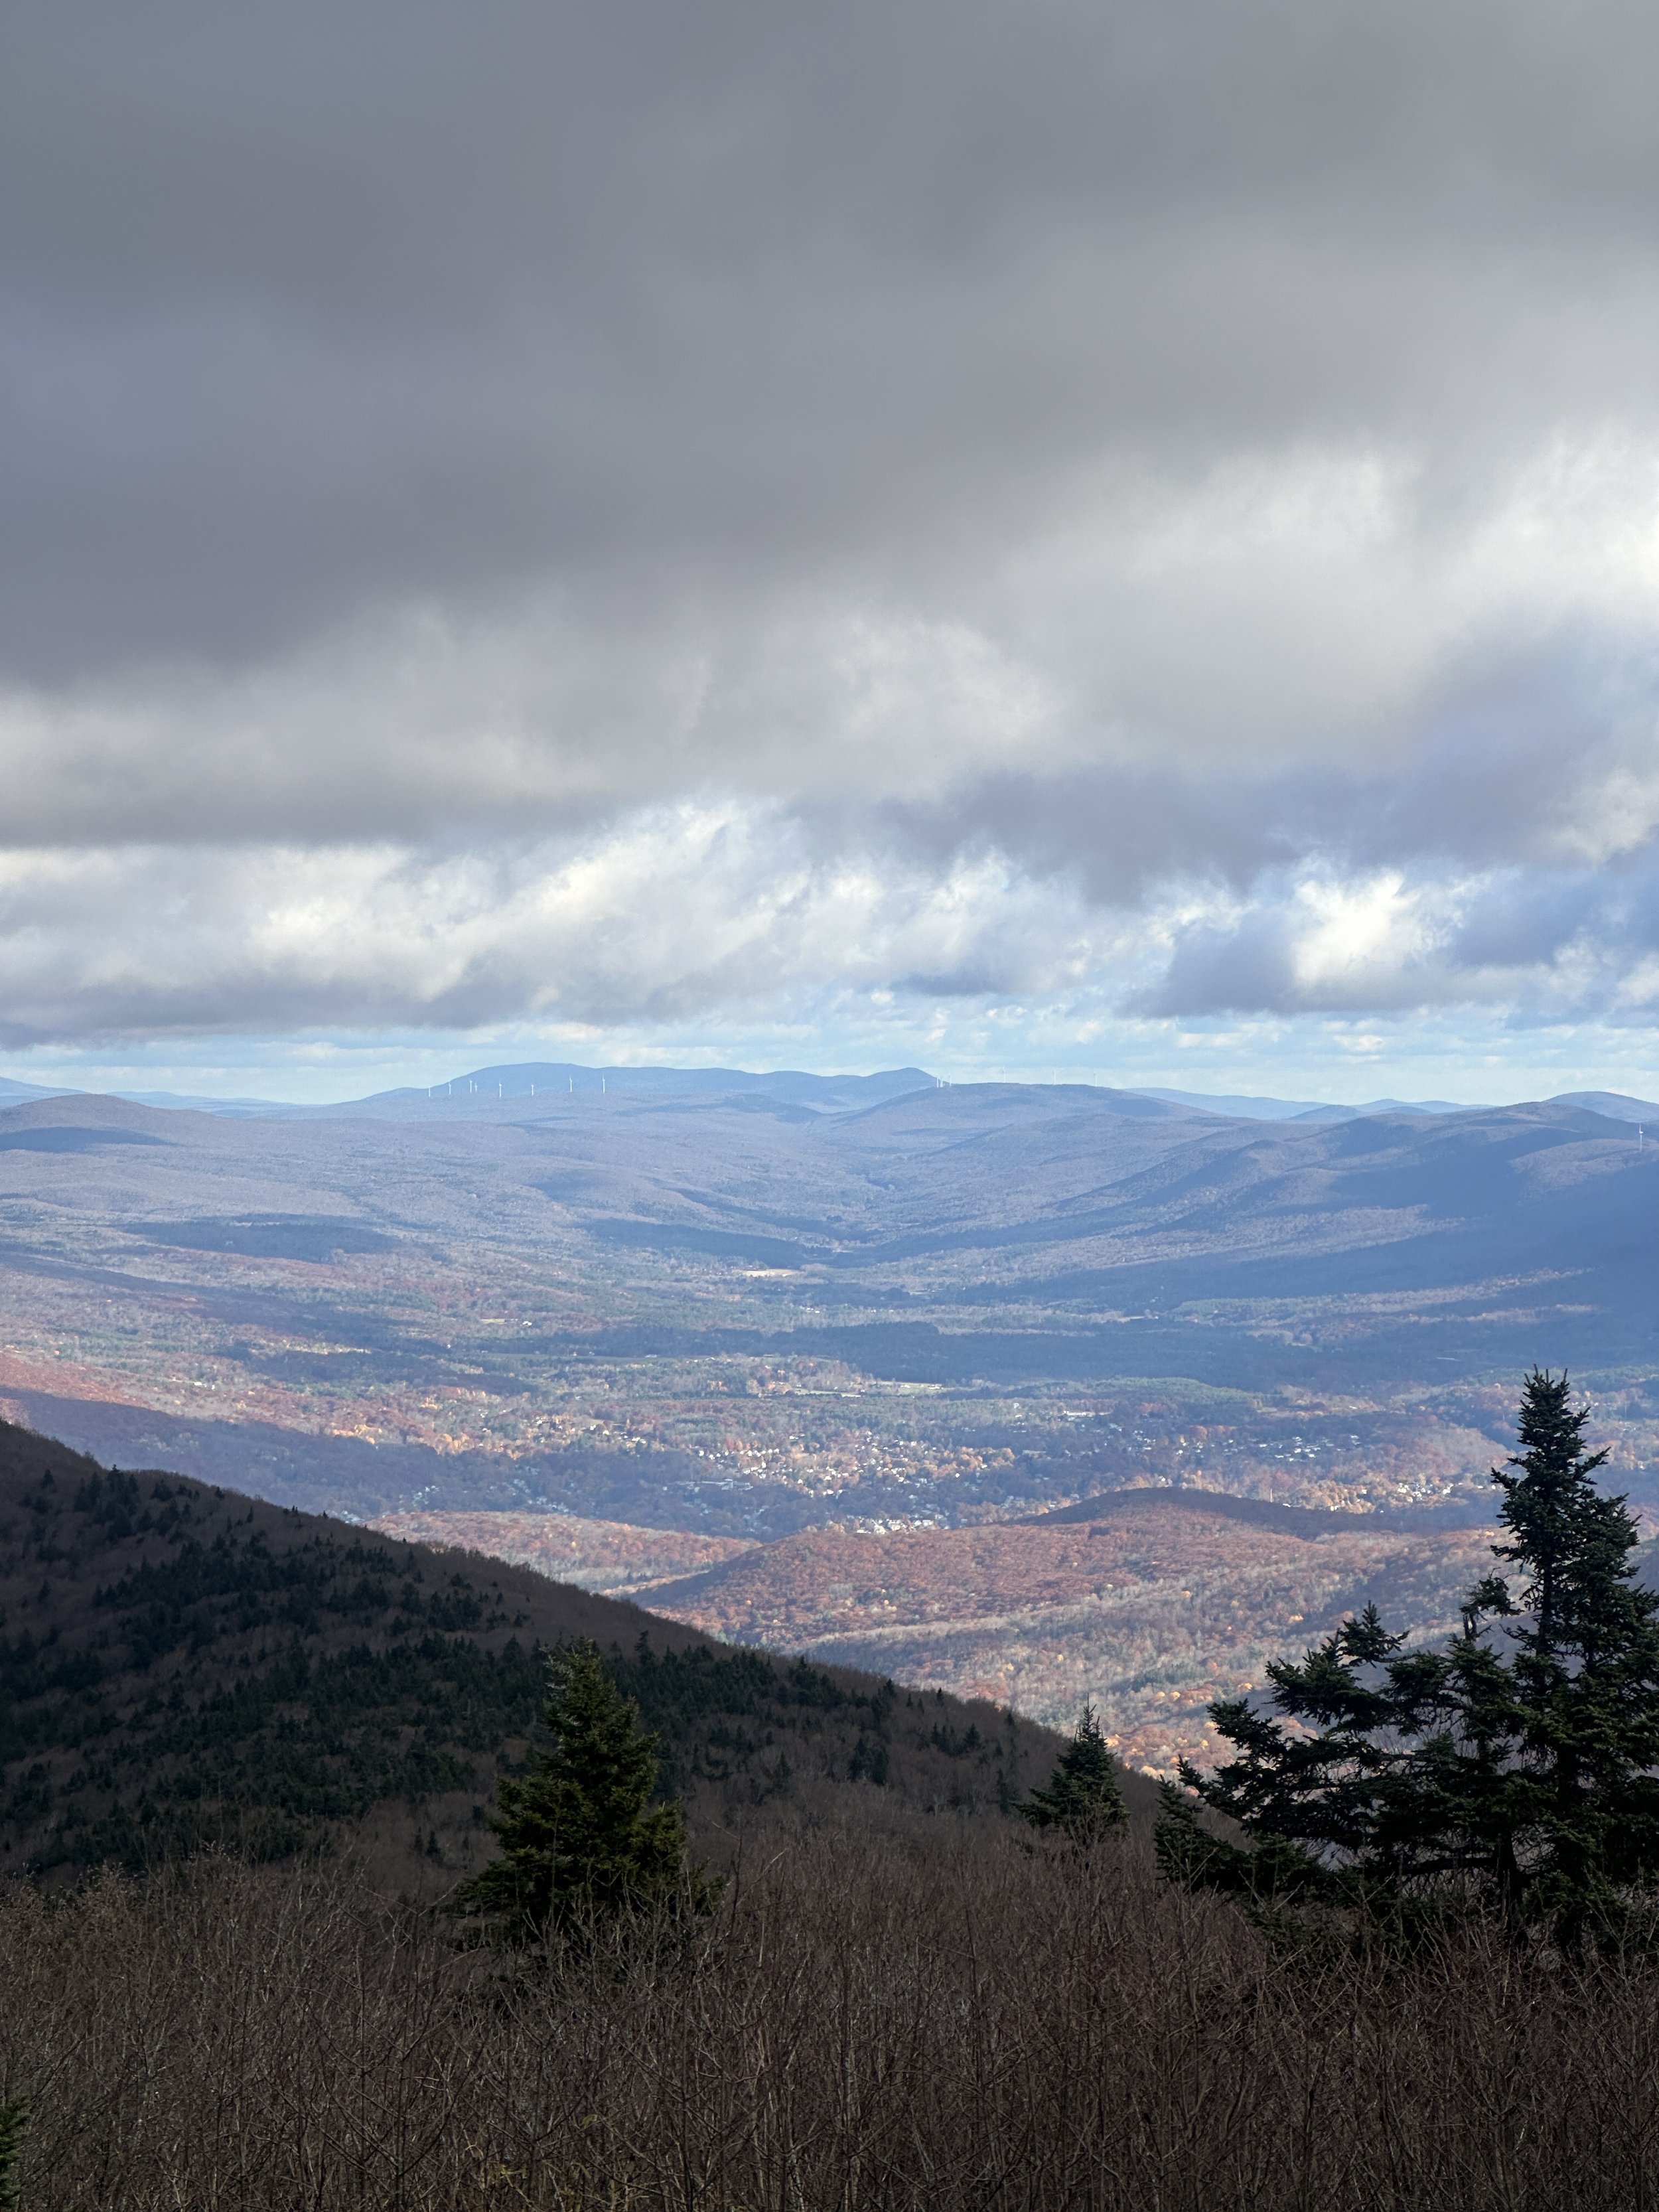
I walked up to the Veterans War Memorial Tower, only to find the doors locked. I figured it was due to heavy winds that morning, but just as I turned around, a Mount Greylock State Reservation employee approached the door and unlocked it. I made my way around the spiral staircase to the top. I had endless views of Vermont, the Catskills and the serene Berkshires all to myself for a few minutes. After seven years and a few hikes at this summit, I finally experienced the hype of Greylock. I headed down as others made their way up the tower, and onward to my next peak.


Appalachian Trail > Money Brook Trail

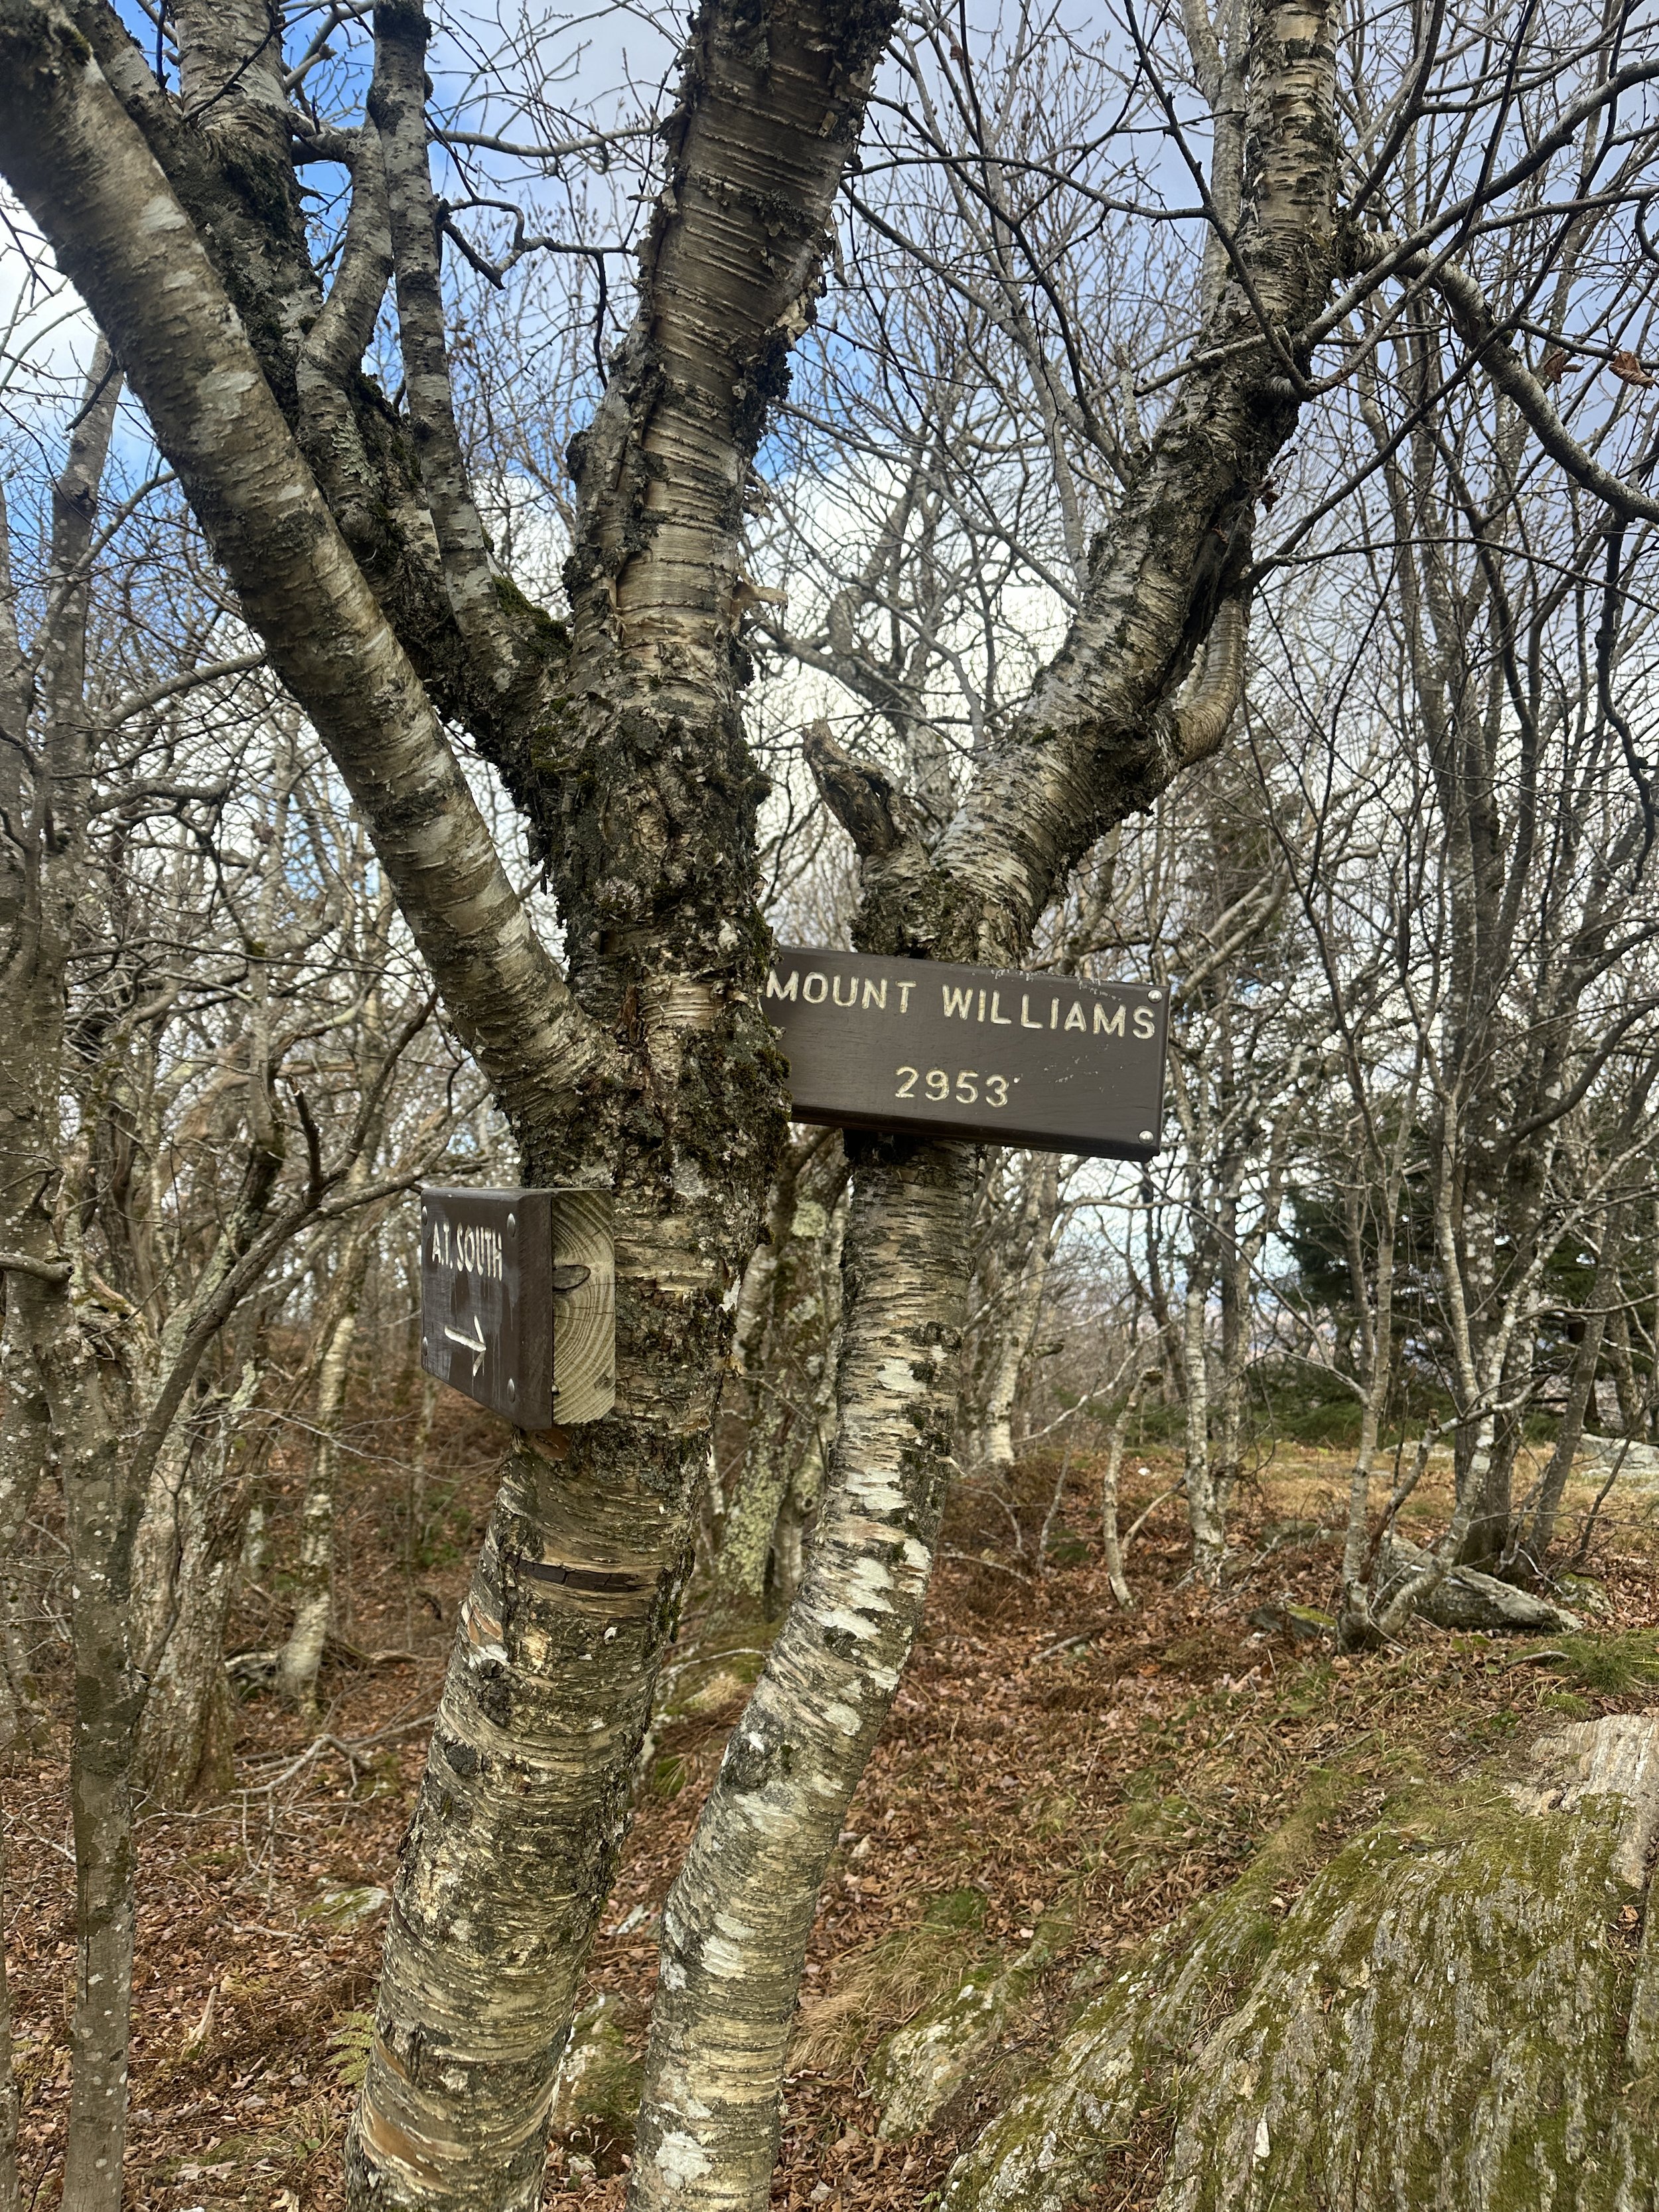
This stretch of trail might’ve been my favorite of the morning. I barely saw a soul, hiked up and over Mt. Fitch and Mt. Williams, and passed by a neat campsite at Wilbur Clearing. The privy even had AT carving into it. I took a detour to Money Brook Falls. With a totally sunny October without rain, the falls weren’t rushing.


Money Brook Trail > Hopper Road Parking Lot
After the detour to the falls, I continued pack downhill on the trail. The trail follows the brook for almost the entirety of the route back to the car. Fall foliage was gone by the end of October up at the summit of Greylock, but a few leaves remained along the Money Brook Trail.


End Point: Haley Farm Trailhead at 1033 Hopper Rd, Williamstown, MA 01267
This route definitely changed my mind about Mt. Greylock. A quiet, late autumn morning on a longer traverse made me love this state’s high point.
Have you hiked Mt. Greylock? If you enjoyed learning about this route, then you may enjoy these hikes around the Northeast:
Hike the Vermont 5 4,000 Footers
Lake Placid 9er Hiking Challenge
Twins Zealand Bonds Traverse (part of the NH 48 Challenge)

Tupper Lake Triad Ultra: The Best Beginner Hiking Challenge for Dogs
I decided I wanted to complete Tupper Lake Triad in a day with my dog— three hikes totaling 7.4 miles and 1,975 feet of climbing. Here’s everything you need to know for a Tupper Lake Triad Ultra:

Lake views from the fire tower atop Mt. Arab on an October morning.
After finishing the Northeast 115, I wasn’t drawn to any particular hiking challenge. Once leaves began to change, so did my feelings toward a new goal. I set my sights on a trio of trails that I could do with my favorite hiking partner, Poppy. Poppy spent the summer hitting the trails with me and seemed ready for a bigger day.
Despite her love for the trails, she hasn’t hiked any 4,000-footers. Yet. She earned her trail legs last month in October when we headed up to Tupper Lake in New York to take on the Tupper Lake Triad—a list of three summits in the scenic town of Tupper Lake comprised of: Mt. Arab, Goodman Mountain, and Coney Mountain. A trip to Tupper Lake could include one of these alone and it would be a wonderful time spent outside. However, I wanted to tackle all three in a day to complete the Tupper Lake Triad Ultra – something Poppy and I could do together. In a day, these three hikes total 7.4 miles and 1,975 feet of climbing. If you subtract the short drives in-between, it almost feels like a 4,000 footer. Great practice for my trail buddy!
Everything you need to know for a Tupper Lake Triad Ultra:

1. Mt. Arab (2,525 feet)
Location: Mt Arab Rd, Tupper Lake, NY 12986 (Mt. Arab Trailhead & Parking)
Distance and elevation: 2.1 miles out-and-back, 768 ft gain
Parking: Plenty of parking with multiple spots opening up both when we arrived and when we left at the Mount Arab Trailhead Parking.
Trail: Take the Mount Arab trail up to the summit, and back down.

Mt. Arab was my favorite of the three mountains mostly because I’m a sucker for a fire tower. I love seeing expansive views, and it’s almost a guarantee when it comes to an Adirondack fire tower (weather permitting, of course).

2. Goodman Mountain (2,190 feet)
Location: Adirondack Park Preserve, Tupper Lake, NY 12986 (Goodman Mountain Trailhead)
Distance and elevation: 3.1 miles out-and-back, 607 ft gain
Parking: Plenty of parking at the Goodman Mountain Trailhead, and with the hike being so short, multiple spots opened up in the time we arrived and departed.
Trail: Take the Goodman Mountain trail up to the summit, and back down.

Excellent views from the summit of Goodman Mountain.

3. Coney Mountain (2,264 feet)
Location: NY-30, Tupper Lake, NY 12986 (Coney Mountain Trailhead)
Distance and elevation: 2.2 miles out-and-back, 600 ft gain
Parking: There are only one or two spots at the Coney Mountain parking area. Parking is available on the very busy road, but the spots are endless.
Trail: Take the Coney Mountain trail up to the summit, and back down.


Receiving your Completion Patch
Once you complete all three (in a day or over multiple days), submit your registration to the Regional Office of Sustainable Tourism with $5 for a patch for you and your pup. The Tupper Lake Triad challenge offers online registration. My patch arrived in my mailbox within a week!
Preparing Your Pup
I trained Poppy on local trails prior to tackling the high elevation gain of all three hikes in one day. A big advantage of the Tupper Lake Triad is that although the elevation gain mirrors an Adirondack 46er, the trails are very well-maintained and accessible. Driving from trailhead to trailhead gave her a chance to recover before the next hike.

Affordable Lodging Near Tupper Lake, NY
Since Tupper Lake is roughly a four-hour drive away from home, I opted to camp at a nearby state campground—Fish Creek Pond. This campground has plenty of sites, bathrooms, and views.
I wanted to test out an air mattress in the back of my SUV, so we car camped at Fish Creek. Definitely worth it!
Where to Eat in Tupper Lake, NY
In this area of the Adirondacks, I always gravitate to Raquette River Brewing. They truly have it all: a plethora of food trucks, beers, and parking spots.
Is the Tupper Lake Triad (ultra or not) making it onto your hiking list? If you enjoyed learning about this hiking challenge then you’ll love exploring these:
Hike the Vermont 5 4,000 Footers
Lake Placid 9er Hiking Challenge
Twins Zealand Bonds Traverse (part of the NH 48 Challenge)

Thru-Hike the Northville-Placid Trail in 9 Days (as a First-Time Backpacker)
I had never camped in the backcountry, nor had I thru-hiked. Yet, I found myself in Northville embarking on a 9-day, 138-mile thru-hike in the most remote part of the Adirondacks…

The start of the Northville-Placid Trail in Northville, NY.
In July 2022, summer felt like it was rapidly coming to an end. I set my eyes on either traveling to Isle Royale National Park in Michigan or backpacking for the first time.
To my surprise, almost all accommodations for Isle Royale were booked months in advance. I thought it was a difficult national park to access due to the only modes of transportation being an hours-long ferry ride or a small, costly seaplane. Apparently a remote island with no roads in Michigan is a highly sought-after vacation destination!
Disappointed that I wouldn’t be kayaking along Isle Royale, I pondered where else to venture to. My gaze lifted from my computer screen to where my wall calendar was.
July’s image was a summery scene in the Adirondack wilderness. It took seven months of this calendar year for me to realize the map illustration next to the days of the month. The illustration followed lakes foreign to me in an area I felt so at home in. I discovered this seemingly endless web of rivers and wooded forests was the Northville-Placid Trail.
I looked the trail up. The Northville-Placid Trail began construction in 1922 and was completed two years later. It is one of the oldest hiking trails in the United States taking hikers along a 138-mile point-to-point trail from Northville, NY, and ending, of course, in the town of Lake Placid.
This would be amazing, I thought to myself. Naturally, I pitched it to my best friend despite knowing she’d say no. It’s an eight-to-fourteen day thru-hike in some of the most remote corners of the Adirondack mountains. We day hiked 4,000 footers a handful of times, but we’d never done anything like this.
The surprises that summer continued. “Let’s do it” was her answer. It didn’t take her (and myself) long to realize we had no idea what we were in for.
About two weeks after we decided to try backpacking out for the first time, we found ourselves waking up before sunrise in our cabin in Lake Placid to pack our bear cannisters and our packs before our ride in the morning. Yes, we were packing for our trip the morning of. Again, total amateurs.
We had an honest-to-God Cheryl Strayed moment attempting to put our packs on for the first time to get them into the trunk. We were successful (and a little scared at how heavy they were) and met our incredible driver at the Lake Placid Historical Society’s History Museum parking lot.
Bob’s cheerful smile alleviated the stress built up from the backpack fiasco. He talked to us about fishing in Alaska, stopped for us to grab coffee, and told us stories of every town we passed through on our way to Northville.
Bob runs Bob’s Shuttles out of Piseco, New York. I found him through the Northville Placid Trail Facebook group a week before. He gave us tips for the trail and even stores hikers’ re-supply boxes in his garage. I couldn’t imagine having to carry 8-14 days’ worth of food. He’s a true gem.
Update: Though he stopped his services in summer 2024, he was a pivotal part of our NPT thru-hike. There are other driving services advertised in the Facebook group.
He dropped us off at the starting point in town, took our photo where we look incredibly vibrant and naïve, and said he’d see us in a few days in Piseco. Fingers crossed.
Here’s a breakdown of my nine days thru-hiking the Northville-Placid Trail:
Day 1: Northville to Woods Lake (13 mi, 2,300 ft gain)
The beginning of the hike is anti-climatic. We hiked three miles in the blazing sun during one of the most humid days along an asphalt road. Cars honked and people waved to cheer us on. At the end of the three-mile trek, we met a woman who told us of a bear sighting in the woods we were entering. Shortly after, a firefighter told us the same thing. Truly a lovely start for two girls who had never slept in the backcountry before.
We welcomed the tree-covered trails once we got there, and after about a mile, we took a lunch break. We regretted only grabbing coffee for breakfast when Bob stopped for us, and begrudgingly ate lunch early. A tortilla, two buffalo flavored chicken packets, and a little Nutella after sweetened the deal.
Pro-tip (from a beginner backpacker): figure out high caloric food because that lunch will get squashed rapidly down your throat on a hot, humid day carrying thirty-pound packs.

West Stony Creek Crossing
The West Stony Creek crossing, the water crossing I was nervous about getting through, was low, and easy to traverse. However, after heavy rains, we heard it could be impassable.
We made our way to Woods Lake, where our driver Bob told us to not camp at because it can get rowdy. The gorgeous Woods Lake is easily accessible by cars and only a .1 mile walk –making it an easy spot to access for the lake views. As we approached sunset, we decided to stay despite Bob’s warning. We took a dip in the lake we had all to ourselves, and I experienced the most magical sunset.
We woke up abruptly in the middle of the night to a couple locals having a good time. They went out on the water blaring music in a boat and returned the boat right next to our tent. Should have listened to Bob.


Day 2: Woods Lake to Canary Pond (14.6 mi, 2,000 ft gain)
After disrupted sleep at Woods Lake, we slept in and ate our oatmeal gazing at the gorgeous lake in front of us. We passed a few tiny bodies of water (Rock Lake, Meco Lake, and Silver Lake) before reaching our destination.


I was thrilled to have our campsite to ourselves with no easy access for cars to drive up to. We were beyond sweaty from another grueling heat wave day, so a dip in a pond was starting to feel like an NPT routine we could get behind.
Little did I realize that something in the water kept leeching onto me and turns out, it was actually a leech! We swiftly jumped out and decided maybe it wouldn’t become a daily ritual on trail.
Day 3: Canary Pond to Piseco (14.5 mi, 1,600 ft gain)

Our saving grace was knowing we would reach Bob on day 3. We had absolutely no service and were hopeful getting into a town would help. We also had a package that Bob kindly let us keep in his garage of our meal refuels and other items. Piseco was the point where my friend was contemplating leaving trail. I enticed her with a hotel stay and when we reached Bob’s Garage, we booked a night at The Inn at Piseco Lake. They offer a thru-hiker’s discount, but even without it it’s worth it. We left behind some oatmeal packs at Bob’s for the next thru-hikers, as we were extremely over it two days in. A nice shower without worrying about leeches was refreshing.


Day 4: Piseco to West Canada Lakes (16 mi, 2,500 ft gain)

Out with Oatmeal… In with Mashed Potatoes
We exchanged oatmeal for mashed potatoes, and used the inn’s microwave to cook this fine dining breakfast of champions.
With renewed spirits (mostly thanks to the shower and an absorbent towel), we embarked toward the part of trail I was most excited for: the West Canada Lakes. We had some turkeys trotting aggressively around us as we started the day, but we avoided the beatdown as soon as we entered the woods. At this point, my feet were blistered and legs bug bitten. My friend convinced me to hike in socks and Crocs… and I finally agreed. It completely down poured our last two miles, but we slogged our way to West Lake Lean-To #2, only to discover a group of college kids embarking on an orientation camping trip. I remember thinking that I wished I had one of those back in college! My other wish was simultaneously that they weren’t there so we wouldn’t have to set up our tent in the rain a little ways away.


Day 5: West Canada Lakes to Cedar River (16.4 mi, 1500 ft gain)
We awoke to dampness, a norm on the NPT in early August. Canada Lakes were rainy, so we didn’t linger too long in the morning. All of our clothes were still soaked, and it was tough to sleep because despite elevating my feet, they wouldn’t stop tingling. I created my own pillow by wrapping my rain jacket around my Ziploc bag of “clean” clothes. Clean is relative on trail.


This morning was rough if the trail images above didn’t give that away. My socks and boots were wet with my first step. The trail’s swamps joined together with last night’s rain to create a large lake. The slog was only two miles, but lasted two hours.

Wakely Dam Camping
As we entered Wakely Dam, we passed by a few campers. To our surprise, a bit of trail magic appeared. A camper saw our packs (and probably our faces) and offered ice cold Pepsi cans. I don’t even like Pepsi, but in that moment, it tasted like pure sunshine. Turns out they were from Northville, NY, so they were delighted to hear we had hiked from their home to this spot.
We washed our dirty clothes in the Cedar River Flow, but with the humidity, they did not dry overnight. Clean, damp clothes may almost be worse than dirty and dry ones.
Day 6: Cedar River to Lake Durant (12.2 mi, 1300 ft gain)
A shorter mileage day in terms of distance, but not feeling. It was wonderful to get into the Lake Durant campground, book a campsite, and set up camp with plenty of daylight left though. I walked down to the lake for a short dip. We finally caught up on journaling and showered in the campground showers. We laid inside our tent for hours before we succumbed to sleep.


I usually sleep well in the woods, but with wet socks all day, my feet were blistered beyond repair. My camp sandals (chacos) only made it worse. One of the top priorities in town the next day was to find a pair of Crocs if I hoped to continue the trail.
Day 7: Lake Durant to Long Lake (14.5 mi, 1800 ft gain)

We left Lake Durant with puffy eyes set on our next resupply in Long Lake. Bob wonderfully left our second resupply at the Adirondack Hotel in Long Lake. To keep spirits high (and to have company on this thru-hike), we booked a night at the hotel to recharge once we made it.
This was the second rainy day on trail and we would reach the highest point of the entire trail just past Tirrell Pond at 3,008 ft in the Blue Mountain Wild Forest. Rain fell consistently as we had the longest stretch of wooden planks, a quarter-mile, lined with wet ferns brushing up against both sides of our bodies. My feet were utterly drenched. Once we reached the parking lot, my shoes came off immediately.


Adirondack Hotel in Long Lake, NY
We barely reached service enough to call Jim, one of the sweet owners of the Adirondack Hotel, who gave us a ride into town. There’s very little a burger, beer, and a Stewart’s milkshake can’t fix. It was just the fuel we needed to explore four stores before finding a pair of Crocs in my size! My hopes of finishing the trail in the next three days were high.

The sunsets along the Northville-Placid Trail were unreal, and this view just steps from the Adirondack Hotel in Long Lake was no exception.

Day 8: Long Lake to Cold River (12.5 mi, 1300 ft gain)
It was tough leaving Long Lake for the trail. We ate at a diner before our ride back to the Northville-Placid Trail. With new crocs in tow, things were looking up. We knew we were roughly 2/3 done, but we still had a third to go. Southbound hikers informed us of plenty of blowdown in this last section to top it off.
We walked along Long Lake, stopping at Plumley Point for lunch. It felt like the best day on trail yet mostly due to weather and views. Long Lake truly goes on for a long time (so it felt) and the heat wave finally broke. If I was to hike the NPT again, I would spend an extra day soaking in the lake views.


We continued on with our sights set on one of the Cold River lean-tos. We would’ve loved Lean-To #3 because of its higher vantage point of Cold River, but a father-son duo celebrating their last hurrah before the son went off to college occupied it. Cold River Lean-To #4 was right along the water. Not a bad consolation prize. True to its name, it was our first chilly night on trail. On one of the last nights, I finally got to wear the leggings I had carried for eight days but hadn’t used. The father and son came by to let us know of a bear sighting, but sadly it never said hello to us.


Day 9: Cold River to Lake Placid (24.2 mi, 2,800 ft gain)
Sitting on the rocks taking in the morning cold, we sipped our coffee. So refreshing after so many sweaty days. Each morning we were packed up and on the trail earlier than the day before. Things were in a groove it felt like.
The smell of pine and sound of the Cold River filled the air during the first few miles of the morning.
We passed through Shattuck Clearing, awed at views of the Seward range (that I was tempted to summit), and explored the Rondeau Hermitage site. We hit ten miles by noon and decided to keep going to our spot for the night.
There was a tricky spot to navigate here with a massive tree log serving as a bridge. I was impressed I managed to walk across with my pack with ease. We approached our lean-to for the night in the late afternoon. Moose Pond had a beautiful lean-to, but the pond wasn’t easily accessible. With 15.2 miles behind us for the day, and several hours of daylight to go, we thought we’d do what we hadn’t done yet: a twenty-mile day.
It didn’t feel like the final night at Moose Pond, so we decided to tackle on the additional nine miles to finish the trail a day early. It felt amazing to hit a twenty-four mile day for our finale, and even better to make it to Big Slide Brewery for their honey pepperoni pizza that might’ve been devoured in record time.
Note: Mileage and elevation gain are rounded up to the nearest tenth.


A few recommendations:
1. Purchase both the Northville-Placid Trail Map and the latest edition of the Northville-Placid Trail book. Both come in a pack for $30 from ADK.org.
2. Use Piseco and Long Lake as refueling stations if you need them, not Blue Mountain Lake. Blue Mountain Lake adds a handful of miles in one direction that you may not be up for. The post office there also could be closed depending on when you make it in.
3. Do not rely on phone signal. We had no service with T-Mobile or Verizon the first three days from Northville to Piseco for us. We only had service at The Inn at Piseco Lake when we connected to wi-fi.
4. The Northville-Placid Trail is extremely isolated. Over the span of nine days and 138 miles traversed, we only saw 1-2 groups (whether it was a solo hiker, a couple, or a college group closer to the end) daily. There is little room for error if you are injured or need assistance until you reach the town milestones: Piseco, Long Lake, Lake Placid. Plan accordingly.
The Northville-Placid Trail only furthered my love for the Adirondacks. I had only hiked a handful of the 46 at this point, but it instilled in me a desire to complete them all. The remoteness of this trail appealed to me, despite the challenges being very isolated in the woods can create.

Have you heard of this thru-hike? Would you do it?
If you enjoyed this post, check out other hiking adventures:

Four Reasons to Visit Nevada’s Greatest Gem (No, Not Vegas)
And that’s how I landed on visiting my 44th national park. What I did not plan for is loving northern Nevada as much as I did. Here are four big reasons why this small town…

Summit of Wheeler Peak, the highest mountain in Nevada’s Great Basin National Park, June 25, 2024.
When one of my close friends decided to get married in beautiful Breckenridge, I immediately knew I’d extend my trip. Flying to that part of the U.S. isn’t as easy as driving to the mountains in the Northeast, so I wanted to take full advantage of my time out west. After last summer’s excursion to Isle Royale National Park off the coast of Michigan and Virgin Islands National Park a few months prior, the more remote a park is, the more I seem to enjoy it.
I mapped out the closest new-to-me park from Denver and there was only one national park that was remotely in driving distance. To be fair, driving distance is relative, but to me, a ten-hour drive, partly along America’s loneliest highway, sounded like the perfect plan.
And that’s how I landed on visiting my 44th national park: Great Basin National Park in Baker, Nevada. What I did not plan for is loving northern Nevada as much as I did. Here are four big reasons this small town made its way to the top of my favorites list:

Stella Lake from the Stella Lake trail heading to Wheeler Peak.
Wow, does this park genuinely have it all! From the world’s oldest living organisms to the state’s (technically) highest peak and only glacier, Great Basin National Park should be on everyone’s list of places to explore.
Hike Wheeler Peak
Y’all know I love a good hike, and after hiking a couple 14ers in Colorado, I was ready to take on Nevada’s second highest peak. Nevada’s highest peak, Boundary Peak, is only about 70 feet higher and partially in another state, but one minute at Wheeler Peak’s summit will make you feel like you’re on top of the world.
At 13, 063 feet, this peak towers over Great Basin National Park. A little over 8 miles and 3,000 feet of climbing, this trail was very easy to follow. I brought microspikes and trekking poles, but did not need to use them.
Explore the Oldest Bristlecone Pines in the World

Bristlecone Pine Glacier Trail
Great Basin bristlecones are over 5,000 years old. There’s a short trail from the Wheeler Peak campground that takes you through an informational path of the bristlecone pines. Definitely worth a detour if you’re already at the campground.

Dip Your Toes in an Alpine Lake
There are a handful of alpine lakes in Great Basin National Park. The most popular ones are found along the Alpine Lakes Loop leaving from the Wheeler Peak campground. I took the Stella Lake trail up Wheeler Peak, so I had the joy of staring at Stella Lake for awhile as I made my way to the summit. Once atop Wheeler Peak, I had a birds-eye-view of three alpine lakes. Three! I felt great getting off the mountain, so I added in the Alpine Lakes Loop and my feet were glad I did. Stella Lake is the largest of the three, but my favorite was Teresa Lake. Turquoise blue waters, a view of Wheeler Peak, I couldn’t ask for a better ending to the day’s hike. I woke up early the next morning for another dip and had the lake all to myself for a couple hours.
Gaze at Nevada’s Only Glacier (while it’s still there!)
If you’re on the Bristlecone Pines Trail, you can continue hiking for a little under a mile to see Nevada’s last remaining glacier. I know this park is remote, but I am truly shocked it’s one of the least visited. There is so much history packed into this park that everyone can find something to take away from a trip here.
Tips: Great Basin National Park is at a higher altitude than most visitors live at. Remember to hydrate, pack ibuprofen, and take it easy as you adjust. If you’re sensitive to the sun, higher altitudes bring you closer to the sun, so pack the sunscreen!
Best time of year to visit: There’s something to see in every season, but if you’re outdoorsy, winter conditions close the main (and only) road, Wheeler Peak Scenic Road, into Great Basin National Park. I visited in mid-June when snow had mostly melted. It’s not uncommon for snow to be present until the end of June depending on how heavy winter was that year.
Cost: Great Basin National Park is currently free of charge to explore.
Where to stay: The park offers campgrounds, but I highly recommend Stargazer Inn.
2. Stargazer Inn and Bristlecone General Store
Baker is a small town with a big heart, largely thanks to the owners of the Stargazer Inn. As I’m getting older, I find I gravitate toward a small town feel (if that was not evident by my desire to find the most remote parks and explore them). I have visited plenty of America’s biggest cities, and nothing attracts me more than a small town where locals are welcoming, the food is delicious, and the views are endless.
This trip I chose not to camp to minimize my packing list, so I was looking into stays around each of my destinations. I came across Stargazer Inn, a quaint inn right in the heart of Baker, Nevada mere minutes from Great Basin National Park. I gave Liz a call and sure enough she had a room for me to stay. What she also had, was a connection to Western Mass since she and her husband actually lived here for several years. This little pocket of Nevada is over 2,500 miles from me and yet it still felt like home— thanks to Liz.
Liz and James are the owners of Stargazer Inn and they also host monthly events that cultivate a community in Baker with meet-ups for book clubs, full moon hikes, and more!

I love camping, but my room at the Stargazer Inn put my mind at ease as a solo female traveler, kept my packing list minimal thanks to so many amenities (laundry room, small kitchenette with a fridge, microwave, and coffee!), and saved on travel time to the park. The Stargazer Inn has 10 rooms to stay in, and also offers RV and van hook-up sites.
Address: 115 S. Baker Ave. Baker, NV 89311
Contact: Email Liz at stay@stargazernevada.com or give her a call at 775-234-7323.
Tips: The Stargazer Inn also features a general store, the Bristlecone General Store for any supplies you might run low or run out of. Or maybe if you underestimate the Sierras sunshine like I did, there’s plenty of aloe vera to purchase there.
3. Female-Owned Food Businesses
With most of my trips incorporating long hikes, part of my trip always includes finding food gems. And in a town with only one street and a population that’s smaller than my 7th grade first period class, I was hesitant about where I’d find a post-hike meal. I stocked up on food prior to arriving, but was surprised by the two finds I came across:
Sugar, Salt, and Malt Restaurant (70 Baker Ave. Baker, NV 89311)
After my hike up Wheeler Peak, I was ready to eat. I walked into Sugar, Salt, and Malt and when I saw the white sauce pizza on the menu, I was sold.
This pizza included chicken Italian sausage, roasted garlic, ricotta cheese atop artichoke heart and spinach cream sauce with a balsamic reduction. In what feels like the middle of nowhere Nevada, this was quite the sight. It gets better. One of the owners is a trained pastry chef and creates homemade ice cream cookie sandwiches. Naturally I had to try it. There’s the classic chocolate chip cookie with vanilla ice cream, and then there’s the chocolate cookie with strawberry ice cream. This spot was so nice I had to visit twice!


Sandra’s Mexican Food Truck (45 Pioche St. Baker, NV 89311)
My last day in Baker, I contemplated a third visit to Sugar, Salt, and Malt, but they are closed on Wednesdays. In such a small town, there are not a plethora of options, but the ones that are there are delicious. I made my way to try Sandra’s Mexican Food, and yet again, my heart and stomach were full. Sandra cooks delicious burritos, tacos, tacos – you name it. She operates out of a food truck and has churros. Need I say more?
Sandra’s portions are very hearty, I wish I spent more time in Baker to eat there again.
Tips: Check hours prior to planning a visit. For example, Sugar, Salt, and Malt are closed Wednesdays and Thursdays. Additionally, be mindful that with Baker being a very remote town, ingredients and shipments are not as easily accessible, or affordable. Prices at both establishments above are very reasonably priced given the quality of the food and the distance supplies need to travel.


4. The Charming Creativity of Baker, Nevada
Driving through Baker (the whole two-minute drive on its only street) immediately reminded me of my drive through Marfa, Texas. Marfa, before its widespread fame as a minimalist art stop, felt like a middle-of-nowhere art museum. From a tiny Target store to a Prada store (with merchandise inside), Marfa’s exhibits were a stop on my road trip out to Big Bend National Park back in 2016.
While it feels like the middle of nowhere northern Nevada, Baker embraces that. Baker is “where all roads lead” and I loved seeing that on a colorful sign. Another quirky spot is across from Sandra’s Mexican Food. A rundown wooden shack that genuinely looks like it has been around since pioneering days would not catch the attention of most people, but with the Sierra Nevada mountain range as a backdrop, I gave it another glance. There’s a small white plaque on the structure that made me laugh:
Museum of the Future
Coming Soon


Marfa’s increasing tourism has made its way onto many people’s West Texas bucket lists, but Baker feels like how Marfa felt years ago — charming and quirky and undiscovered.
Have you heard of Great Basin National Park? Would you add northern Nevada to your bucket list?

Three Hikes in One Day in Virginia’s Shenandoah National Park
Here are three hikes you can take on in one day’s visit to Shenandoah National Park, including a bonus secret sunset spot:

The always stunning Appalachian Mountains from Shenandoah National Park.
In January, I noticed I had a three-day weekend without any work obligations. Naturally, to me, that means an adventure needs to be planned. I set my eyes on Shenandoah, a place I spent a day in years ago and always hoped to revisit.
Shenandoah, and Virginia in general, often feels overlooked. A hidden gem of a place, like the New River Gorge in West Virginia.
I rarely have the opportunity to visit a national park in the off-season, and of course took total advantage. From Massachusetts, Shenandoah is a 7.5 hour drive, or about eight with a gas and bathroom break stop. I took the more scenic route through the middle-of-nowhere Pennsylvania to take advantage of the lack of traffic on a Friday afternoon start of the long weekend.
Since I was planning so last minute, I didn’t set any plans for my time there. My best kept secret for lodging is booking a cabin stay at a KOA. It felt meant to be when there was one vacant cabin left at the Harrisonburg/Shenandoah KOA. Of course I had to book it. With my rewards points, my three-night stay was very affordable.
These cabins are my favorite because they’re rustic chic. It’s a definite upgrade from a tent (or sleeping in my car if we’re honest), but it’s not lavish by any means.
After my long drive, I slept in. I prepared some coffee and breakfast on the porch of my cabin, and promptly ate it inside because it turns out, Virginia gets cold. Like New England cold.
I packed several layers thinking I would not need them, but ultimately used a lot of my cold weather gear when I went hiking. Always read what park rangers in Shenandoah National Park post about the most up-to-date information on alerts and conditions in the park. Skyline Drive can be entirely (or partially) shut down due to icy conditions.

Shenandoah National Park Wildlife
The only memory I really have from my first trip to Shenandoah is a rocky summit hike I did with dad, but this was quickly overshadowed by my first bear sighting. We caught sight of a bear cub about twenty yards from us and hastened our pace back to the parking lot. Lo and behold, momma bear was on the road.
It was truly a spectacle. That I enjoyed from inside our car because I did not need to be any closer to the bear than I already had been.
It was time to make new memories in Shenandoah, so I embarked on a few hikes. Here are three hikes you can take on in one day’s visit to Shenandoah National Park:
1. Bearfence Mountain
I took full advantage of the off-season and arrived to the park before sunrise to start my day with the sun atop a summit. The best spot to catch sunrise is Bearfence Mountain. Here’s a secret: you don’t have to make it past the icy ledges to the actual summit for breathtaking, 365-degree views.

The first light on a winter morning without a car or other hiker in sight for a couple hours in the park.
I was the only one in the parking lot, at milepost (MP) 56.4 when I arrived at 7 A.M. As soon as I turned off the ignition and crossed the road to the trailhead, I remembered this was the hike I did with my dad seven years ago. The one where I saw the momma bear on the road. A fitting mountain name for this hike. As much as I love seeing wildlife, I was hoping I wouldn’t come across a bear this time around.
The trail was icy, and as always, I’m racing against the sun. I made it up about .3 miles and around 275 feet of elevation when the wind really kicked in at one of the false summits. I was alone and cold, but couldn’t wait for the sun to rise.
The summit was a bit further out, along a little more of a rocky, iced ridgeline. I decided it was best to camp where I was and enjoy the start of the day from where I was. This hike is also one of the few hikes in all of Shenandoah National Park where you catch a glimpse of Skyline Drive from a bird’s-eye-view. I love a good road photo surrounded by nature.
But what I truly loved, was feeling like I was the only person for miles on this mountain watching the sun rise. Sunrises really are the best.
When I could no longer feel my fingers, despite my gloves and hand warmers, I headed down the same way I went up. Confident as always, I ate it on one of the last steps before I made it to the road. Just Shenandoah reminding me to humble myself.

The route from Strava
Here’s the route I took. At the end of the trail, I looked at the trail map and realized there is a way to avoid the icy, rocky ridgeline that I stopped short of by hiking on the Appalachian Trail instead. Next time (and if I wake up early enough)!
2. Hawksbill Mountain
When you finish soaking up the first light to hit the Appalachian Mountains of Virginia, it’s time to head to a Shenandoah favorite, rightly so.

Shenandoah really has it figured out with all of its rocky ledges.
Right off Shenandoah National Park’s main park road, Skyline Drive, is the trail for Hawksbill at MP 45.6.

The route for Hawksbill Mountain
This hike was so nice I had to do it twice. One of my favorite aspects about it is that the summit reaches over 4,000 feet. I didn’t know any hikes further south from Massachusetts hit 4,000 feet, considering Massachusetts’ highest peak, Mt. Greylock, comes in at 3,490 feet.
In about one mile and only 500 feet of climbing, I was met with a windy, icy summit reminiscent of New Hampshire’s wintry peaks.
3. Stony Man Mountain
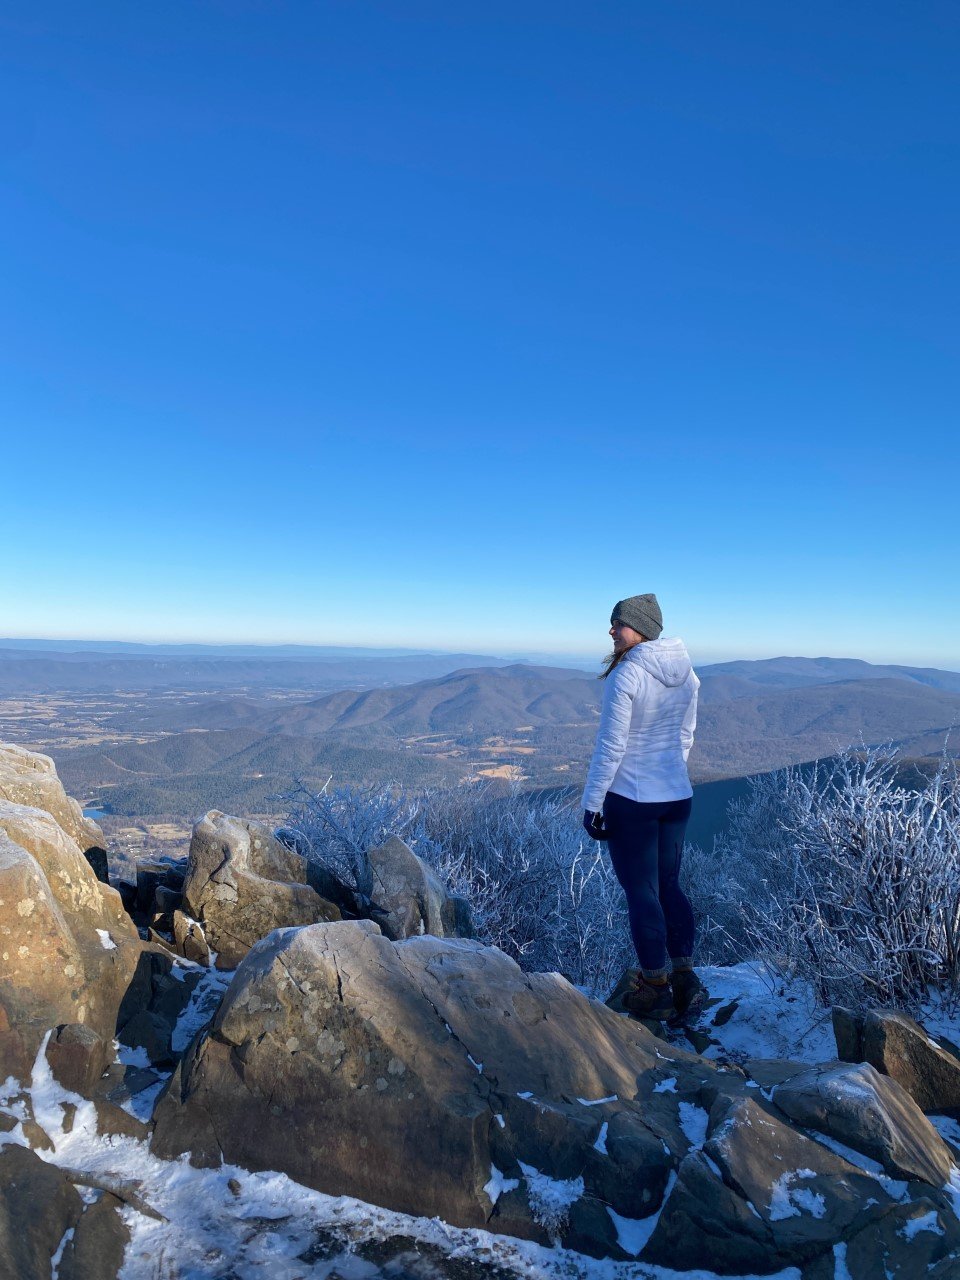
Stony Man was a quick jaunt, but worthwhile to see the Appalachian Mountains from a different perspective.
As the day begins to near the late afternoon, it’s time to make moves to catch sunset. You have two incredible options for sunset: one is to hike up Stony Man Mountain for jaw-dropping views of the Appalachian Mountains. Another, if you’re tired (or short on time), is to pull over at one of the overlooks and take a hidden trail to a secluded ledge. More on both options below.
A great trail leading right off of Skyline Drive is Stony Man Mountain. The parking lot is at MP 41.7. I had little to no service in the park, so I relied on the park map provided to me by the park rangers upon entering the park, as well as downloaded trail maps from AllTrails. There is also a Little Stony Man, so be sure to go for the big guy. This hike traverses the Appalachian Trail, which I loved, because it again reminded me of home back in New England.
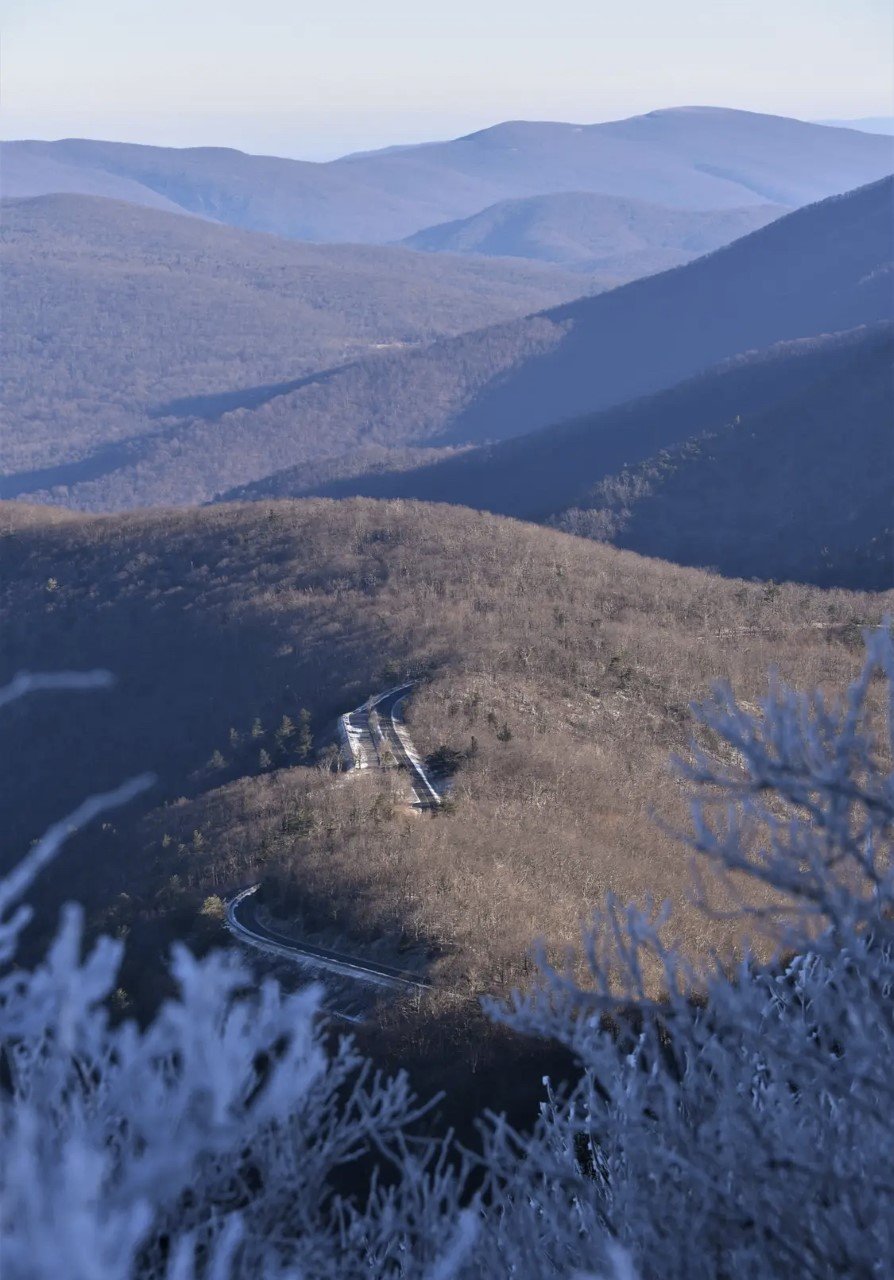
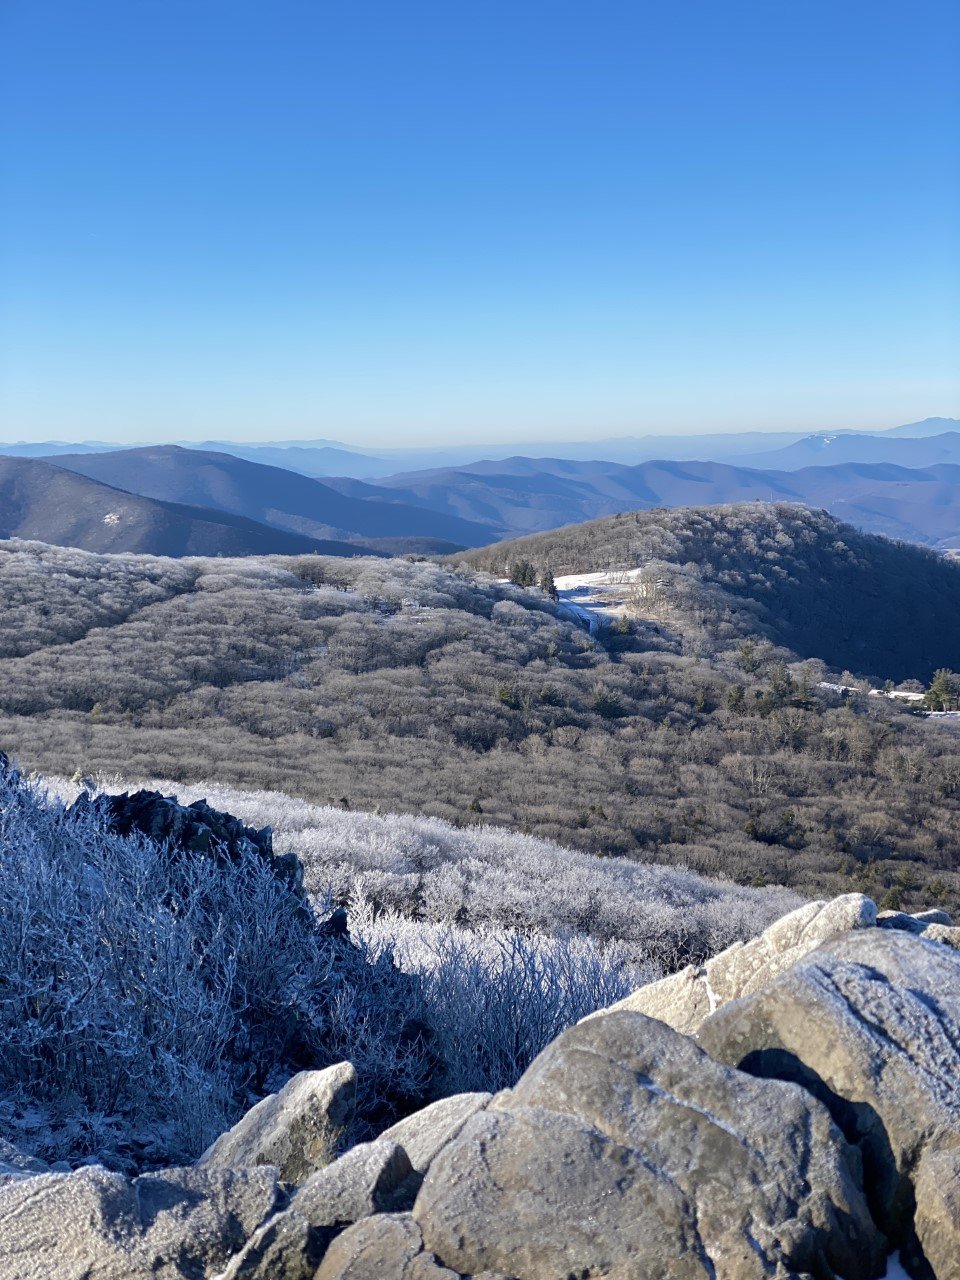

The Strava route for Stony Man Mountain
A speedy three-quarters of a mile to the summit with roughly 300 feet of climbing brought me to this scenic spot. The other major perk of the off-season? Parking lots, trails, and summits entirely to myself. I loved every minute of it!
I would hike up Stony Man for sunset because it is short, has ample parking, and of course, the views.
Bonus Sunset Spot: The Point Overlook (MP 55.5)
If you’re short on time, or exhausted from a day full of hiking, check out MP (milepost) 55.5. Pull over and park at The Point Overlook right off Skyline Drive. You’ll find a stone wall with an empty space in it. Walk through that empty spot down the trail, roughly 300 feet.

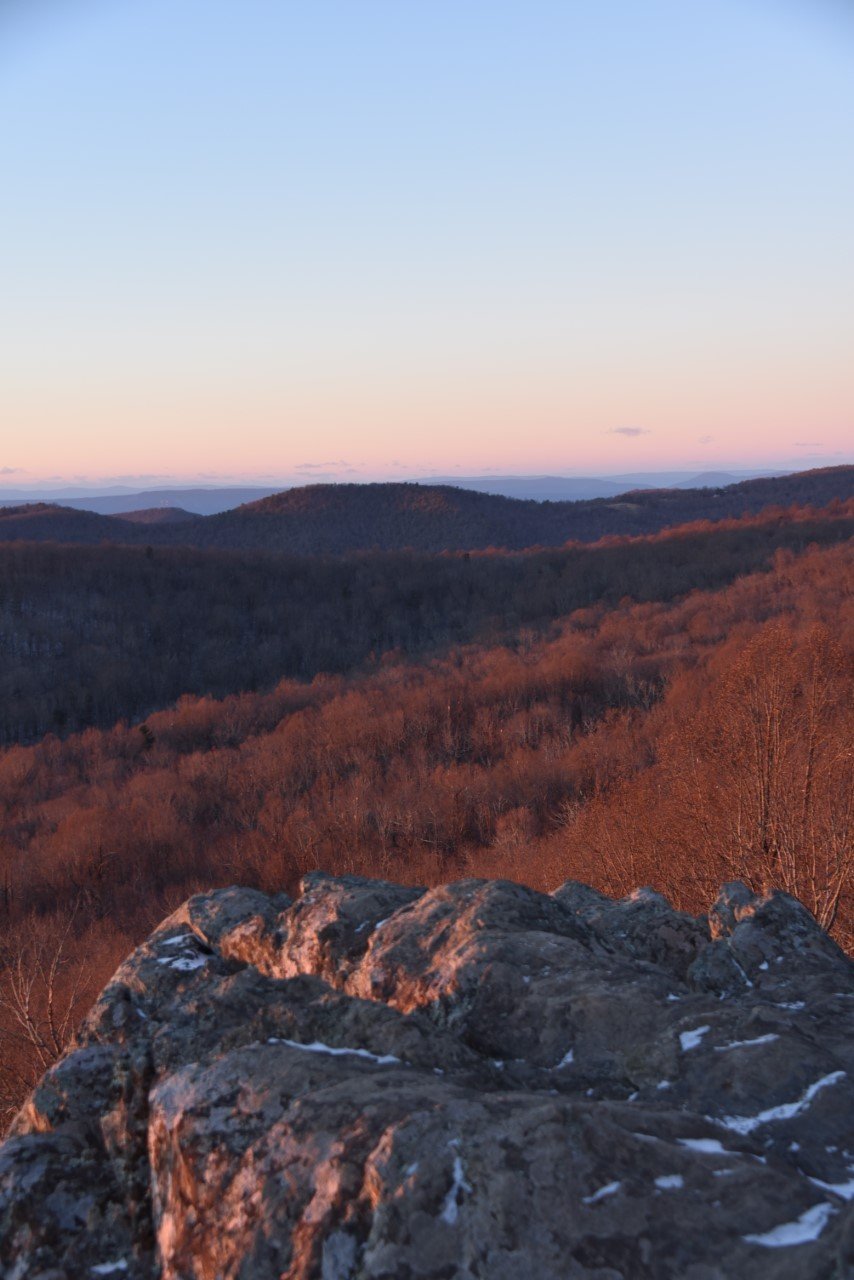
You’ll be greeted with a rocky ledge all to yourself. I parked at The Point Overlook with two other cars, but neither party ventured on this hidden path. It’s definitely worthwhile, especially if you are short on time to run up a mountain.
Which hike is making it to your list? Would you take on all three in one day?
If you enjoyed learning about this national park, then you’ll love exploring these:
3 Hours in Kentucky’s Best-Kept Secret: Mammoth Cave NP
Two Must-Do Experiences in Florida (No, Not Disney)
The Best Time of Year to Visit White Sands National Park, New Mexico
3 Colorado National Parks To Visit (That Aren’t Rocky Mountain!)
7 Lessons I Learned Road-Tripping Across the U.S.
Visit America's Newest National Park: The New River Gorge, WV

Hiking Esther Mountain in the Adirondacks
On my hike up Whiteface, we took a slight detour in the wrong direction. When we approached the trail sign for Esther, and read, “path not maintained or marked,” we trudged on to Whiteface. After all, I wasn’t chasing the 46er list.
Joke’s on me because three years later…

I first discovered the Adirondacks from one of my best friends in college who was living in Hawaii at the time. She sent me a picture of Whiteface’s stony summit path and said, “you have to go there.” Naturally, I drove four hours the next morning (luckily it was the weekend), drove the road up Whiteface, and indulged in the best foliage I had ever seen. Still possibly the best foliage in all my years living in New England since.
I mean look at those colors. I took the photos of Whiteface Mountain below back in October 2016. I had only survived the Franconia Ridge the summer prior and had no idea the mountains and views in store when I’d move to Massachusetts the following year.

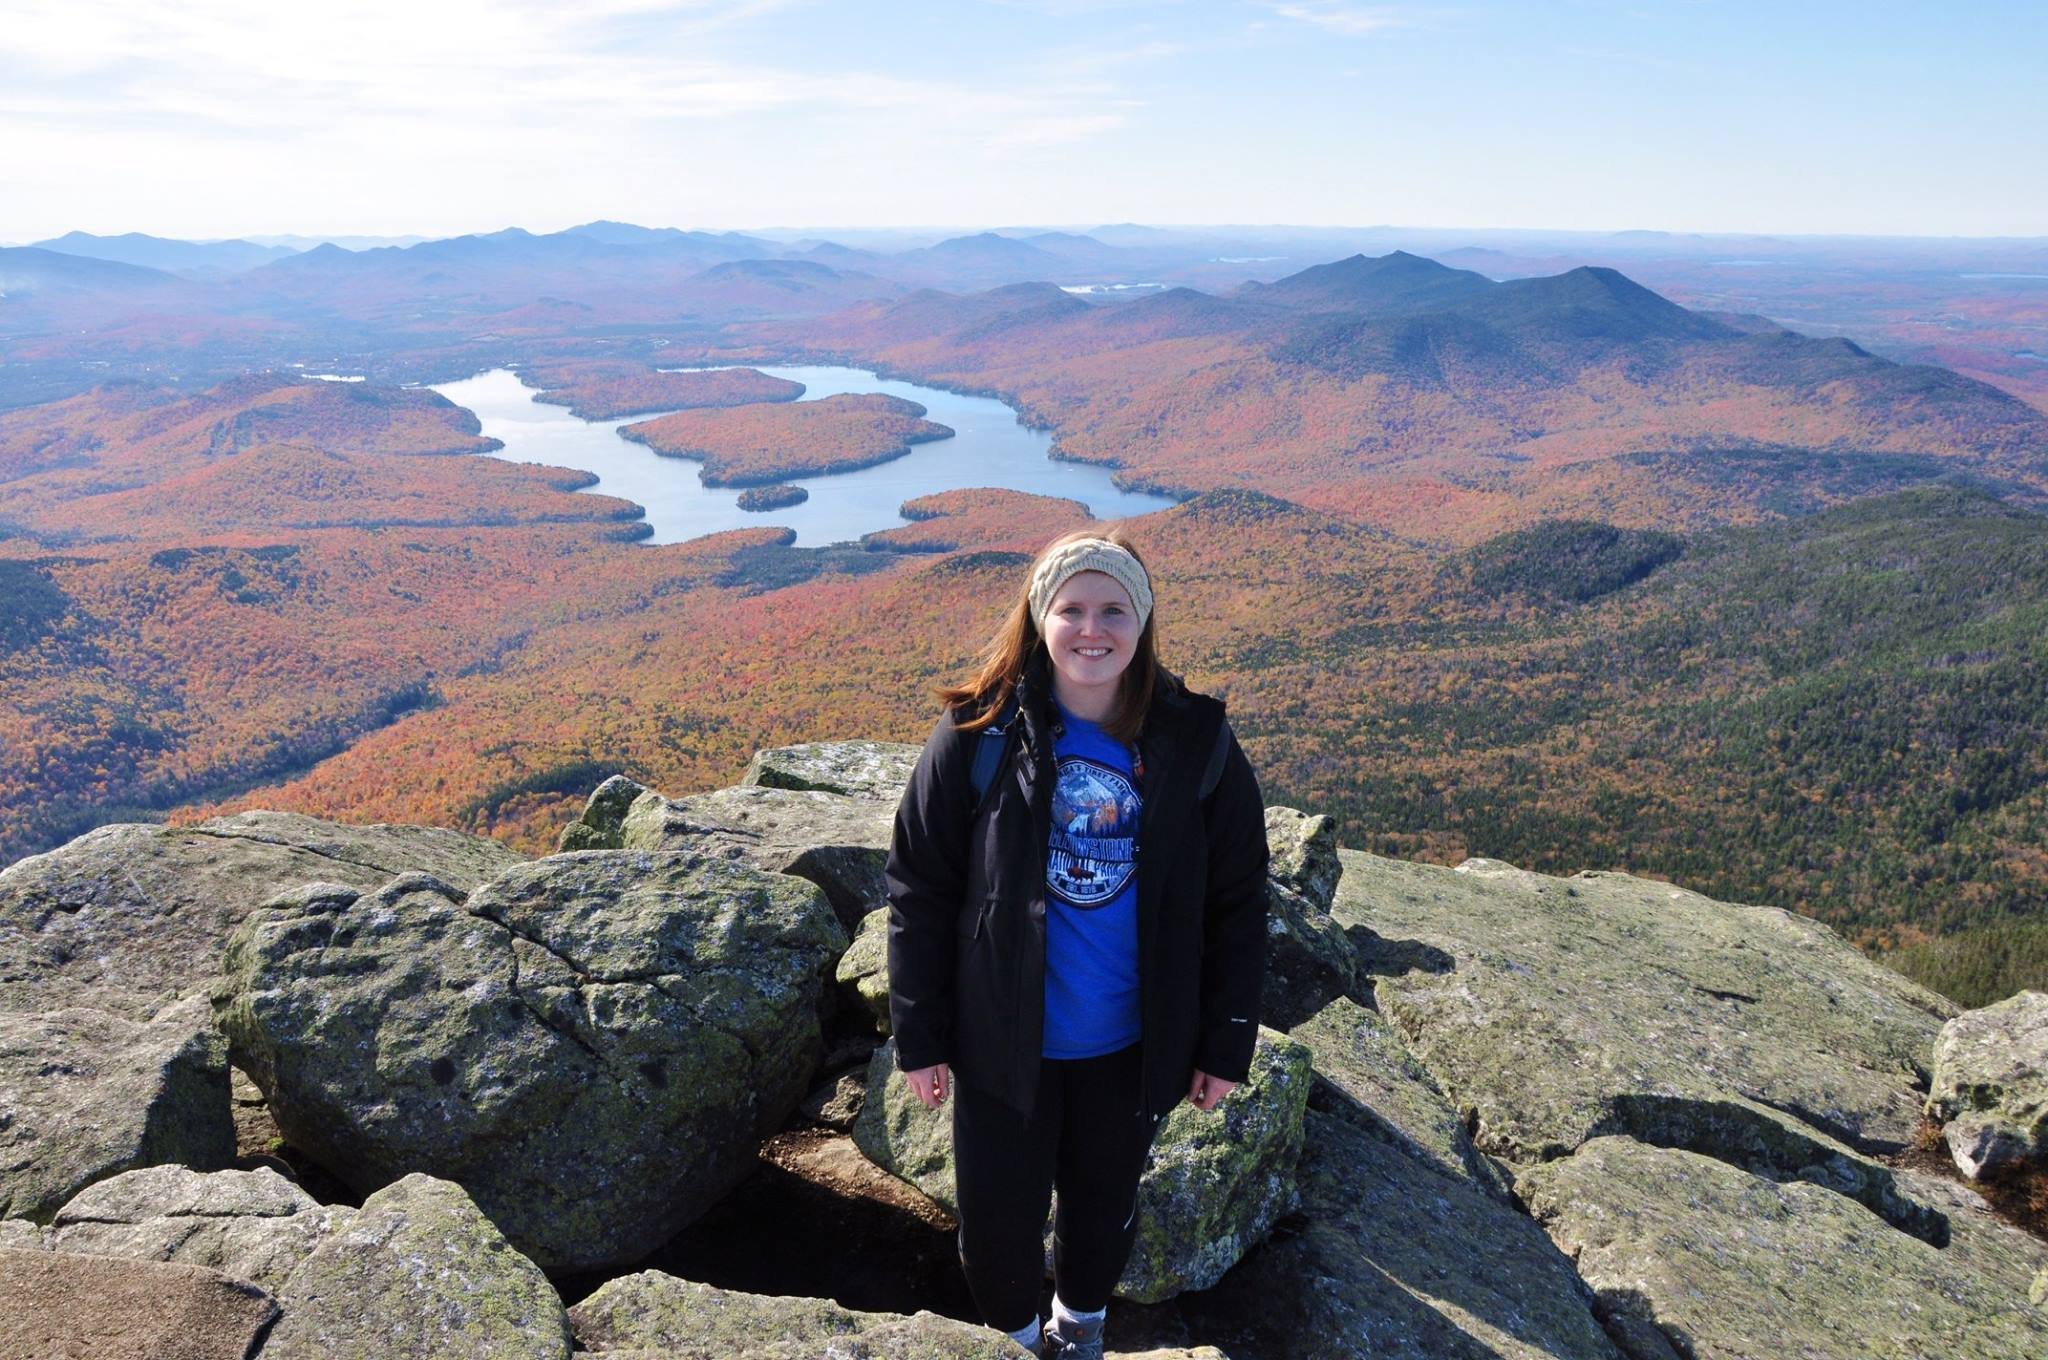
Little did I know that five years later I’d hike up the very mountain that first introduced me to the Adirondacks.
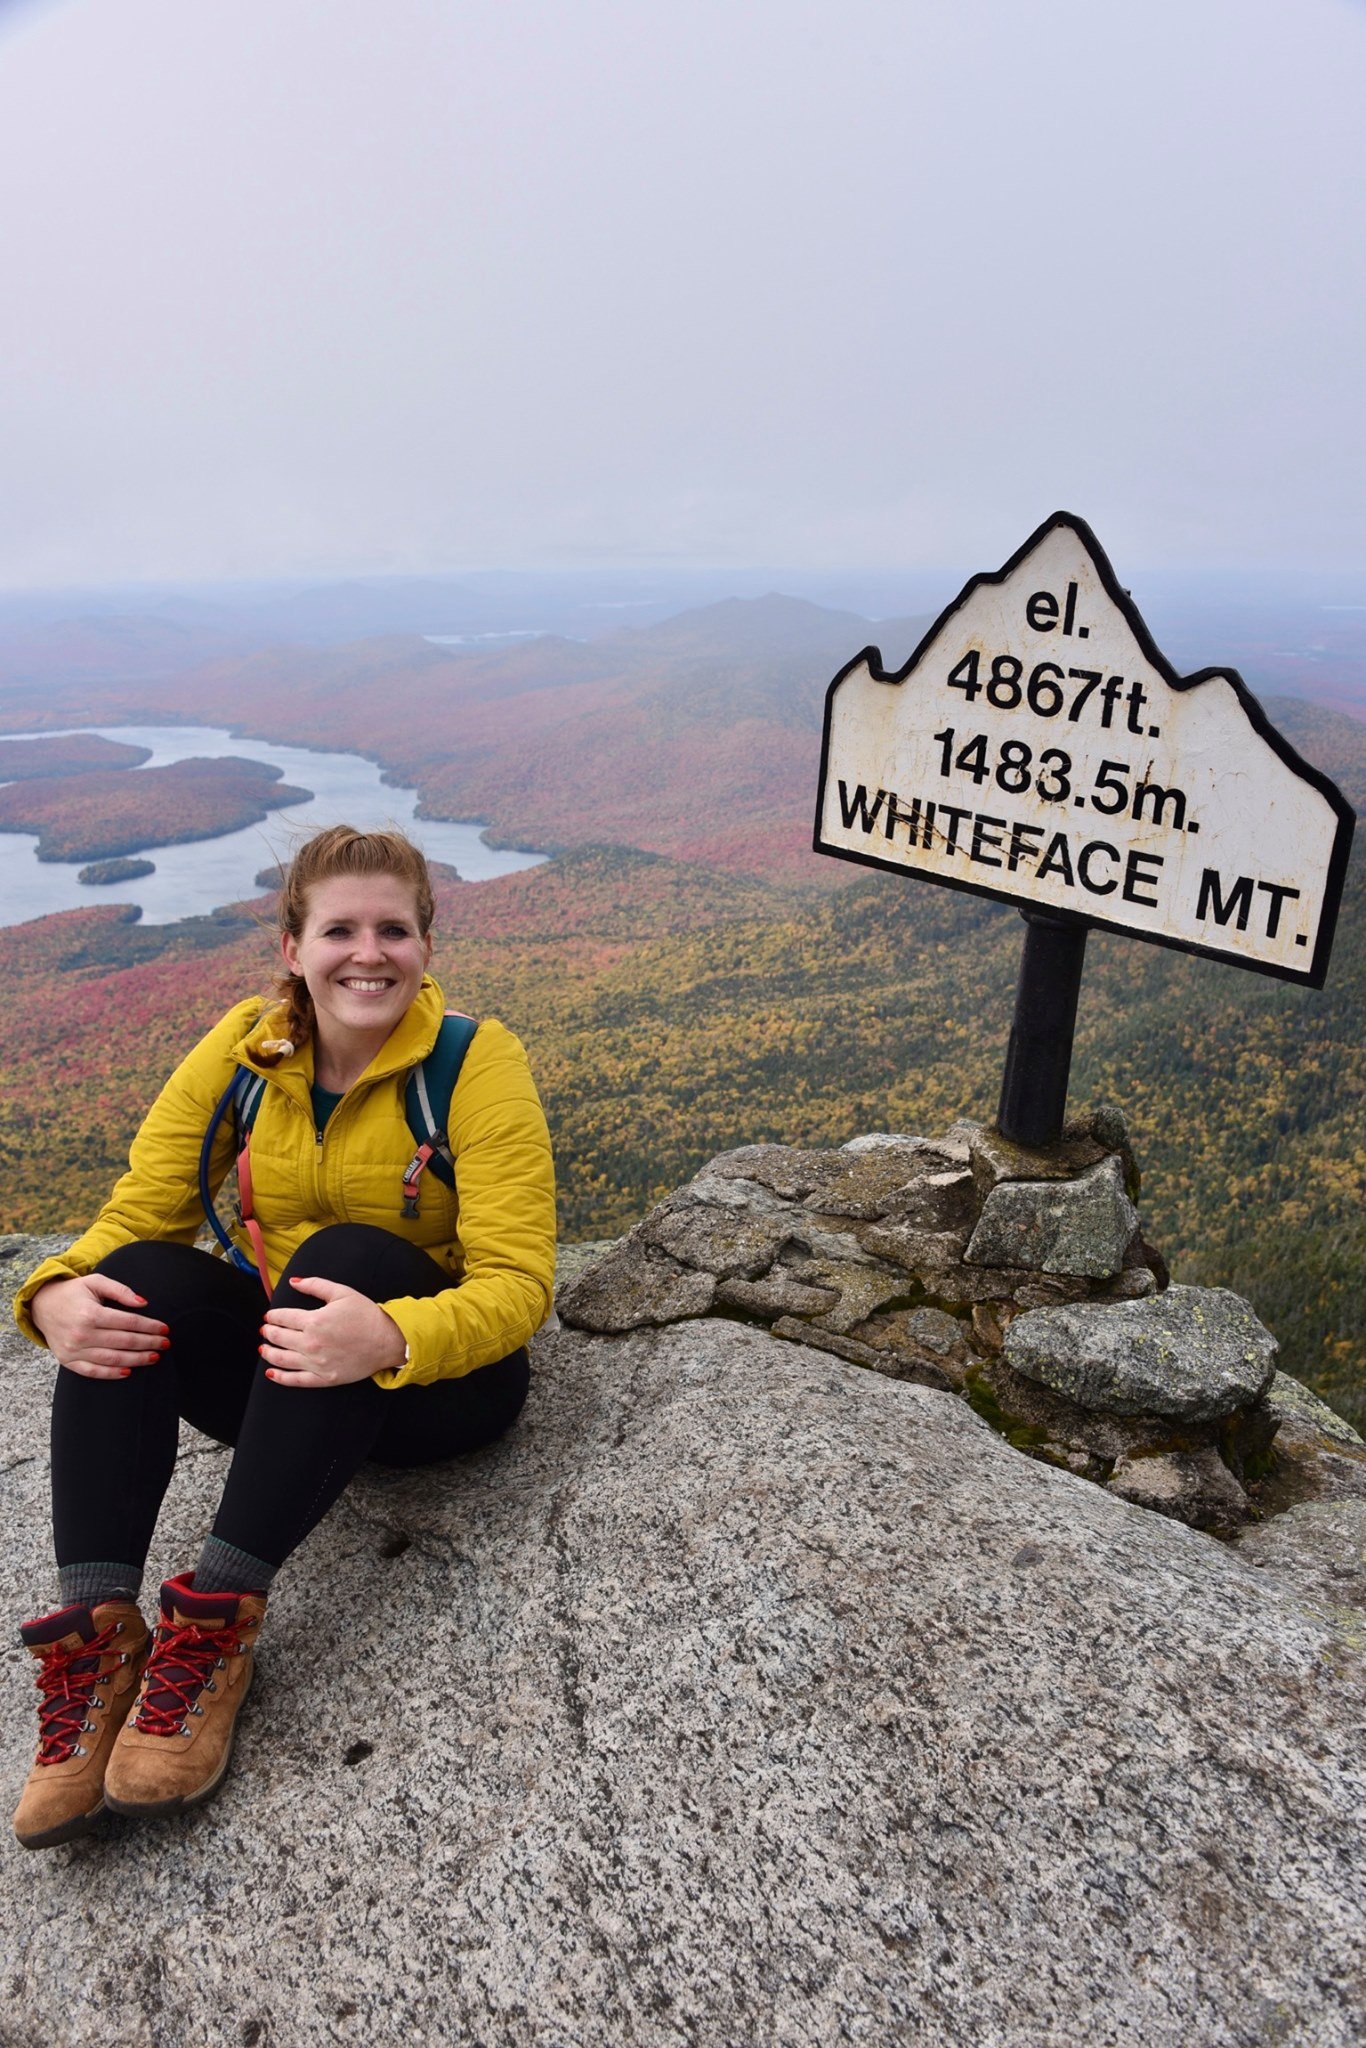
Whiteface Mountain in October 2020
Featuring a naive me, thinking I wouldn’t take on the Adirondack 46 at some point.
It also comes in at 4,867 feet, making it one of the highest peaks in the Adirondacks. Of course this places Whiteface on the 46er list (New York’s 46 highest peaks). Along one trail to Whiteface is a short detour to Esther Mountain.
On my hike up Whiteface, we took a slight detour in the wrong direction. When we approached the trail sign for Esther, it read, “path not maintained or marked.” Dejected from the detour, we trudged onward to Whiteface. After all, I wasn’t chasing the 46er list. I was there to spend time outside, and see the foliage. Not push on to a viewless summit in uncharted terrain.

Joke’s on me because three years after my Whiteface ascent, I decided I wanted to tackle the 46 highest peaks in the Adirondacks. So here I was with a free Saturday and a craving for a good climb. The weather was sunny and the temperature was moderate. I made a go for it!
Last weekend, I parked at the Atmospheric Sciences Research Center at 110 Marble Mt Ln, Wilmington, NY 12997. Plenty of parking here, but be sure to not park at the center itself. The trail is indicated with a visible sign.
From the start of the trail, it’s a lovely (short-lived) flat path before the 2,000 foot climb begins. A real-world, snow-covered stair climber. What more could you wish for?
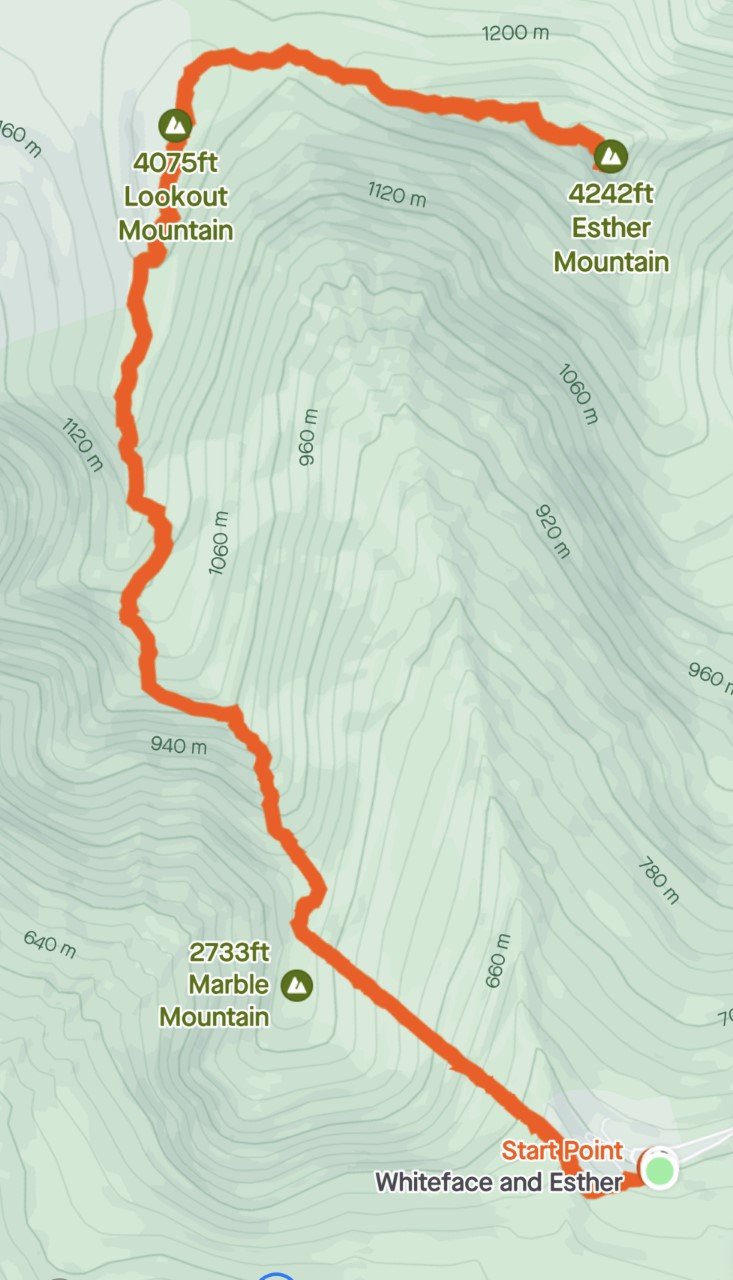
Trail Route from Strava
An out-and-back 6.3 miles with about 2,800 feet of elevation gain.
The great part in summer is that the sunshine is covered for this brutal, sweaty climb. The best part in winter when all the tree branches are bare, is that the sun shines just enough to warm your uncovered face, while the rest of your body is fired up.
I love a good climb, and Esther was no different. At about .8 miles, you reach Marble Mountain, roughly 2,700 feet. A great break spot, complete with rocks to sit on and a view worth gazing at. When you’re done, the next leg of the trip continues to climb (shocking, I know), up to Lookout Mountain at 4,075 feet.
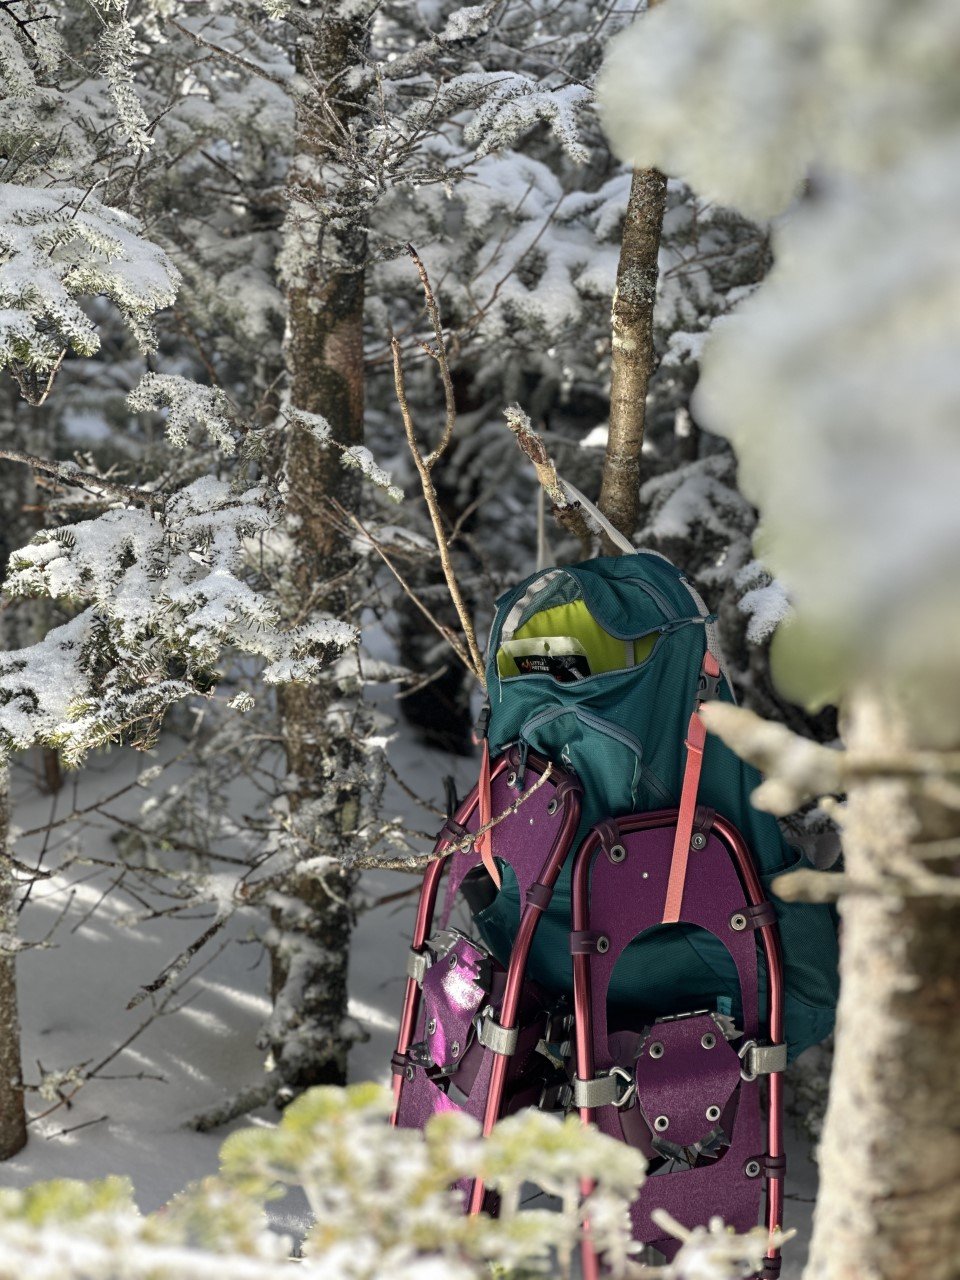
Snowshoes are actually required in the Adirondacks during the winter with more than 8 inches of snow.
The trail was very packed down, so I used microspikes on the ascent. I thought I’d try out my new snowshoes on the descent and they were incredible. These Winter Walker snowshoes from L.L.Bean are super affordable and did me well on a 4,000 footer! They are currently on sale too!

Esther Trail
The iconic Esther sign I referenced earlier is at this point, where you can either turn left for Whiteface, or head right, to the “not maintained” path. The beauty of winter (and several snowshoers before you) is having a very clear path outlined for you. I never faltered from the trail.
After a bit more climbing (several hundred feet), I soaked up the summit to myself. Everyone I have talked to Esther about always brings up the summer mudfest, or the lack of summit views. I’m not sure if it was because this was my first hike back in the Adirondacks after months away with marathon training, or if there were several feet of snow that elevated me, but I loved the far-off views of Whiteface I saw.
I’m a little biased because I also love winter hiking. A lot. I spent about an hour on the summit wanting to enjoy the perfect day before I headed down.
When I reached my car, I clocked in about 2,800 feet of climbing in 6.3 miles of going out-and-back on the Marble Mountain trail to the Esther trail.

The mountain is apparently named after Esther, a fifteen-year-old girl who was the first known person to summit. Turns out, she hiked up here just for the love of hiking. How fitting considering that was the exact way I felt all day up there. Hiking up Esther Mountain in the winter is definitely the way to go.
This was my 21st peak of the 46. Here’s to many more summit smiles!
If you enjoyed this trail review, check out these mountains:
Cascade and Porter Mountains in the ADKs
Twins, Zealand, Bonds Traverse in the Whites